-->

dev dns, synology

Nowadays many people use their phones as their primary web browsing device. As mobile usage is ubiquitous and increasing even more, testing the web applications on mobile platforms is becoming more important.

Chrome has a great emulator for mobile devices but sometimes it’s best to test your application on an actual phone.

If your application is the default application you can access via IP address you’re fine but the problem is if you have multiple domains you want to test at some point you’d need to enter the domain name in your phone’s browser.

Today I bumped into such an issue and my solution involved one of my favourite devices in my household: Synology DS214Play

Local DNS Server on Synology

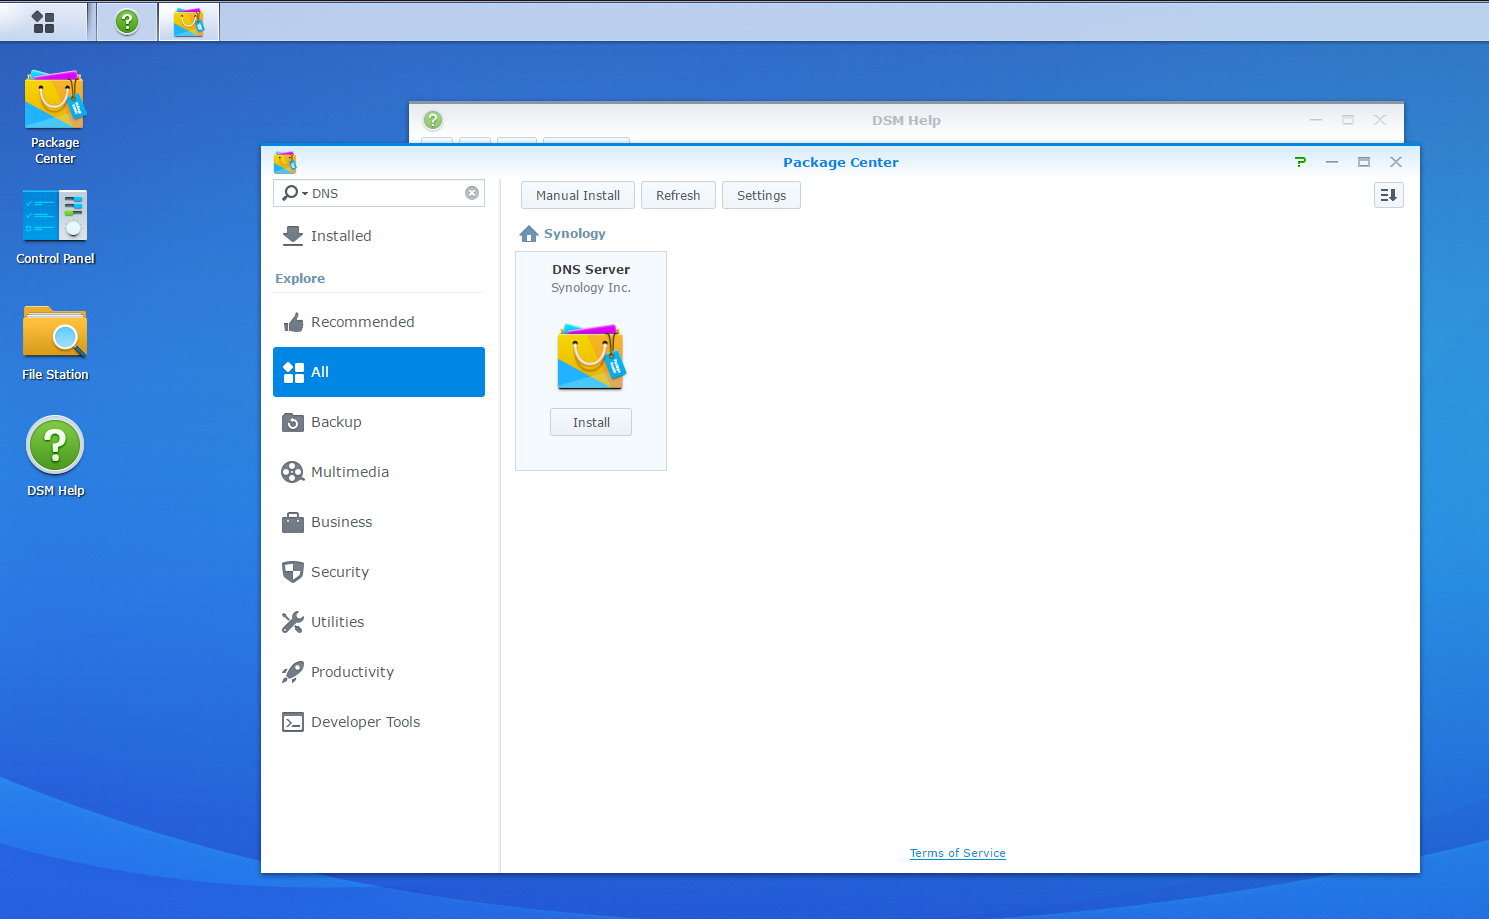
Step 01: First, I installed DNS Server package by simply searching DNS and clicking install on Package Center.

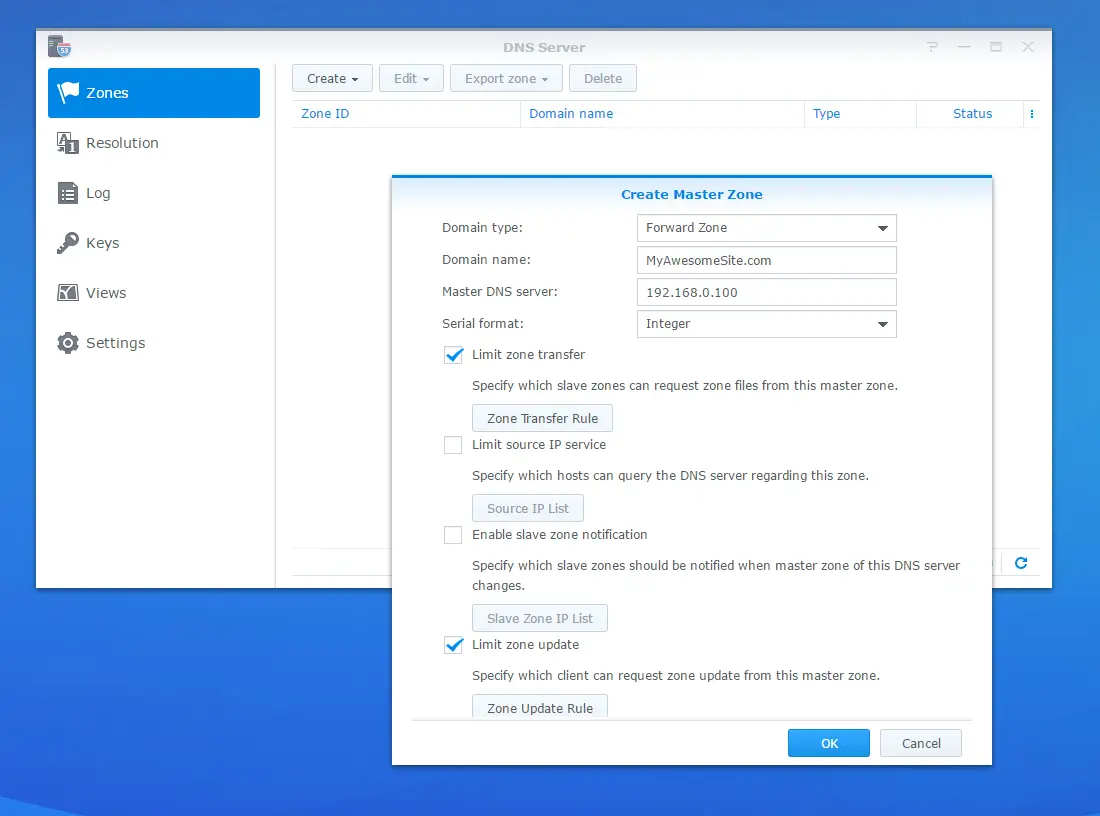
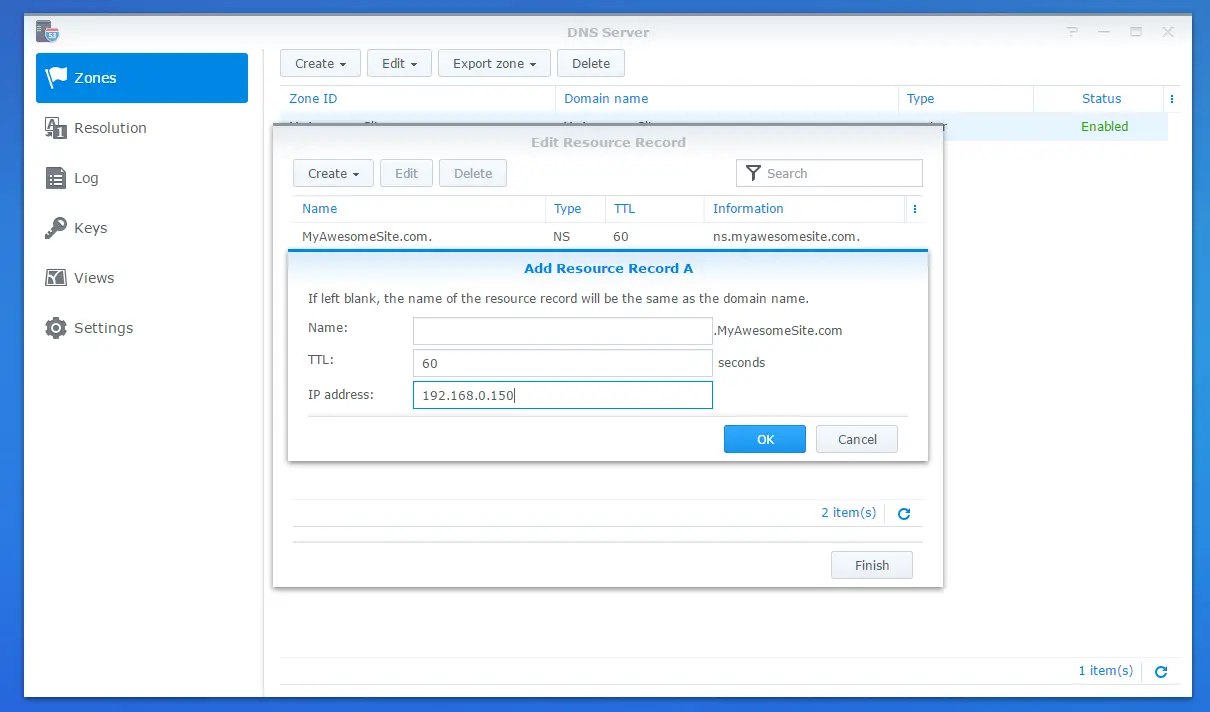
Step 02: Then, I opened the DNS Server settings and created a new Master Zone. I simply entered the domain name of my site which is hosted on IIS on my development machine and the local network IP address of the Synology as the Master DNS Server.

Step 03: Next, I needed to point to the actual web server. In order to do that I created an A record with the IP address of the local server a.k.a. my development machine.

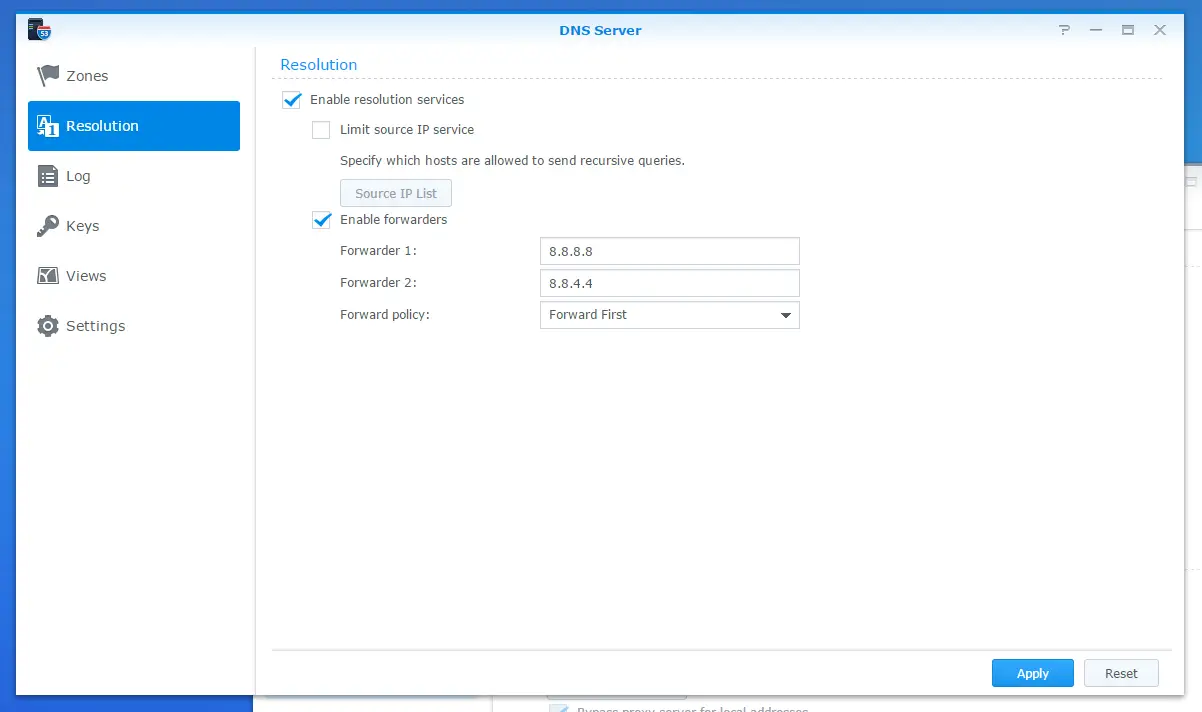
Step 04: For all the domains that my DNS server didn’t know about (which is basically everything else!) I needed to forward the requests to “actual” DNS servers. In my case I use Google’s DNS servers so I entered those IPs as forwarders.

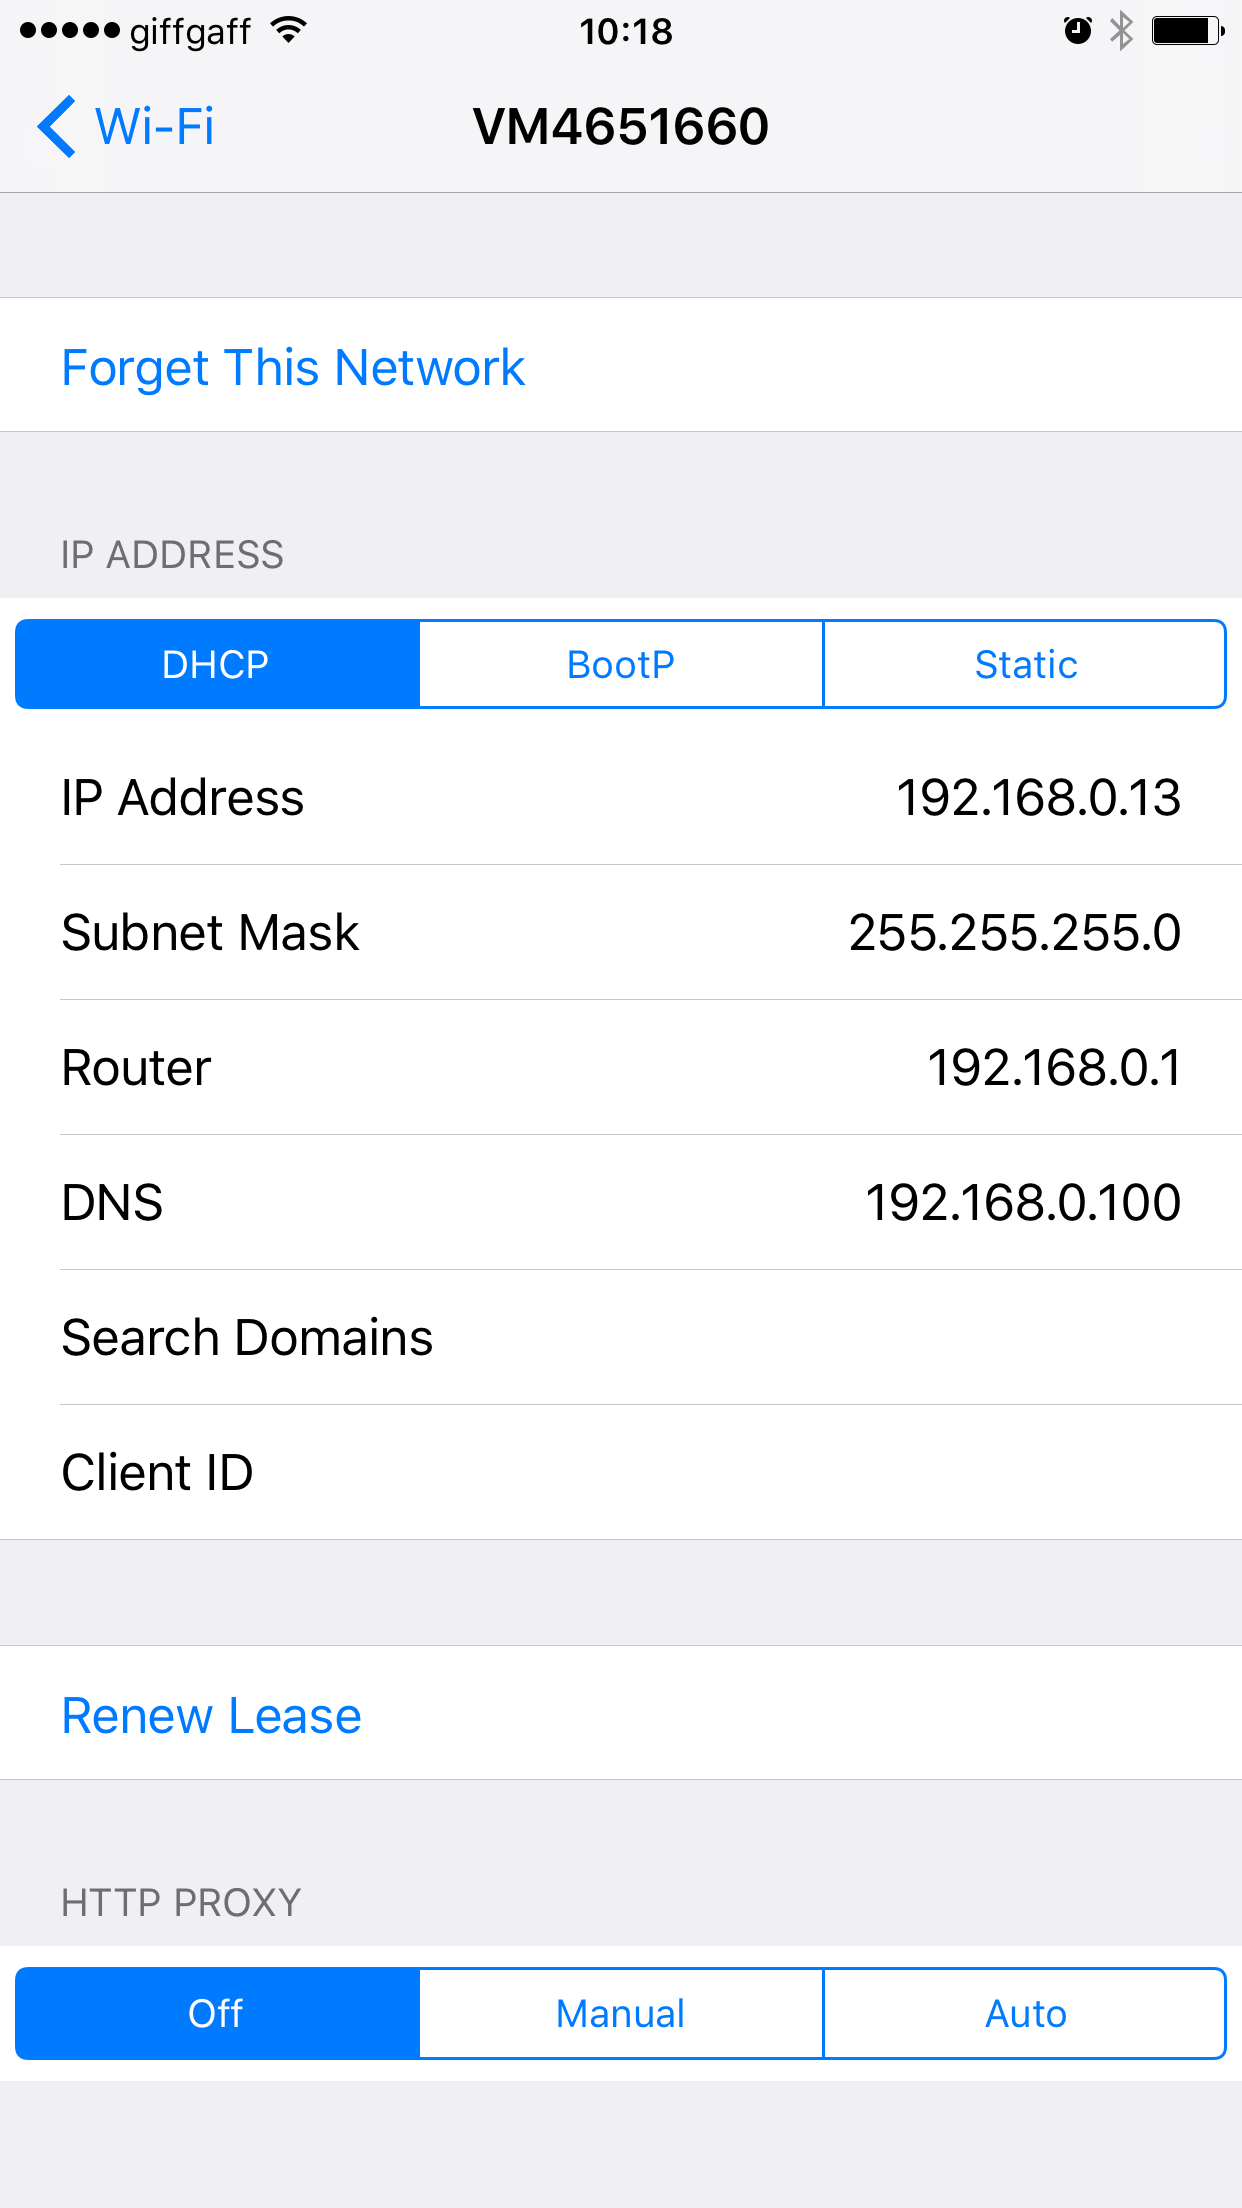
Step 05: At this point the Synology DNS server is pointing to the web server and web server is hosting the website. All is left is pointing the client’s (phone or laptop) DNS setting to the local DNS server.

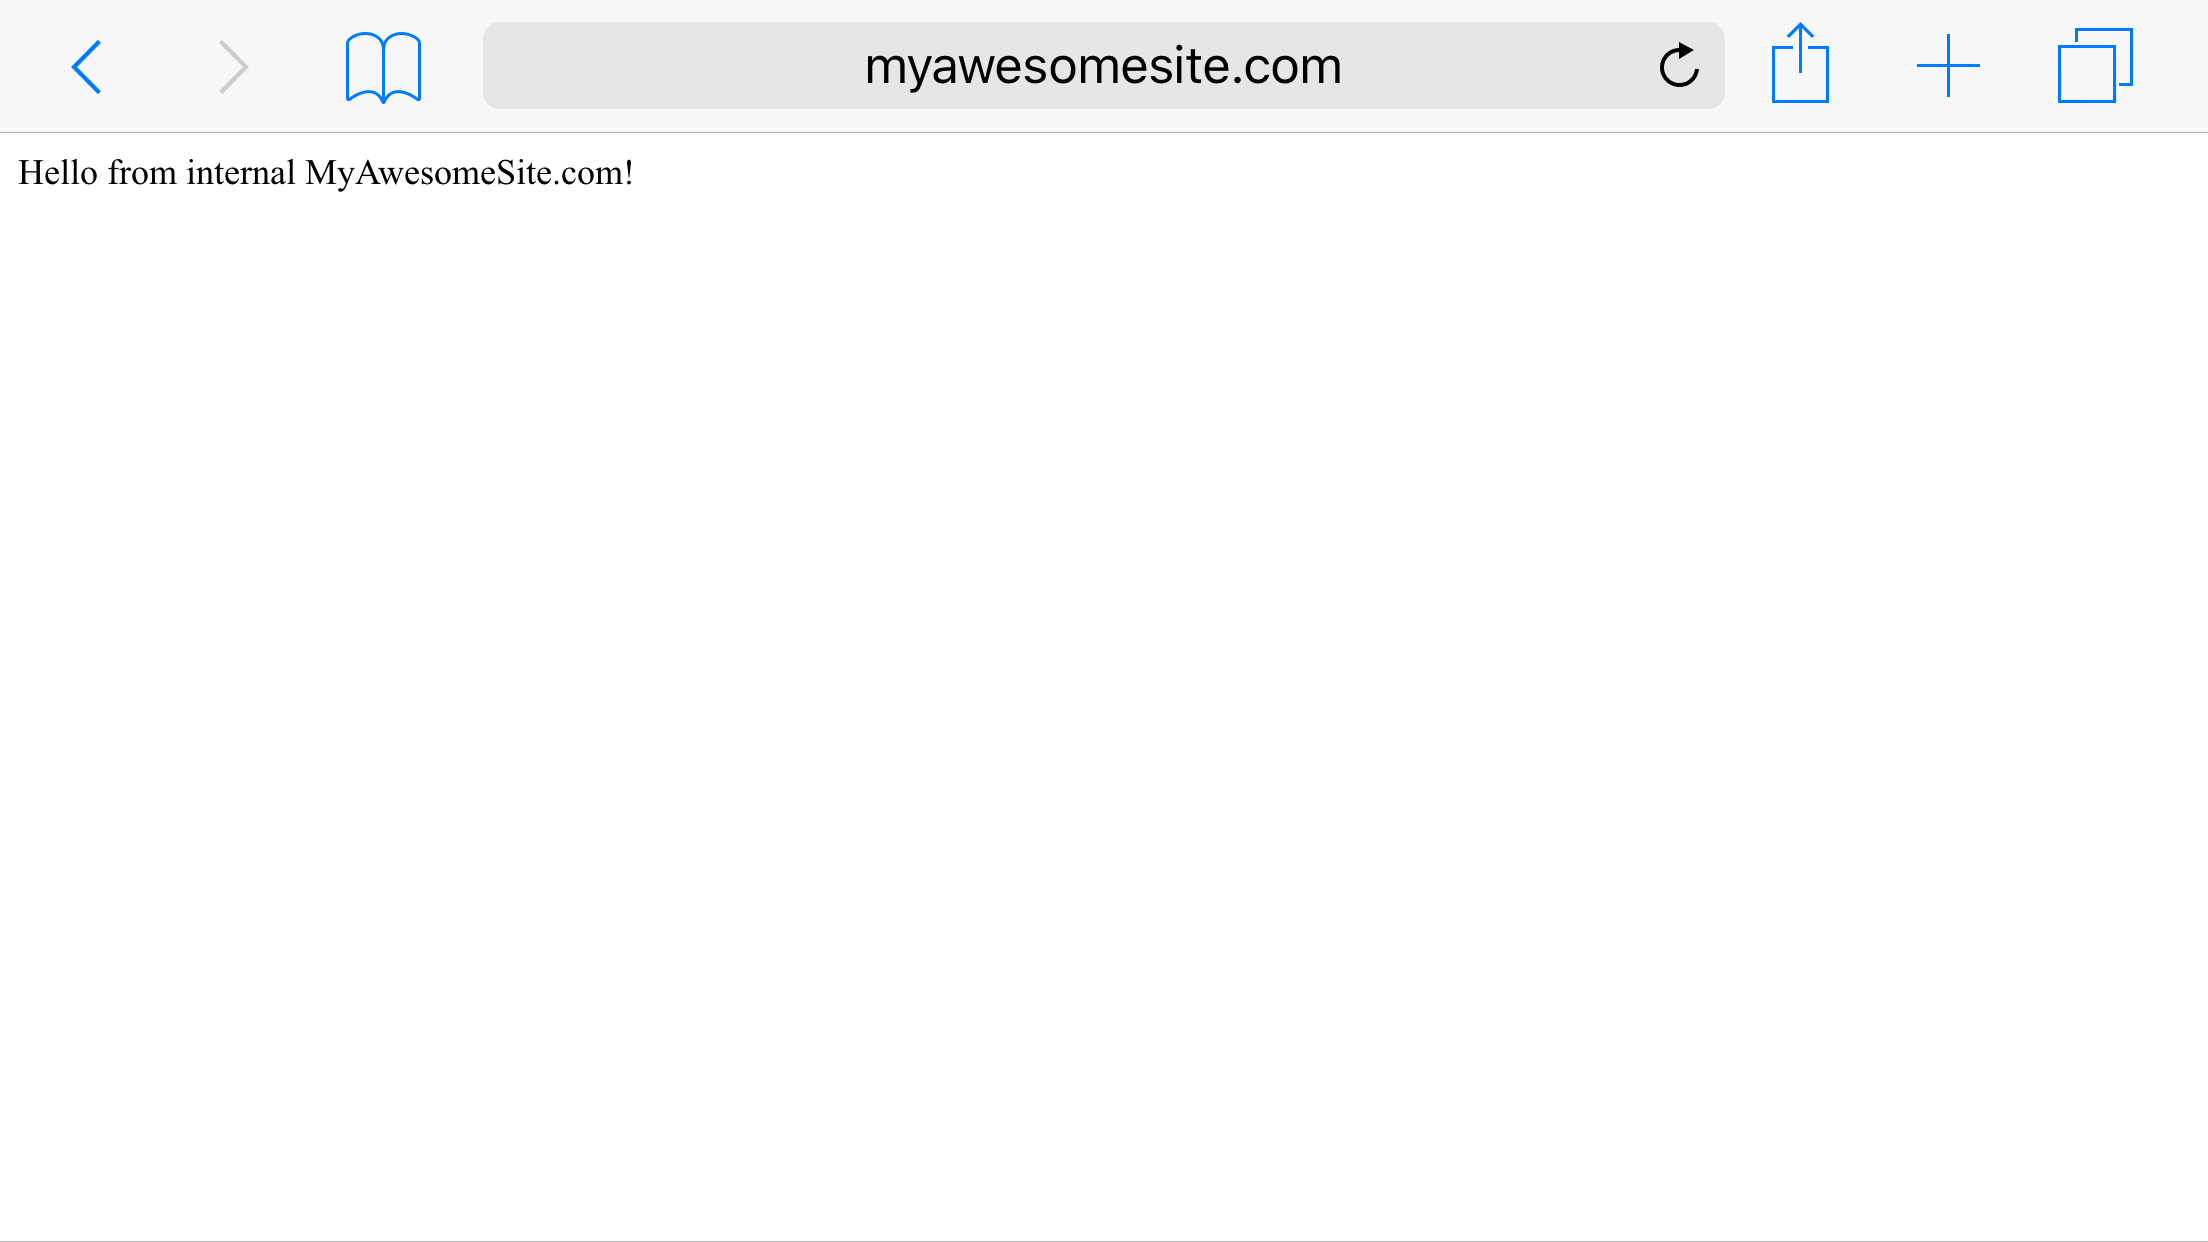
Step 06: Now that it’s all setup I could access to my development machine using a locally-defined domain name from my phone:

Conclusion

Another simple alternative to achieve this on Windows laptops is to edit hosts file under C:\Windows\System32\drivers\etc folder but when you have multiple clients in the network i.e macbooks and phones, it’s simpler just to point to the DNS server rather than editing each and every single device. And also it’s more fun this way!

Resources

dev pdf, csharp

I like playing around with PDFs especially when planning my week. I have my daily plans and often need to merge them into a single PDF to print easily. As I decided to migrate to Mac for daily use now I can merge them very easily from command line as I described in my TIL site here.

Mac’s PDF viewer is great as it also allows to simply drag and drop a PDF into another one to merge them. Windows doesn’t have this kind of nicety so I had to develop my own application to achieve this. I was planning to ad more PDF operations but since I’m not using it anymore I don’t think it will happen anytime soon so I decided to open the source.

Very simple application anyway but hope it helps someone save some time.

Implementation

It uses iTextSharp NuGet package to handle the merge operation:

public class PdfMerger
{
    public string MergePdfs(List<string> sourceFileList, string outputFilePath)
    {
        using (var stream = new FileStream(outputFilePath, FileMode.Create))
        {
            using (var pdfDoc = new Document())
            {
                var pdf = new PdfCopy(pdfDoc, stream);
                pdfDoc.Open();
                foreach (string file in sourceFileList)
                {
                    pdf.AddDocument(new PdfReader(file));
                }
            }
        }

        return outputFilePath;
    }
}

Also uses Fluent Command Line Parse, another of my favourite NuGet packages to take care of the input parameters:

var parser = new FluentCommandLineParser<Settings>();
parser.Setup(arg => arg.RootFolder).As('d', "directory");
parser.Setup(arg => arg.FileList).As('f', "files");
parser.Setup(arg => arg.OutputPath).As('o', "output").Required();
parser.Setup(arg => arg.AllInFolder).As('a', "all");
    
var result = parser.Parse(args);
if (result.HasErrors)
{
    DisplayUsage();
    return;
}

var p = new Program();
p.Run(parser.Object);

The full source code can be found in the GitHub repository (link down below).

Resources

dev slack, csharp

Slack is a great messaging platform and it can integrate very easily with C# applications.

Step 01: Enable incoming webhooks

First go to Incoming Webhooks page and turn on the webhooks if it’s not already turned on.

Step 02. Create a new configuration

You can select an existing channel or user to post messages to. Or you can create a new channel. (May need a refresh for the new one to appear in the list)

Step 03. Install Slack.Webhooks Nuget package

In the package manager console, run

Install-Package Slack.Webhooks

Step 04. Write some code!

var url = "{Webhook URL created in Step 2}";

var slackClient = new SlackClient(url);

var slackMessage = new SlackMessage
{
    Channel = "#general",
    Text = "New message coming in!",
    IconEmoji = Emoji.CreditCard,
    Username = "any-name-would-do"
};

slackClient.Post(slackMessage);

Done

That’s it! Very easy and painless integration to get real-time desktop notifications.

Some notes

  • Even though you choose a channel while creating the webhook, in my experience you can use the same one to post to different channels. You don’t need to create a new webhook for each channel.
  • Username can be any text basically. It doesn’t need to correspond to a Slack account.
  • First time you send a message with a username, it uses the emoji you specify in the message. You can leave it null in which case it uses the default. On consequent posts, it uses the same emoji for that user even if you set a different one.

Resources