Infrastructure as Code with AWS CloudFormation
If you have a habit creating your AWS resources manually, things can get very messy very quickly. At some point you realize that you have no idea if a resource is still in use and just to be safe you leave it alone.
I found myself in this situation and decided to take advantage Infrastructure as Code paradigm using AWS CloudFormation. To start simple I decided to migrate my automated CV response application to a CloudFormation stack. Going forward this is a much efficient way to write blog posts too. Instead of writing step by step instructions I can simply post the CloudFormation stack in JSON or YAML.
Infrastructure of Code in a nutshell
![]()
Basically this approach allows you to define, manage and provision all the resources that define your system.
Advantages:
- Changes can be source-controlled
- Entire provisioning process can be automated
- entire infrastructure can be easily recreated in a different account.
- Resources can easily be identified. Tags can be used to identify which stack the resources belong to.
- Resources can easily be clean up. Deleting a stack will delete all the resource it created.
Basic Terminology
- Stack: All the resources used to create an infrastructure.
- StackSet: A StackSet is a container for AWS CloudFormation stacks that lets you provision stacks across AWS accounts and regions by using a single AWS CloudFormation template.
- Design template: This is the file YAML or JSON format that defines all the resources that will be created AWS
Where to start…
Even though you get familiar with the concepts finding where tostart can be intimidating sometimes. When it comes to CloudFormation, there are a lot of sample templates that you can start and build upon.
So here’s an easy way to get started:
Step 1: Save the following snippet to a local file such as cloudformation.sample.yaml:
Resources:
  Ec2Instance:
    Type: AWS::EC2::Instance
    Properties:
      InstanceType: t2.micro
      ImageId: ami-0aff88ed576e63e90
In the example above I’m using a stock AWS Linux AMI in London region.
Step 2: Go to Stack and click Create Stack (Make sure you’re in EU London region otherwise AWS won’t be able to find the AMI specified in our template)
Step 3: In specify template section, select Upload a template file
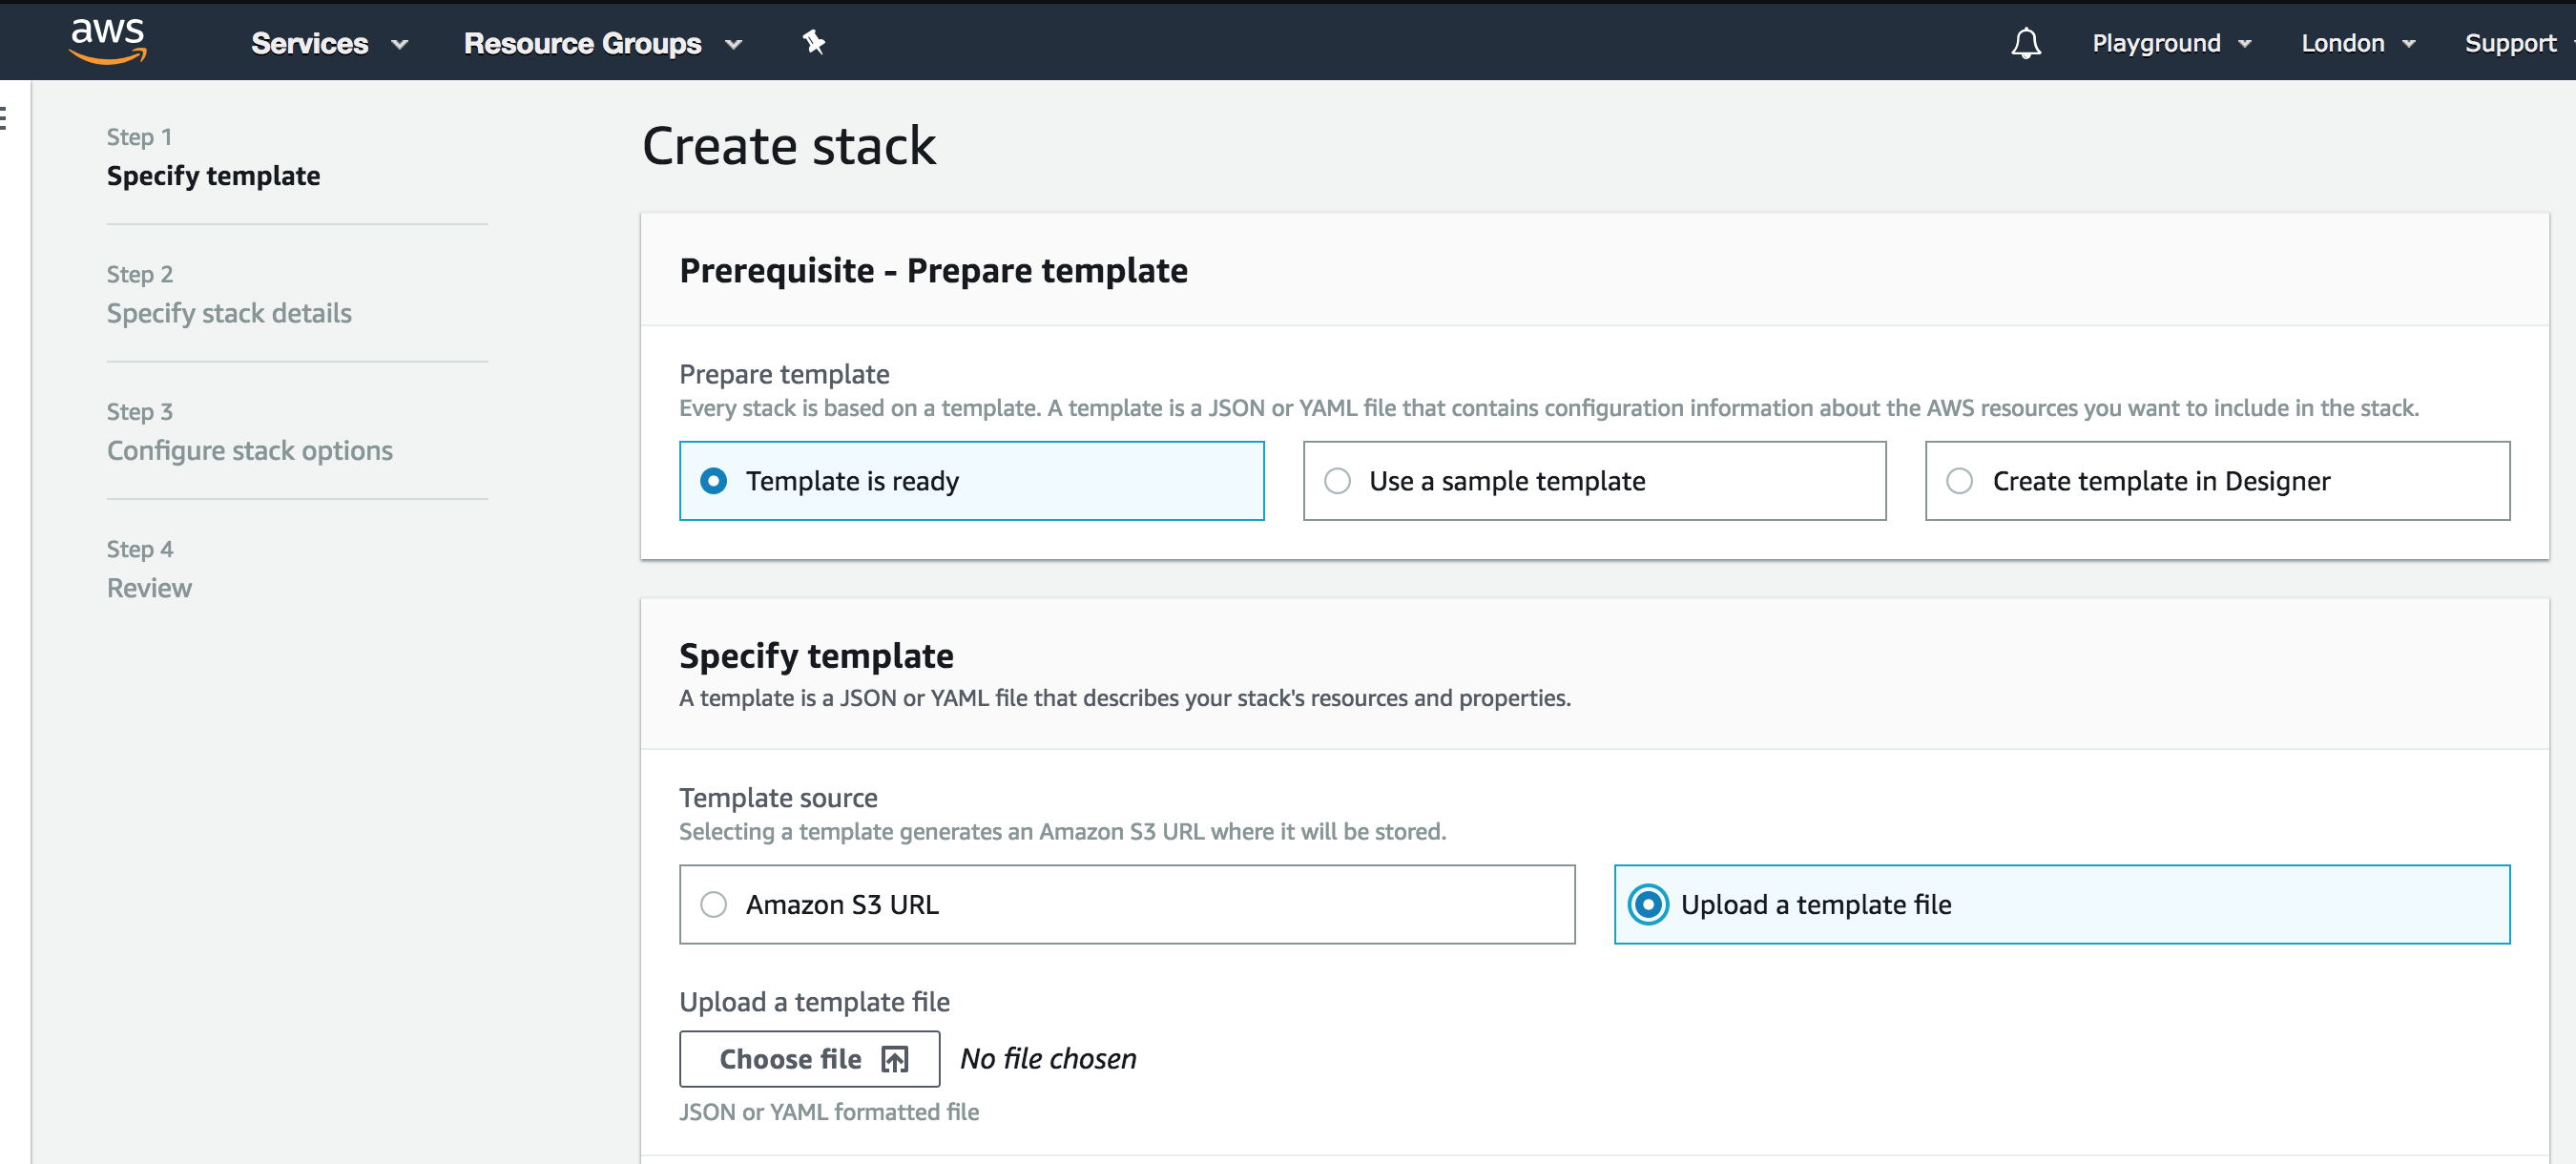
Step 4: Clock Choose file to locate your file and upload your template.
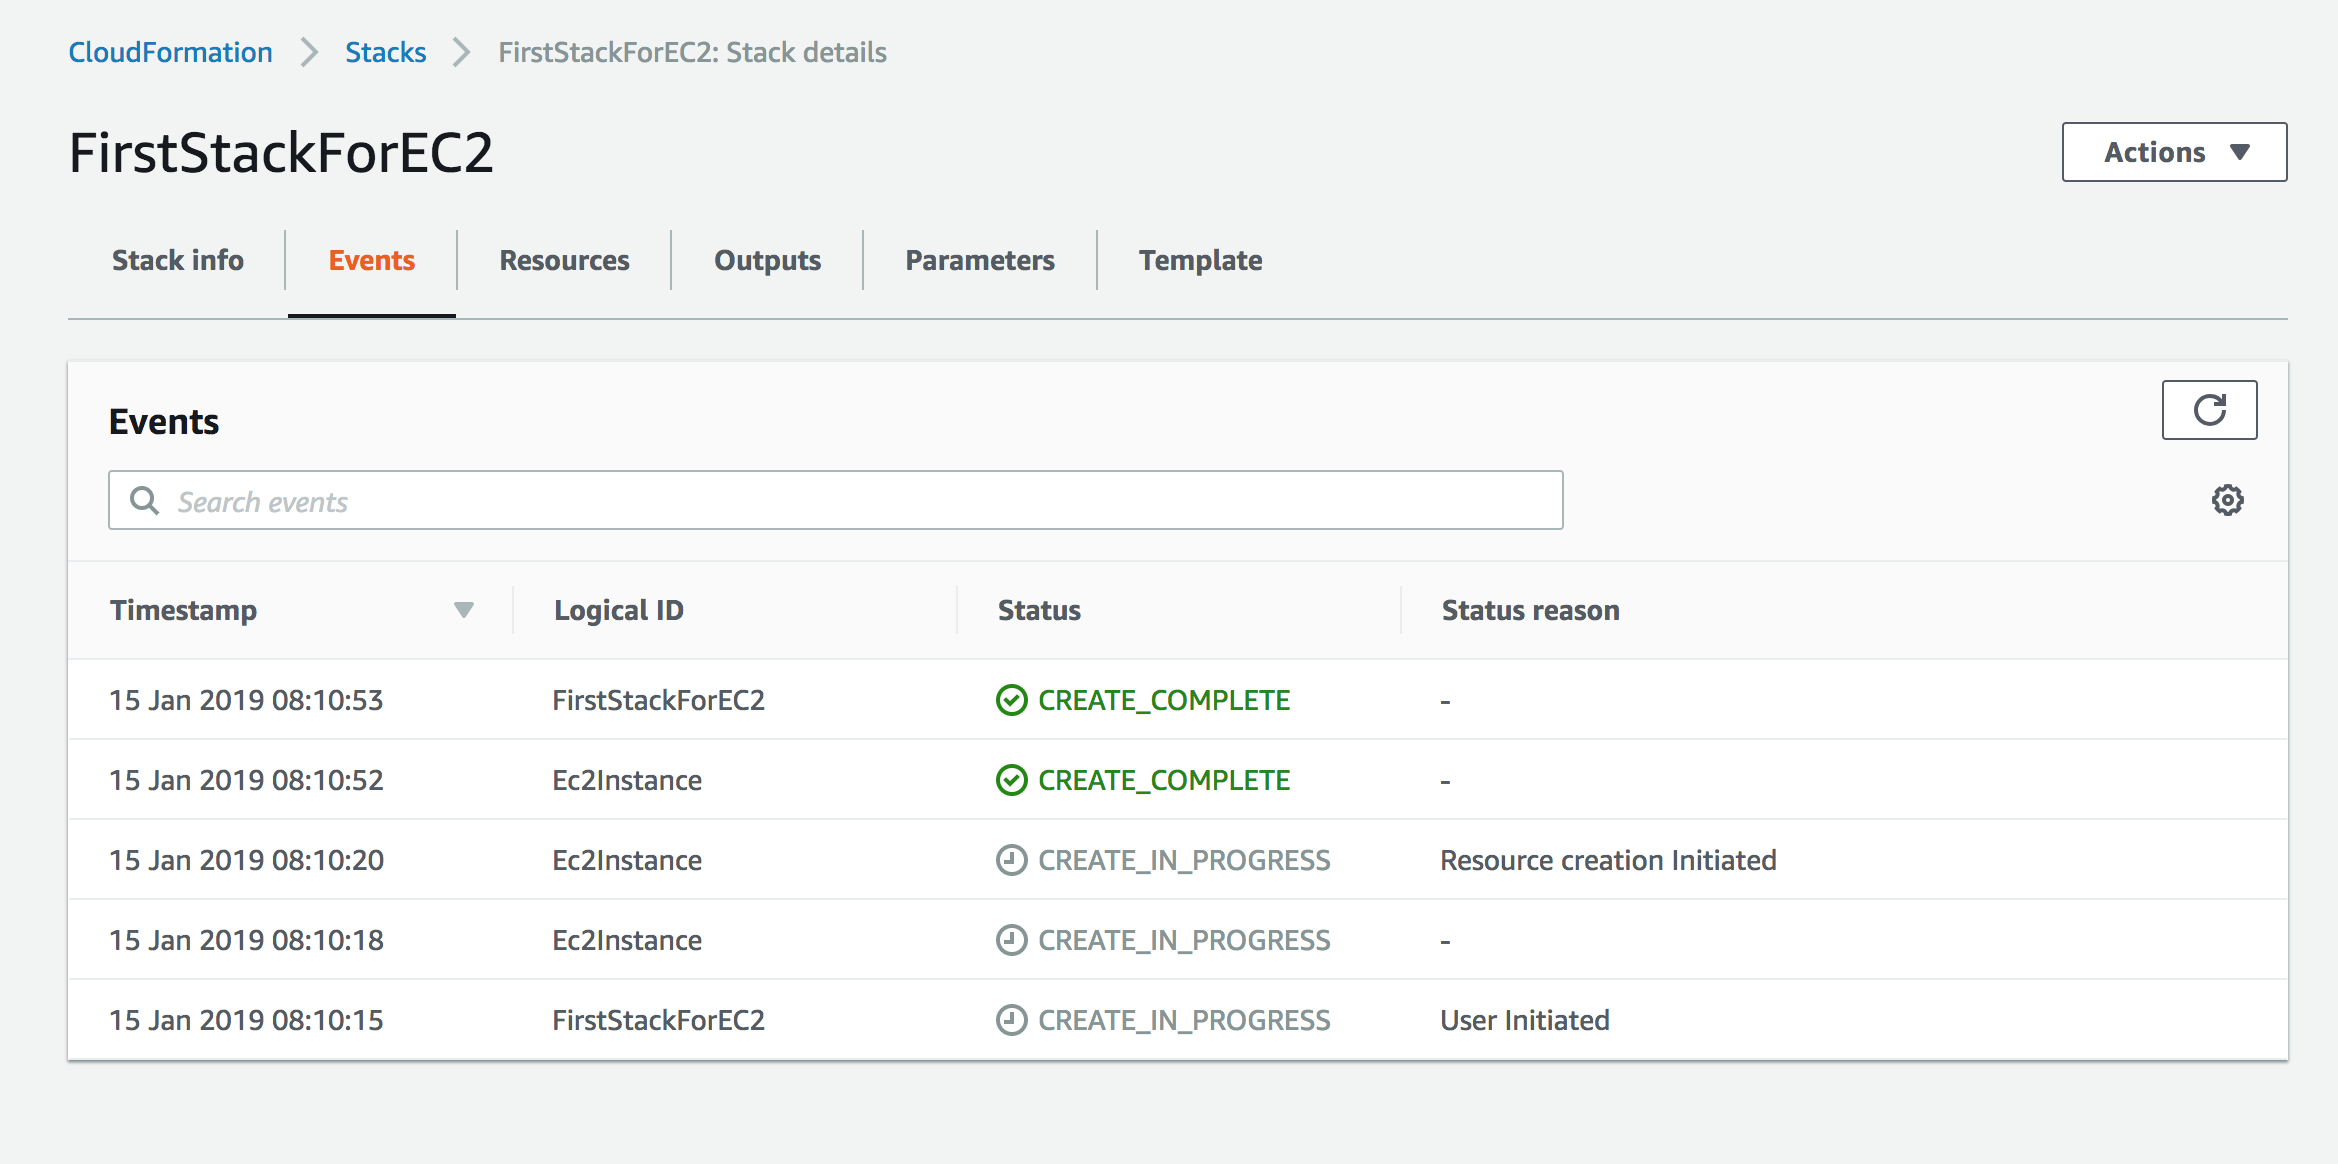
Step 5: Click next and specify a stack name something like FirstStackForEC2 and click Next
Step 6: Click Next on Configure Stack Options view and in the final review step of the wizard click Create Stack.
At this point you can observe the progress of your stack being created.
Now if you go to EC2 service in the same region you should be able to see the new instance:

If you delete the stack, it will in turn delete everything it created which is the EC2 instance in this example.
Launch Stack URLs
I always like the launch stack buttons that I see every now and then. I think there’s something magical about clicking a button and watching an entire infrastructure being created right before your eyes!
Basically clicking the Launch Stack URL opens the wizard we just used with the fields populated with the values in the template.
Step 1: Upload the template to S3 and make it publicly accessible.
Step 2: Use the following naming convention and replace the values:
https://console.aws.amazon.com/cloudformation/home?region=region#/stacks/new?stackName=stack_name&templateURL=template_location

In this example I uploaded the Launch Stack button image to my GitHub repository so that I can link to it.