In this post I woud like to talk about a common Git branching strategy: Git Flow.
Basic approach
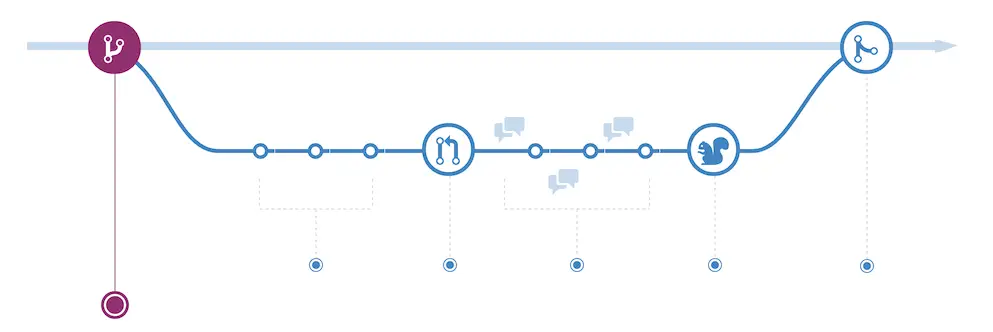
- Main diagram of the workflow:
| Supporting branch |
May branch off |
Must merge back into |
Naming convention |
Lifetime |
Remarks |
| Feature |
develop |
develop |
anything except master, develop, release-*, or hotfix-* |
as long as the feature is in development |
Features should never interact directly with master. |
| Release |
develop |
develop and master |
release-* |
preparation of the release |
Starts after feature-freeze. Allows minor bugfixes. Adding large new features here is strictly prohibited. |
| Hotfix |
master |
develop and master |
hotfix-* |
preparation of the release |
Similar to release in that used to prepare a production release but unplanned. |
Automation
Most tools have plugins to support Git Flow. In the example below I will use SourceTree which is available in Windows and Mac.
In this example I’m going to use a GitHub repository called gitflow-automation-test. I’ve already created it in GitHub and in my development environment.
Initialization and working with features
First thing to do with Git Flow in SourceTree is to initialize the repository.
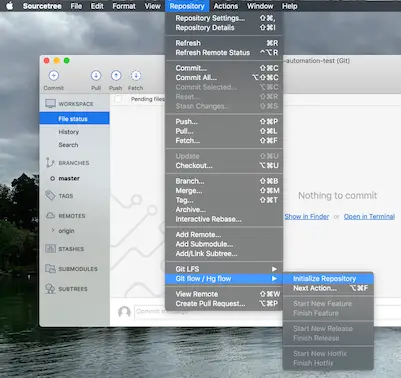
It sounds confusing at first because the git repo itself is already initialized. What it actually does is explained here. It shows a dialog box to configure the plugin:
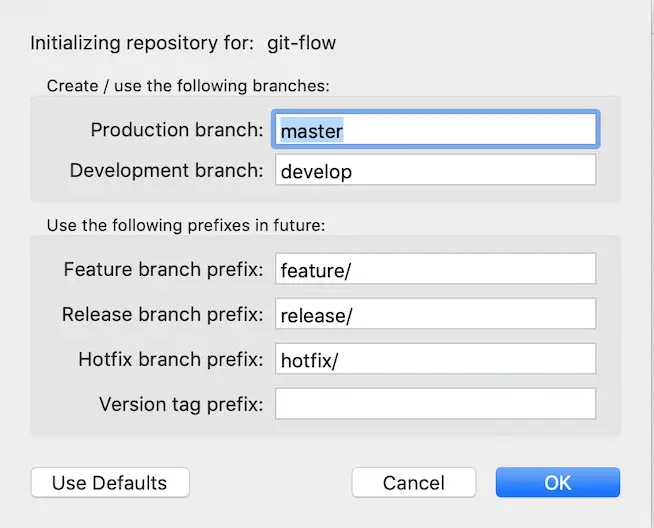
It also created the local develop branch.
At this point we have the three types of branches explained above to choose from to start. Let’s start with a new feature named “users”
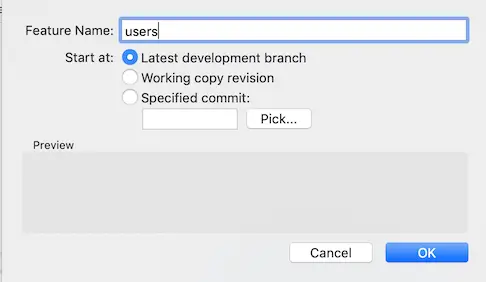
I just added a blank file that represents the changes required for that feature and commmited my changes.
Now that the feature has been implemented, I want to finish the feature. Similar to start, I went to Repository -> Git Flow -> Hg Flow -> Finish Feature

As the options in the window suggests, this action merges the changes into develop and deletes the local branch. It doesn’t push to remote so we have to push it ourselves.
Releasing new version
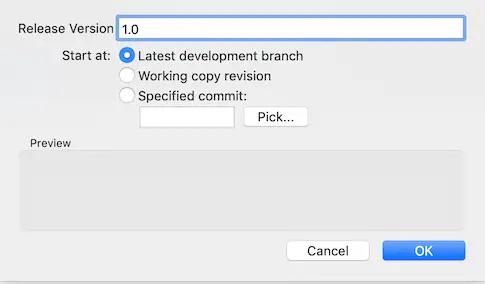
Now let’s assume we’ve implemented all the features planned for this release and we want to deploy a new version of our application.
To achieve this we start a new release:
Once we are ready to ship this release, we end the release similarly:
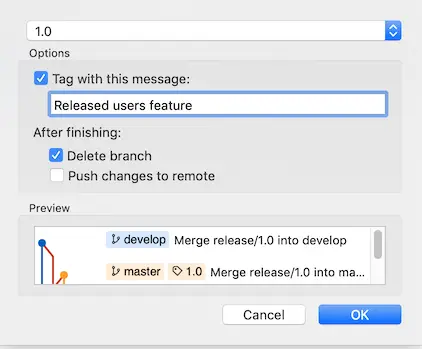
We can choose to push to the origin directly too. If we switch to detail view in Sourcetree output we can see a nice summary of actions that took place:
Summary of actions:
- Release branch 'release/1.0' has been merged into 'master'
- The release was tagged '1.0'
- Release tag '1.0' has been back-merged into 'develop'
- Release branch 'release/1.0' has been locally deleted
- 'develop', 'master' and tags have been pushed to 'origin'
- You are now on branch 'develop'
Working with hotfixes
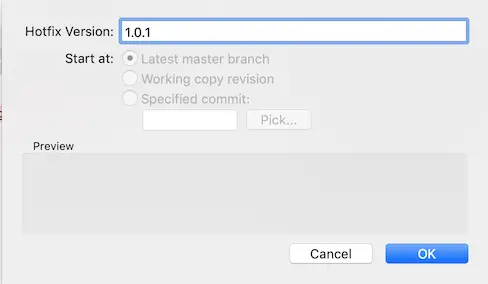
As the development continues, let’s assume we implemented another feature named “orders”. Finished the feature and pushed to origin. Now we have a new feature in develop. Suddenly we noticed there’s a bug in the production and we need to deploy a hotfix. We cannot create a new release branch off of develop because the new “orders” feature would be deployed along with the bugfix. So we create out hotfix branch off of master which always points to production.
As we can see the code reverted back to master:
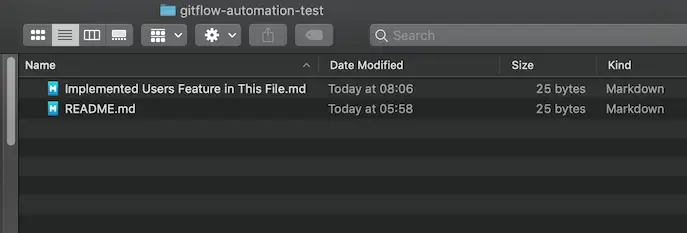
So I added another file to represent the changes for the hotfix and finished the hotfix:
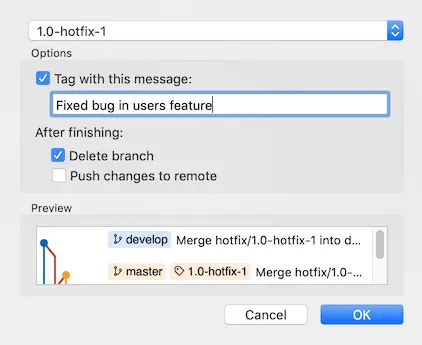
And the summary of actions looks like this:
Summary of actions:
- Hotfix branch 'hotfix/1.0-hotfix-1' has been merged into 'master'
- The hotfix was tagged '1.0-hotfix-1'
- Hotfix tag '1.0-hotfix-1' has been back-merged into 'develop'
- Hotfix branch 'hotfix/1.0-hotfix-1' has been locally deleted
- 'develop', 'master' and tags have been pushed to 'origin'
- You are now on branch 'develop'
As we can see the process is very similar to release. The only difference is the originating branch which was master in this case.
Working with pull requests
It’s a good practice to create pull requests and ask colleagues to review the code before merging into develop. This can still be part of Git Flow.
In this example I’ve created a new feature called “customers”. The changes are represented by the file “Implemented Customers Feature in This File.md”. I’ve commited my code to my feature branch and pushed it to GitHub.
Now I can click a new Pull Request by clicking Compare & pull request button:
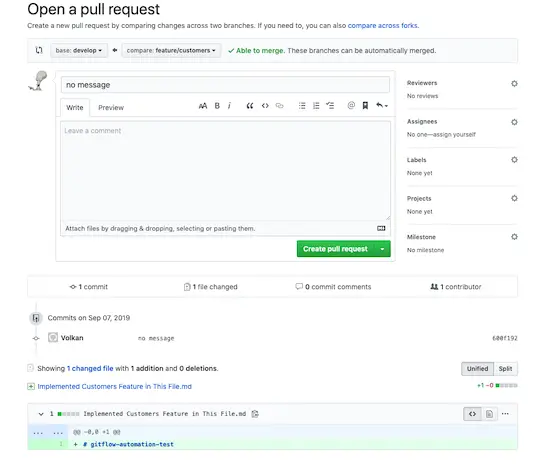
I’ve clicked on Create Pull Request and now it’s open on GitHub.
At this point there are several strategies you can take such as reviewed handling the merge and the developer deleting the local branch themselves (as there won’t be a Finish Feature step).
My suggestion is for the reviewer to Approve the pull request but not to merge it. Once the PR is approved, the developer receives a notification. Also the status of the PR can be seen on GitHub as well:
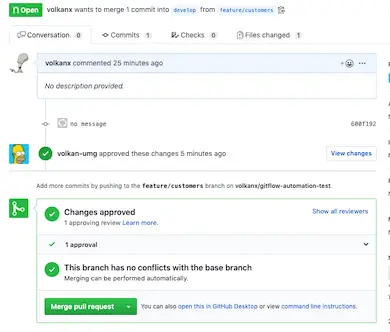
At this point the developer can go back to Git Flow and finish feature as shown previously.
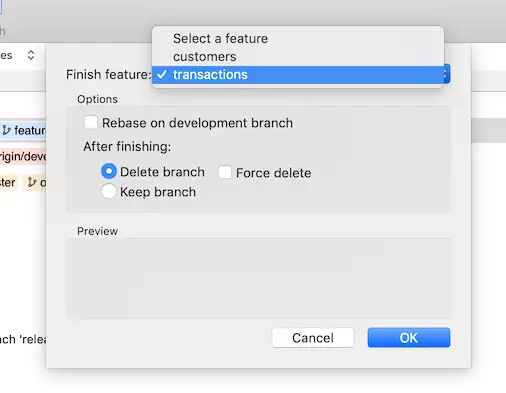
Now that we know customers feature have been approved we can select that and finish that feature:
Summary of actions:
- The feature branch 'feature/customers' was merged into 'develop'
- Feature branch 'feature/customers' has been locally deleted; it has been remotely deleted from 'origin'
- You are now on branch 'develop'
At this point developer needs to push the merged develop branch to GitHub otherwise the recent change (approved customers change) doesn’t appear in remote even though the pull request was merged.
Even if you’re in the middle of another feature and have uncommited files you can still finish the approved feature so it doesn’t interrupt with your work.
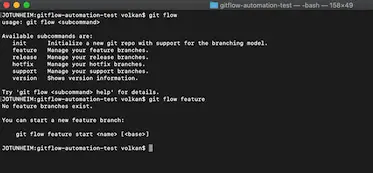
Command Line
All the Git Flow commands explained above are also supported by command line but to be able to use them you have to install it:
Then you can start using it as
In Windows, command line tools come with the installer so no extra installation is necessary.
Resources