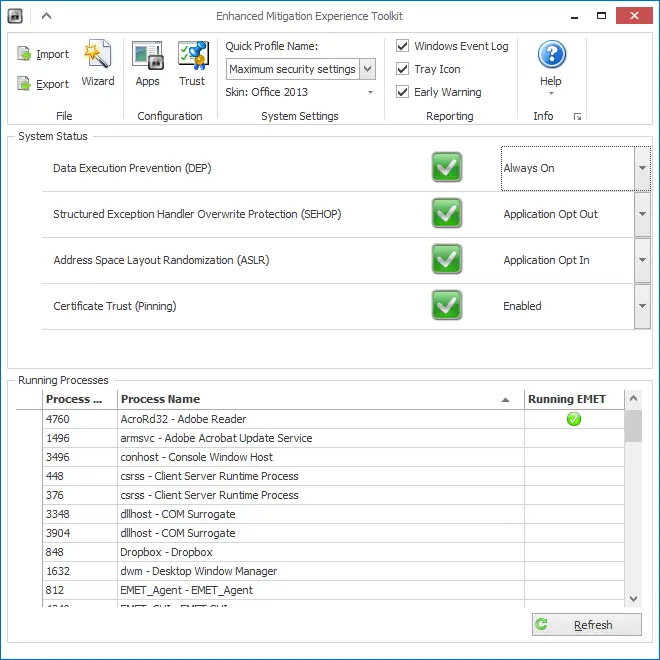
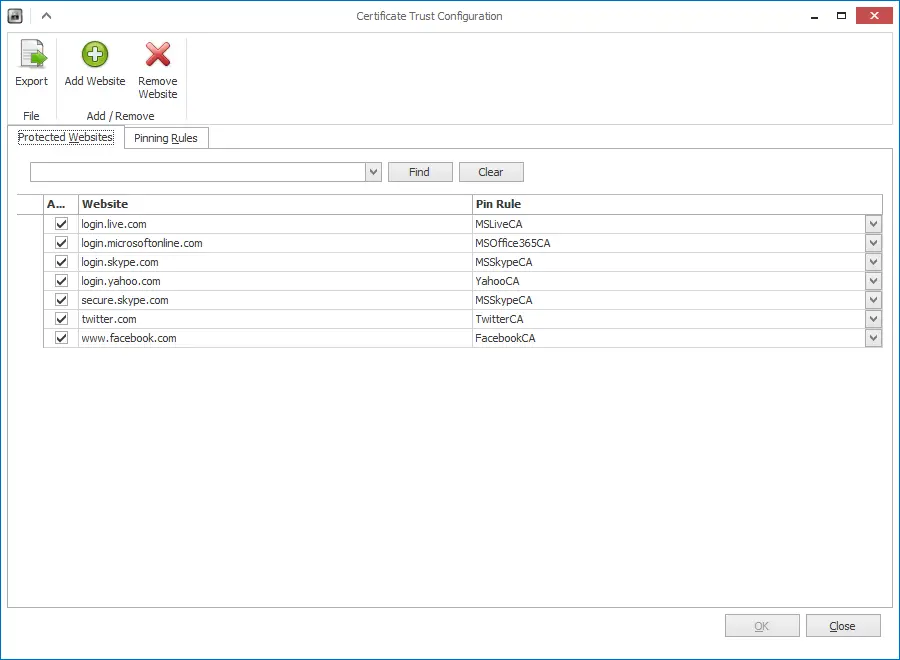
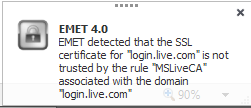
New toy: BeagleBone Black
After Raspberry Pi opened the way for low-cost small computers, a number of them started to show up in the market. One of the most recent ones gaining ground is BeagleBoard.
![]()
I just bought the cheap version which is called BeagleBone black which looks something like this:
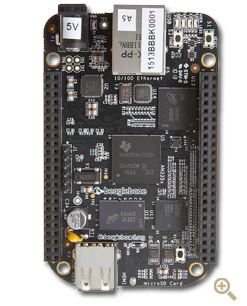
Nice looking little fellow, right?
Getting Started
I followed the getting started guide which you can find on the home page. Also the link in the resources section. When I plugged it in to USB it is recognized as a removable device. Then downloaded and tried to install the drivers as suggested but no luck. Apparently the drivers are unsigned and Windows 8 didn’t allow me to install them. Googling a little bit I found a step-by-step guide to change the machine settings so that unsigned drivers can be installed. I followed the steps and it worked like a charm. The original URL is in the resources section also the steps are below.
Troubleshooting
To be able to install drivers on Windows 8 follow the steps below:
1. Press win+c on the keyboard to bring up the charms side bar (or move mouse to right top corner of the screen)
2. Click the Settings button.
3. Click the Change PC Settings at the bottom of the sidebar.
4. On screen that shows up, select the General option from the sidebar then scroll down the page that appears.
5. Click the Restart now button under the Advanced startup section.
6. You will momentarily see the restarting screen, then it will switch to a blue screen titled "Choose an option"
7. Click the Troubleshoot button.
8. Click Advanced options.
9. Click Startup Settings
10. Click Restart
11. You should then see a Startup Settings screen after your computer reboots.
12. Press 7 or F7 on your keyboard to Disable driver signature enforcement
13. Now Windows 8 will continue starting up.
14. Log-in as normal, and then run BONE_D64.exe again
15. Now you should see 4 warning dialogs about "unsigned driver installation", click OK for all of them.
Results
So far so good:
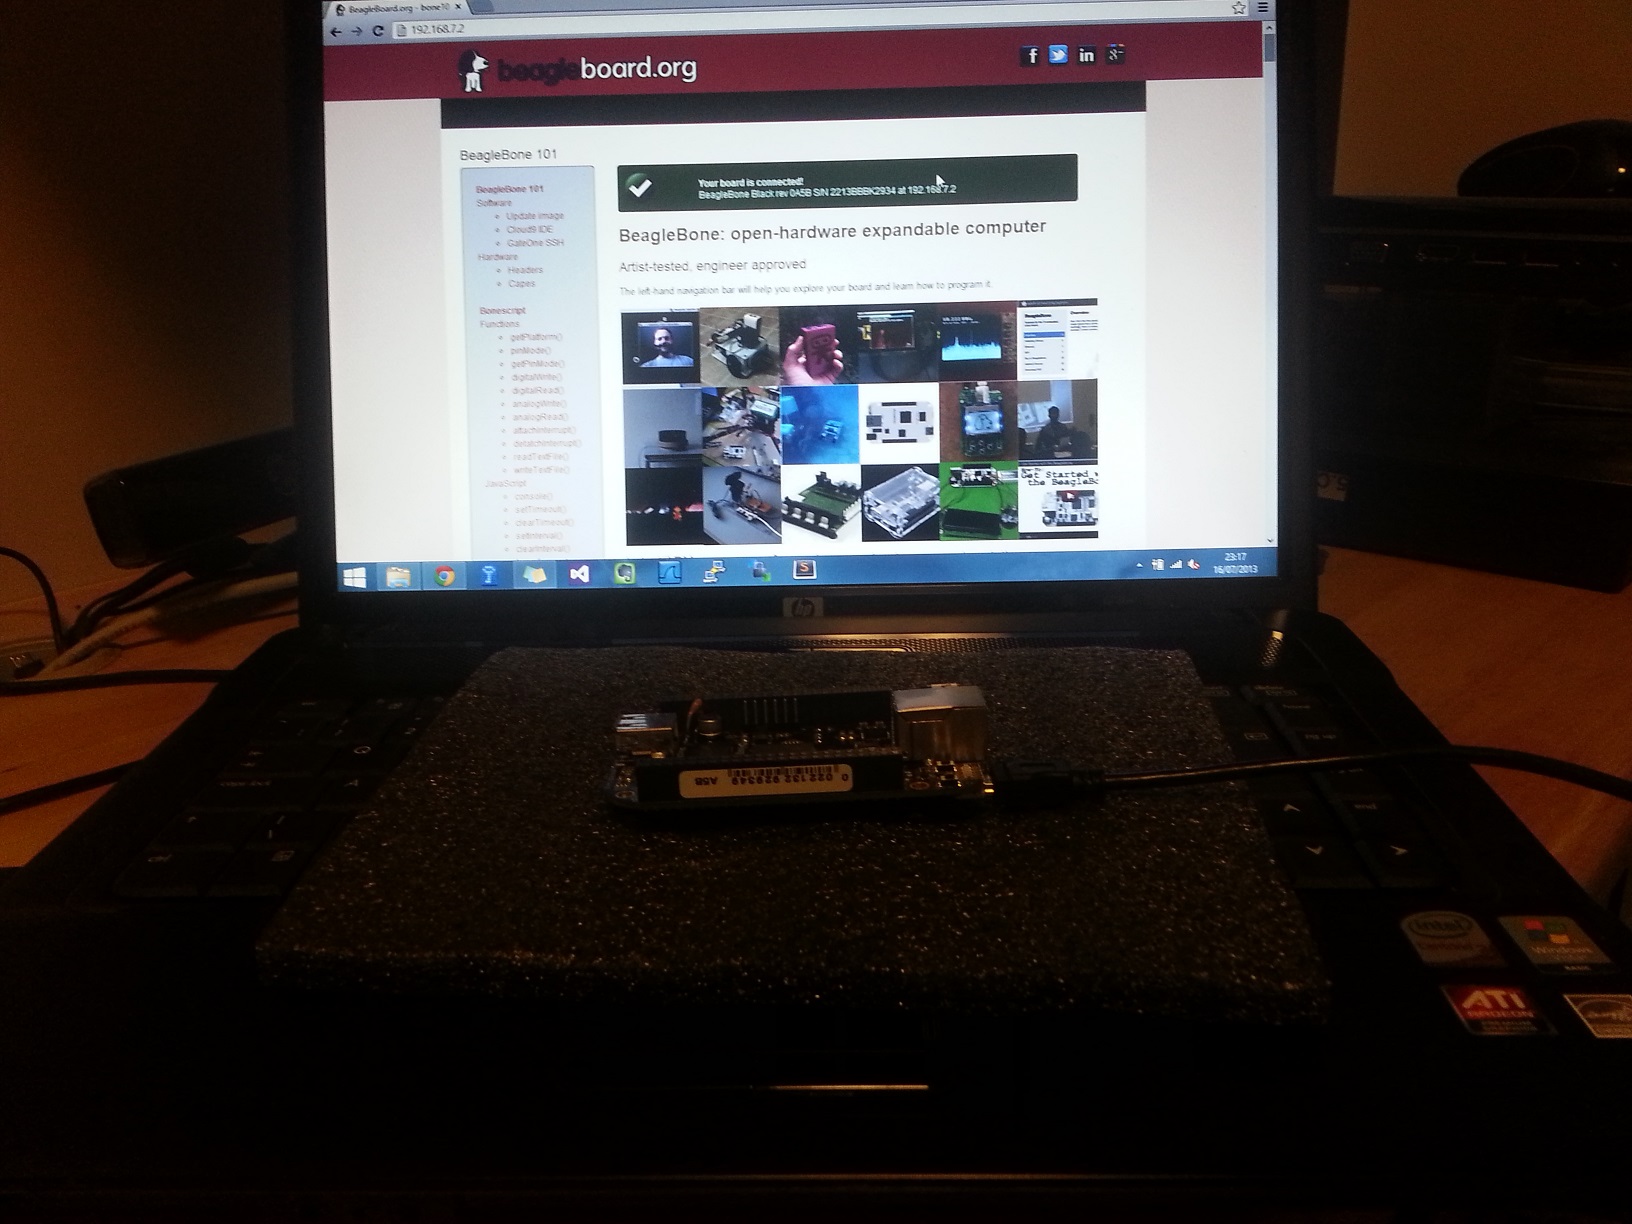
I can connect to the web server running by default. I’ll try to explore what I can do with it further. Let’s see what it is capable of.