
Exploring cloud further: Rackspace
**It’s been a while since I’ve started using Amazon Web Services (AWS) to host my sites. I think it’s a great platform as you only pay for what you use and there are lots of options. And the best part is anything you can do via their user interface (and more) can be done programmatically via their API. I’m extremely happy using AWS but still I wanted to see what its competitors are doing.
Enter RackSpace

So I decided to test RackSpace first. One reason for selecting it is that it has a data centre in London (the closest AWS data centre to UK is in Dublin). Also it is based on OpenStack platform which I wanted to play with for some time. I created my free account but it needs to be activated after you receive a call from a staff member. He just asked basic questions like my username and the reason I created the account. After the call the account was activated and I was ready to explore this new land.
First Impressions
This is still a work in progress actually, I cannot say I have fully covered everything about it. Here are just my first impressions and comparisons with AWS:
Pricing & Billing
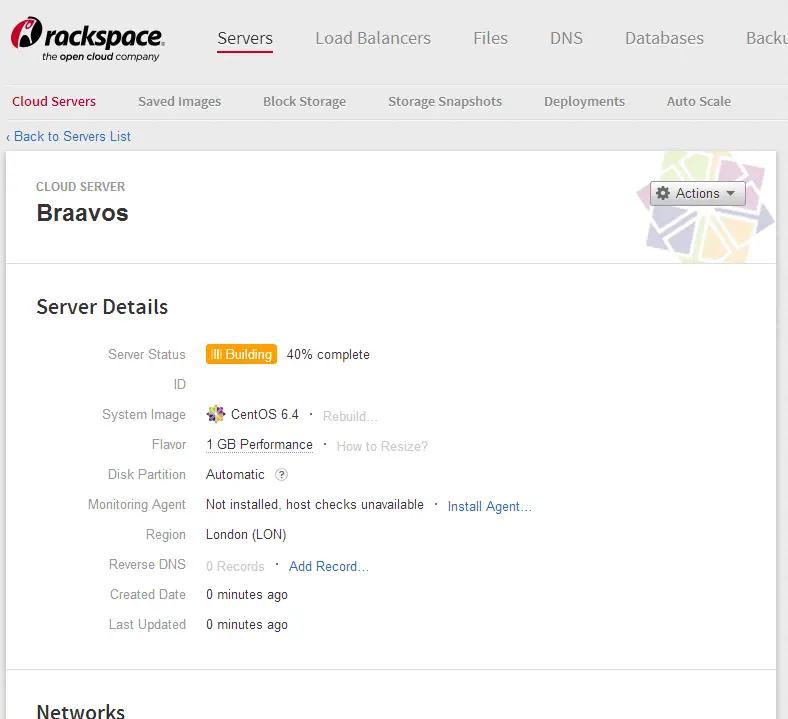
Maybe I’m cheap but my first order of business was compare the prices! The cheapest Linux configuration starts from £0.030/hr. You can find the entire list here. As the site I’m planning to migrate didn’t need much resources I decided to go with the cheapest one: 1GB RAM, 1vCPU, 20GB SSD. After the migration I’m quite happy with its performance.
One interesting thing I noticed is, unlike AWS, you pay for the machine even if you stop it. Excerpt from a documentation says “Shutting down a server will NOT stop billing, since the virtual hard drives are persistent, server resources are always in use whether the servers is powered on or not.” Now that’s not cool! Actually if you are running web-based systems you never stop the machines anyway. But there are many times I preferred to keep the old machine stopped for a period until the new machine proves to functioning fully for example. It’s nice to have the chance to rollback easily if need be. Of course you can do it here too, but you just have to pay twice as much during that period.
Features
When trying to configure the machine I noticed there isn’t a feature like Security Groups of AWS. I had to update the iptables configuration on the machine. Which would make it hard to manage firewall rules in a multi-machine environment. In AWS you just add the new machine to an existing security group and forget about it because all the existing rules are applied to the new one automatically.
Programmability and API
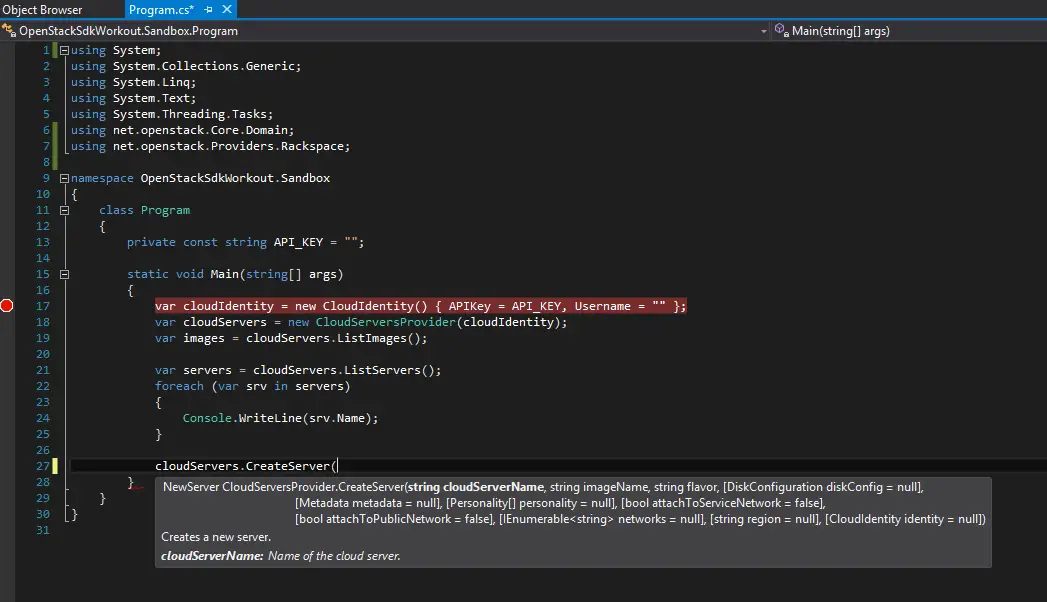
Even though I haven’t developed anything for it yet, I just wanted to see what are our capabilities and how would I develop something when I needed. All I needed to do was get the NuGet package and I was ready to get the list of my machines in a a few minutes. Basically you can manage machines, images, volumes pretty much like AWS. I’ll put a pin to it for now and develop some tools for myself later.
Conclusion
I think the best thing about RackSpace is that it is built on top of OpenStack. This means if you your system to another vendor your applications using the API can remain intact. Also as it is open source software you can build your own data centre if you wanted to. Of course it sounds good to geek ears but I guess in real world it doesn’t have much value as such migration of systems are quite often. Other than that I didn’t see any advantages over AWS but I’ll keep the machine running for a while and see how it goes.