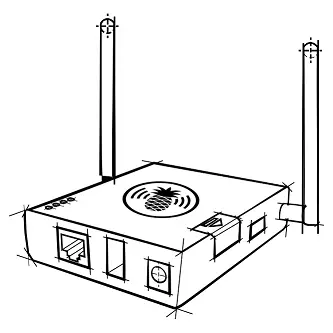
Beware the Pineapple: An overview of WiFi Pineapple Mark V
Wifi Pineapple has been around for quite some time now. Almost two years ago I posted a short review here but with the latest version (Mark V) it’s got badder than ever and they keep adding more features so it’s a nice time to catch up.
What is it?
Basically Wifi Pineapple is a WiFi honeypot that allows users to carry out man-in-the-middle attacks. Connected clients’ traffic go through the attacker which makes the attacker capable of pulling a number of tricks.
Mark IV was based on Alfa AP121U. Instead of buying a pineapple you could just buy an AP121U and create your own DIY pineapple by installing the firmware. Mark V, on the other hand, is a whole new animal.
Equipped with 2 radios it can work in client mode meaning it can piggyback on a nearby WiFi network and bridge the victim’s connections (In Mark IV the only way to provide internet access was 3G which is also still supported).
How does it work?
At the heart of the pineapple lies an attack method called Karma. It works by exploiting trusting devices to probe requests and responses. Our wireless devices, by default, constantly try to connect to the last networks they were on. To accomplish this they actively scan their neighbourhood by sending out probe requests. (A probe request is a special frame sent by a client station requesting information from either a specific access point, specified by SSID, or all access points in the area, specified with the broadcast SSID.)
Normally, access points (AP) that don’t broadcast the requested SSID just ignore the probe request. The correct AP responds with a probe response and the client initiates association with the AP again. That’s how we connect to our home or work network as soon as we arrive. That is convenient and user-friendly but the malicious devices running Karma attack can break this “honor-code” based system. The pineapple responds to whatever AP the device is asking for therefore deceiving it into believing they are home.
What’s the risk
Obviously these honeypots are set up for a reason: To get your traffic. Once you start sending your data through the attacker’s system you are opening yourself to all sorts of attacks. One of the most important ones is called sslstrip. (These “attacks” are called infusions in Pineapple parlance and they can be downloaded and installed in seconds to enhance its capabilities which makes the pineapple an even more powerful weapon)
sslstrip redirects your HTTPS traffic to HTTP equivalent (i.e. You land on http://www.google.com even though you requested https://www.google.com). So when you login to your favorite social network you essentially hand over your credentials to the attacker in plain text.
You can find a full list of available infusions here which can give you an idea what types of attacks are possible.
What’s New
As of Version 2 of the Pineapple firmware a new feature is introduced: PineAP. They define it as “the next-gen rogue AP”.
As Karma attack became more popular vendors started to increase security a little bit. Instead of sending out all the SSIDs that the device has connected in the past, the device simply sends a probe request that says “Broadcast” and the APs respond with a beacon with their information and what SSID(s) they are broadcasting. Then the client can decide which one to connect to. This method mitigates the regular Karma attack. To mitigate this mitigation (!) Pineapple team came up with PineAP.
PineAP has several modules:
-
Beacon Response
Similar to probe responses this module sends beacons. For example if the client is looking for “Home Sweet Home” network, Karma sends a probe response with this SSID and at Beacon Response module sends a beacon with the same SSID making the pineapple look more legitimate. -
Dogma This module sends out beacon frames of SSIDs selected by the attacker (defined in the PineAP SSID Pool). It also allows targeted attacks so you can set the target MAC address.
-
Auto Harvester Since SSID names are more likely to be kept as a secret it helps to collect this information. Harvester collects leaking SSIDs from the potential clients. They are added to the SSID pool to be used by Dogma.
Further Improvements and new features
- Setup screen
A neat feature is, as an extra security step, when you first setup and connect to your pineapple you have to enter a random LED pattern.

As a fan of multi-factor authentication of all sorts I loved the idea of using the physical hardware to improve security.
- Management network
New Pineapple can setup a secure Wifi AP just for the owner so that you don’t have to connect via Ethernet. You can use your phone to check who is connected to the network and manage the pineapple completely by using the responsive UI.
- Recon mode
This is another neat feature that allows to scan all AP and clients around. You can even carry out a deauth attack by just clicking on a client.
Mitigations
-
Never connect to open networks, NEVER!: If you are in the habit of using open wifi networks one day you might come across one of those pineapples in your coffee shop and hand over your data unknowingly to a guy sitting in the table next to you! Even without this risk you should never use networks that you have no control over but this kind of risk makes it even more important.
-
Verify SSL: SSL/TLS is still the most important security measure we have when connecting to websites. Always ensure that you are connected to the right website by checking the certificate. An attacker may not be able to break SSL certificate but they can simply bypass it completely by tools like sslstrip. It’s especially important in mobile devices since they tend to hide the address bar to make more room for the content so generally you never know the exact URL you are sending your requests to.
-
VPN: If you are using VPN your traffic is encrypted and sent through a secure channel. In this case, even if an attacker is able to get your traffic they will not be able to make any sense of it.
-
HSTS: This mechanism allows web servers to declare that web browsers (or other complying user agents) should only interact with it using secure HTTPS connections and never via the insecure HTTP protocol. It helps to mitigate the risks of tools like sslstrip. Downside is it’s not currently adopted by all browsers at the moment.
Conclusion
Wireless networks provide great convenience to us but comes with risks and vulnerabilities (as all conveniences in IT). The hardware is getting smaller and more powerful everyday so the tools like Wifi Pineapple are getting more threatening. It’s important to keep an eye on what kind of risks are out there and learn how to avoid those risks.