Neo4J Browser Tips & Tricks
I’m currently in search of a good tool to manage my graph database data. As they say a picture is worth a thousand words so visualization is very important to understand the nature of the data and make some sense of it. If nothing, it’s simply more fun!
Covering a user interface may seem unnecessary since they are generally pretty straightforward and Neo4J browser is no exception but after using it for some time I discovered some neat features that are not immediately obvious in this post so I’ll go over them. I will be using the beta version (v2.2 M04) so if you are using an older version you can compare the upcoming features with your current version.
You gotta know your tools to get the maximum benefit out of them so let’s dig in!
Accessing the Data
A major change in this version is that the authentication is being turned on by default.
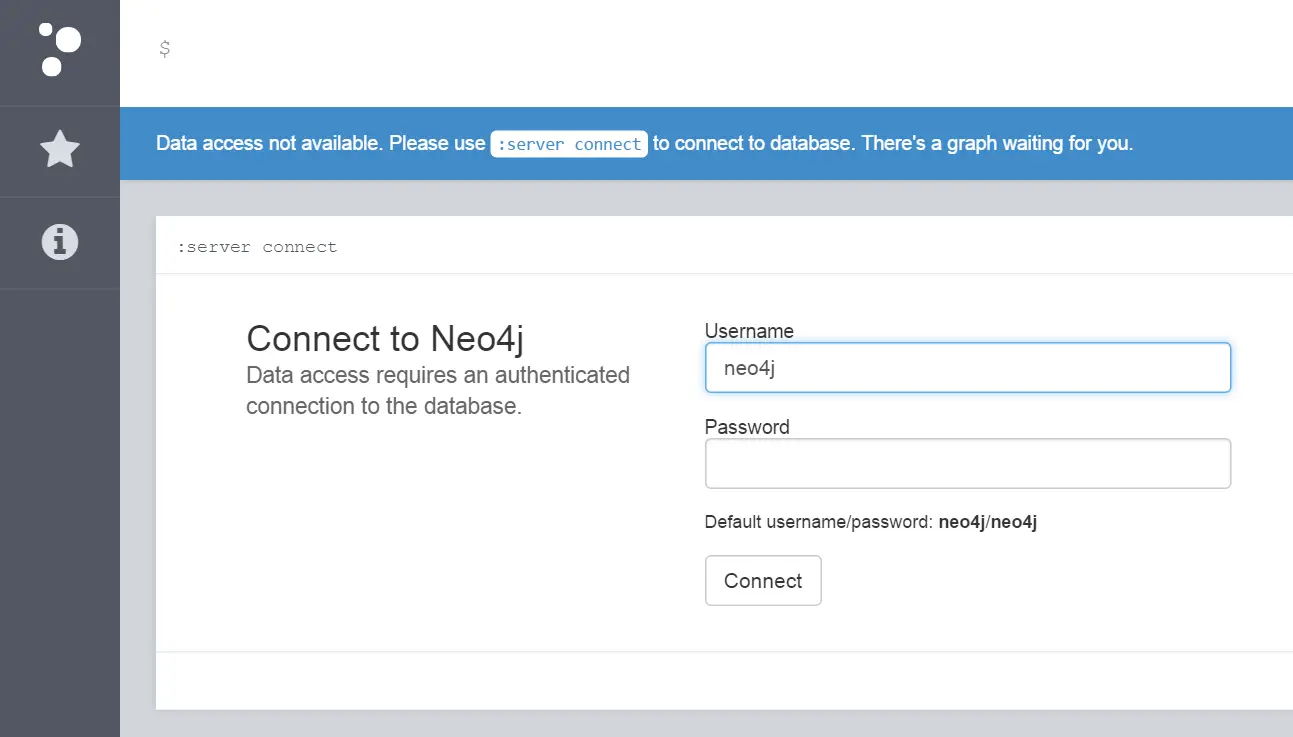
So if you install it on somewhere that’s accessible from the Internet you can have a layer of protection.
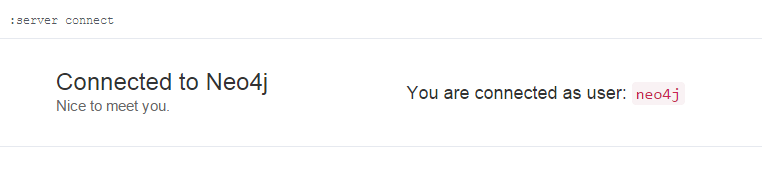
If you close that login window by accident you can run the following command to bring it back:
:server connect
Similarly, if you want to terminate the connection you can run
:server disconnect
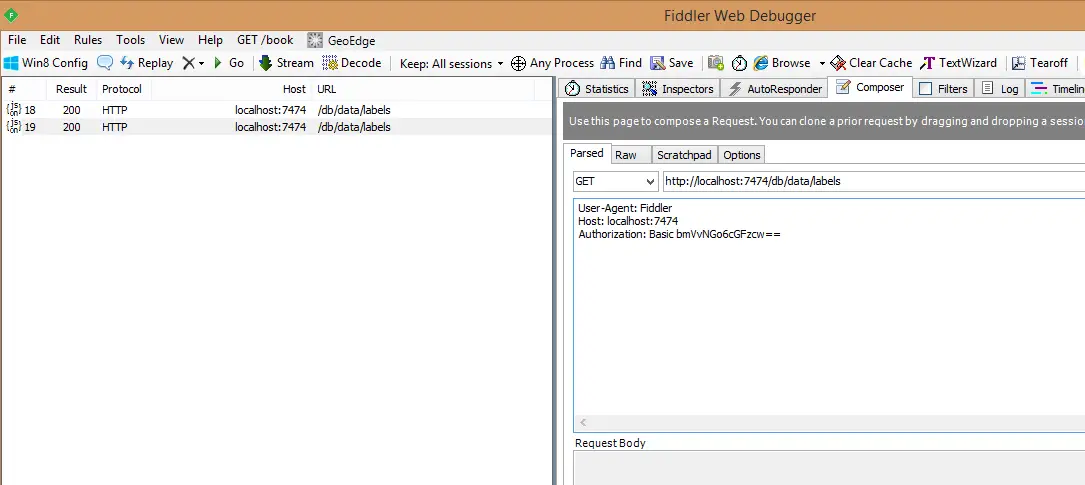
Until v2.2 M03 you got an authorization token back after the connection is established but since v2.2 M04 you don’t get a token. This is because authorization header is calculated by base64-encoding username:password pair.
If you need to connect using other tools you need to send authorization header with every request. This is Base64-encoded value of username/password pair separated with colon.
So in my case I changed the password to pass (I know it’s a horrible password, this is a just test installation :-))
So my authorization header value becomes:
Username:Password --> neo4j:pass
Base64-encoded value --> bmVvNGo6cGFzcw==
And with the correct authorization header I can get an HTTP 200 for the GET request for all the labels:
Helpful commands and shortcuts
- First things first: Help!
To discover all the commands and links to references you can simply run the help command:
:help

- Clean your mess with Clear
Browser runs each query in a separate window and after using it a while you can have a long history of old queries. You can get rid of them easily once and for all by this command:
:clear
- Use Escape to switch to full-screen query view
You can use Escape key to toggle to a full-screen query window. Just press Esc key and you’ll hide the previous query windows.
This is especially handy if you are dealing with long Cypher queries and can use some space. You can toggle back to old view (query and output windows below) by pressing Esc key again. Alternatively it will toggle back if you just run the query.
- Use Shift+Enter for multi-line mode
Normally Enter key runs the queries but most of the time you’d need to work with queries spanning multi-lines. To accomplish that you can simply use Shift+Enter to start a new line and switch to multi-line mode. Once you switch to multi-line mode, the line numbers will appear and Enter will no longer run your query but will start a new line. To run queries in multi-line mode you can use Ctrl+Enter key combination.
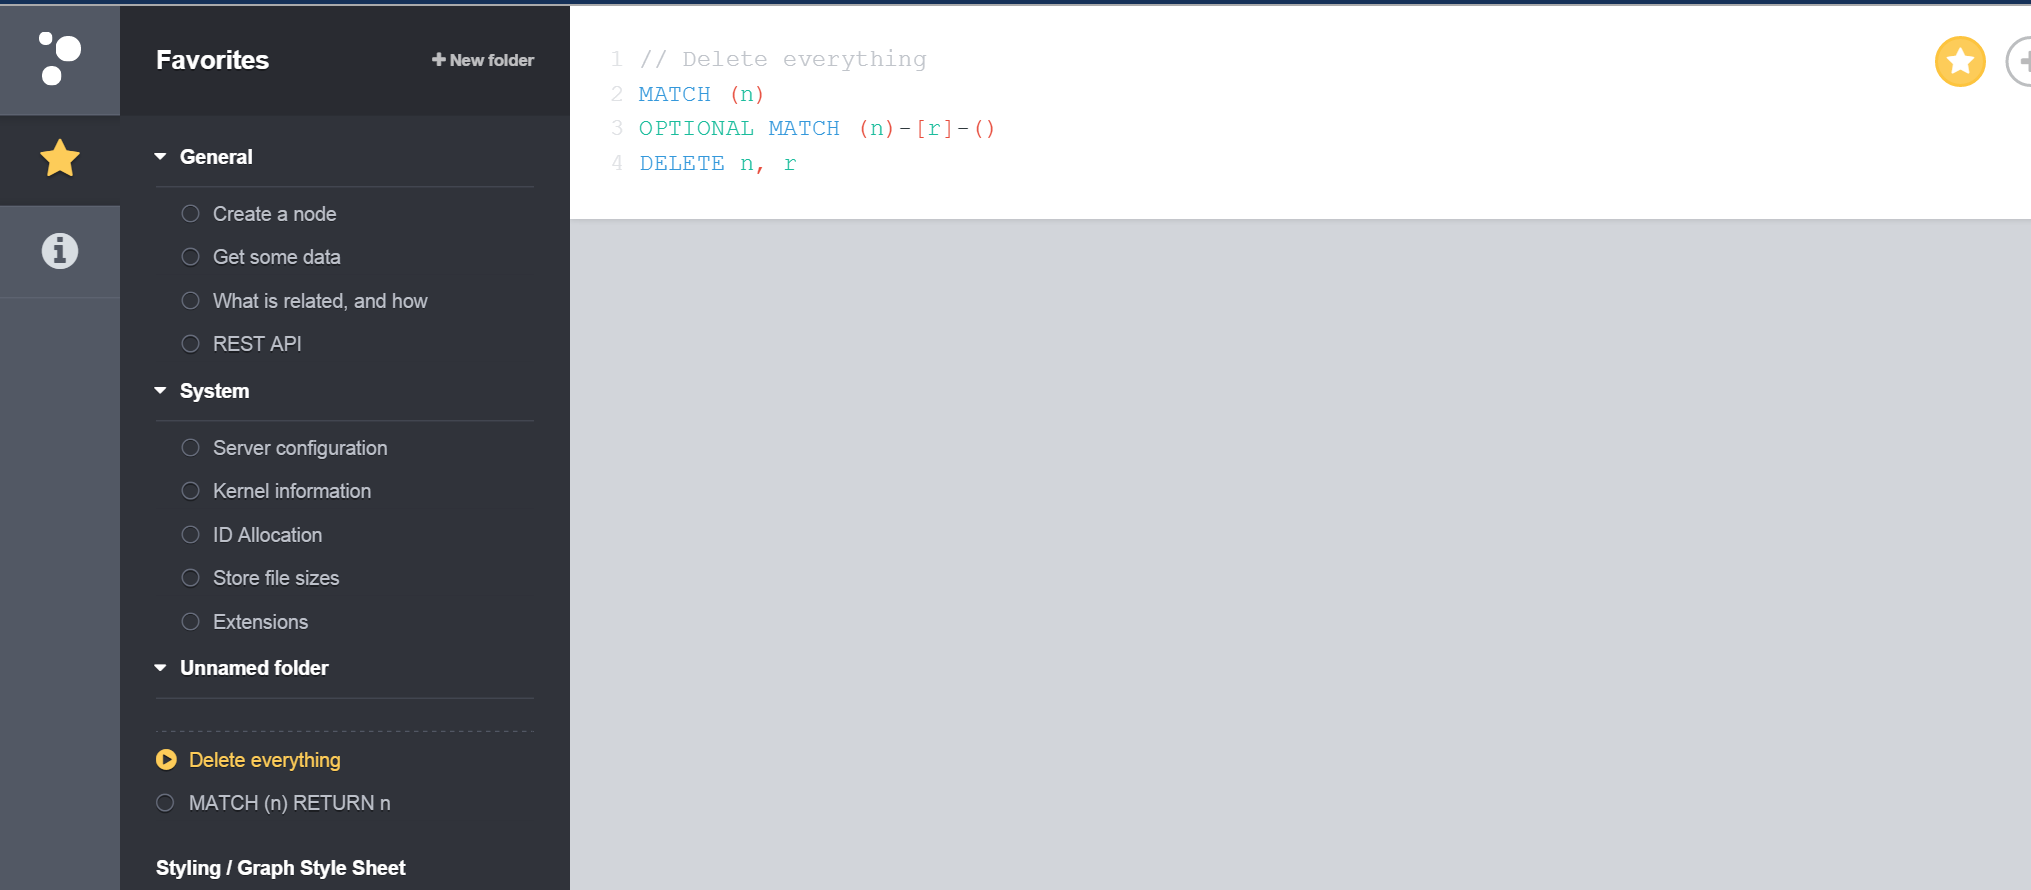
- Name your saved queries in favorites
There are some queries you run quite often. For example in my development environment I tend to delete everything and start from scratch. So I saved my query to the favorites by clicking the star button in the query window. Nice thing about it is if you add a comment at the beginning of your query the browser is smart enough to use it as the name of your query so you don’t have to guess which one is which when you have a lot of saved queries.
- Play around with the look & feel
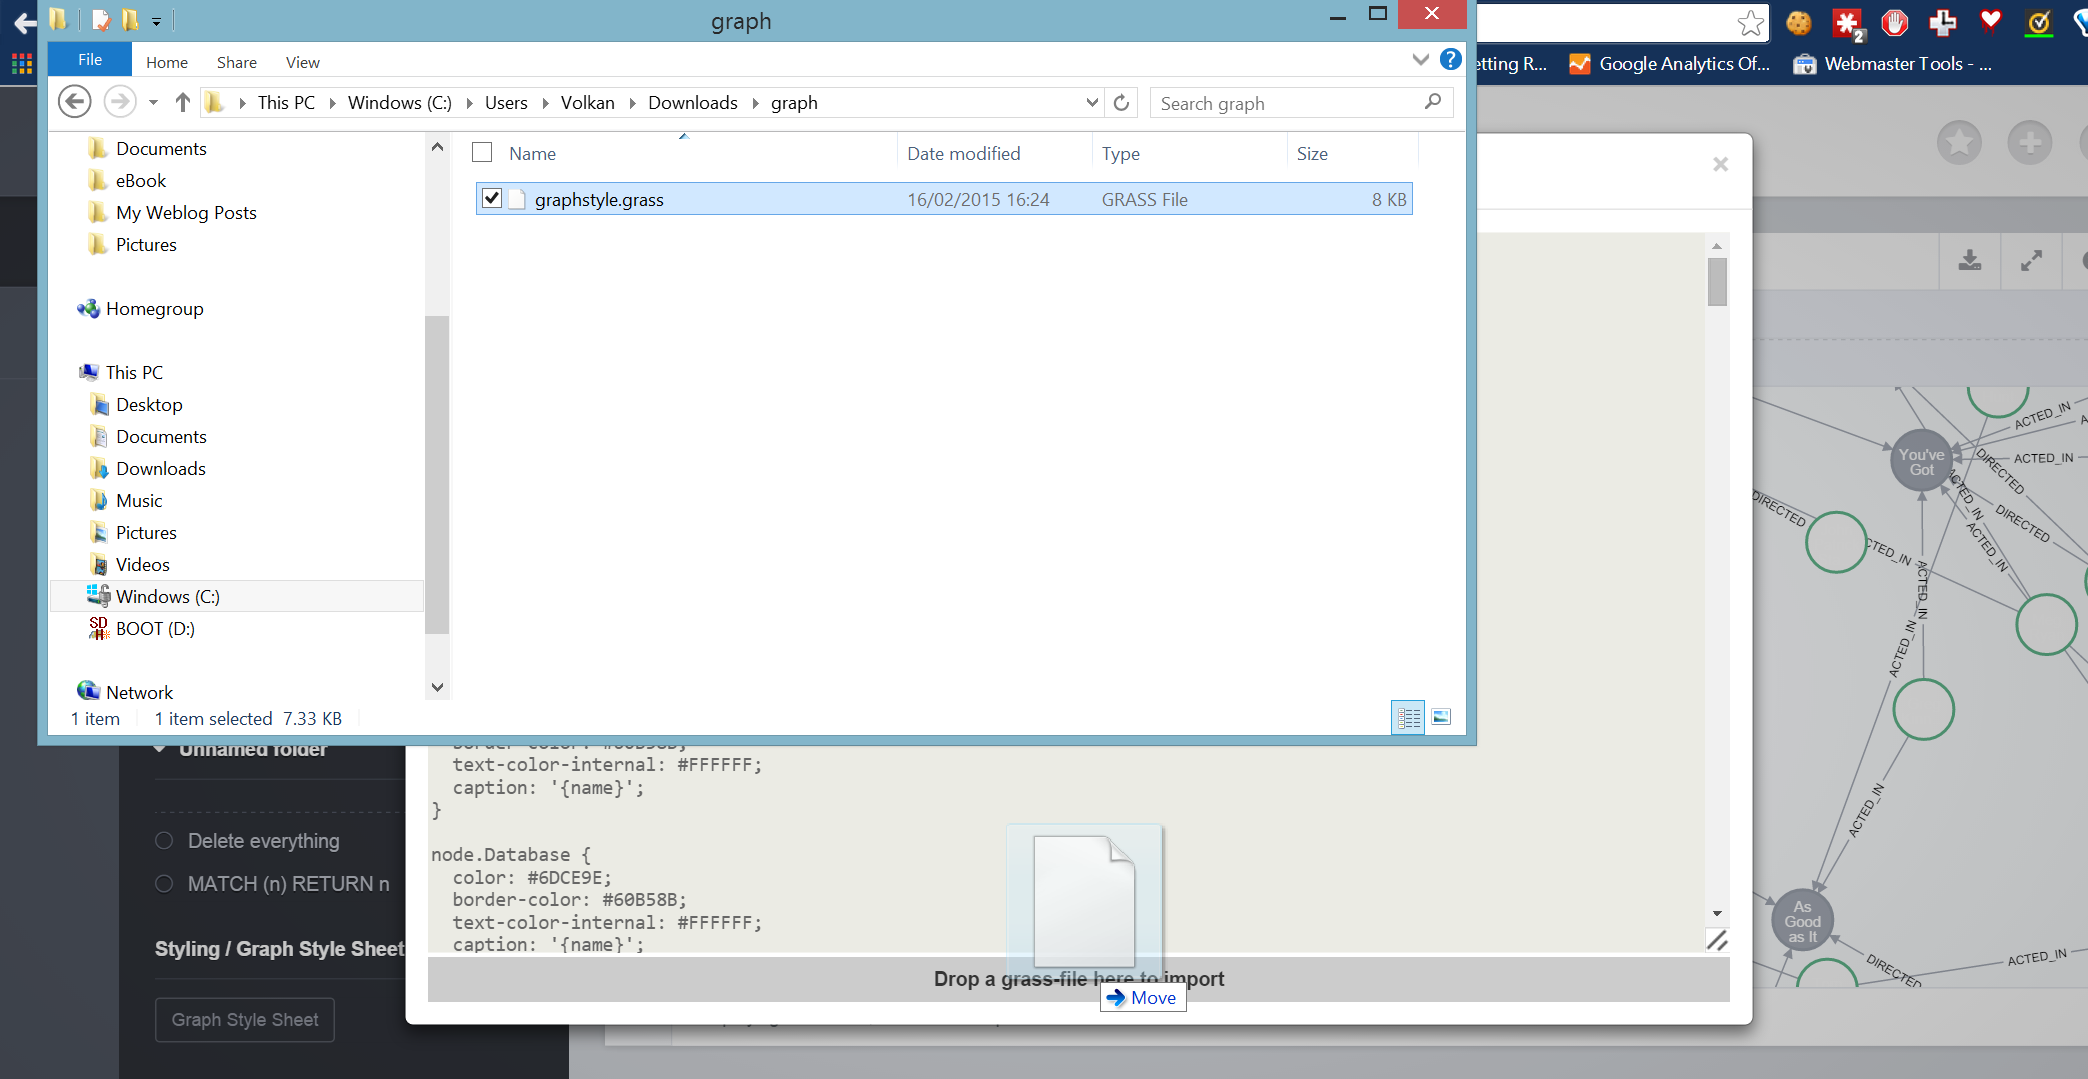
With the latest version you can mess around with the stylesheet that is used to visualize the results. In the favorites tab there is a section called “Styling / Graph Style Sheet”. You can see the styles used by clicking the Graph Style Sheet button. It’s not editable on the editor but you can export it to a .grass file by clicking on the Export to File icon.
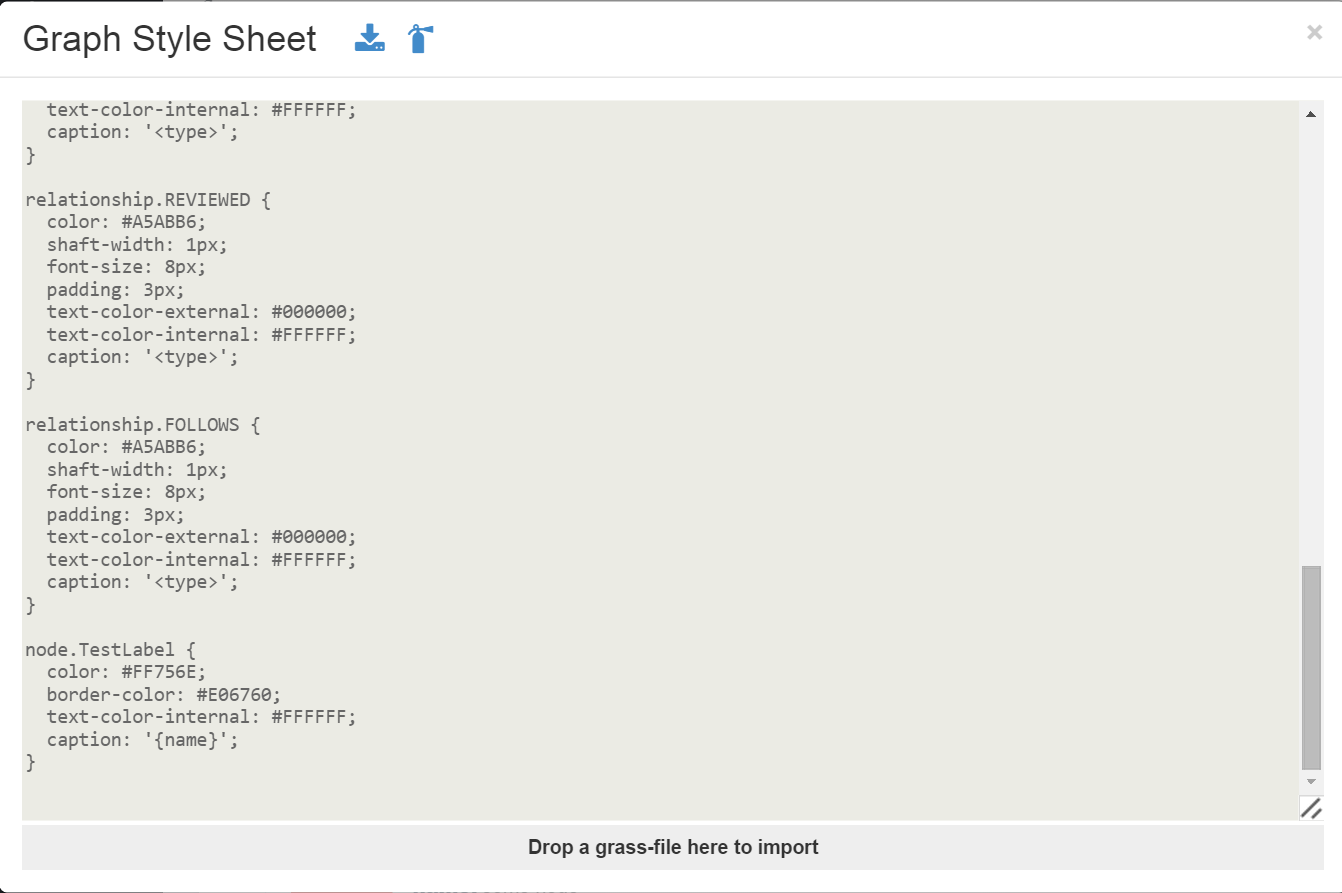
After you make your changes you can import it back by dropping it to the narrow band at the bottom of the dialog window.
You can still get the original styles back by clicking on the icon next to export (that looks like a fire extinguisher!) so feel free to mess with it.
- Use Ctrl+Up/Down arrow to navigate through old queries
You can browse through your query history using Ctrl+Up/Down arrow. I find this shortcut especially helpful when you quickly need to go back to the previous query.
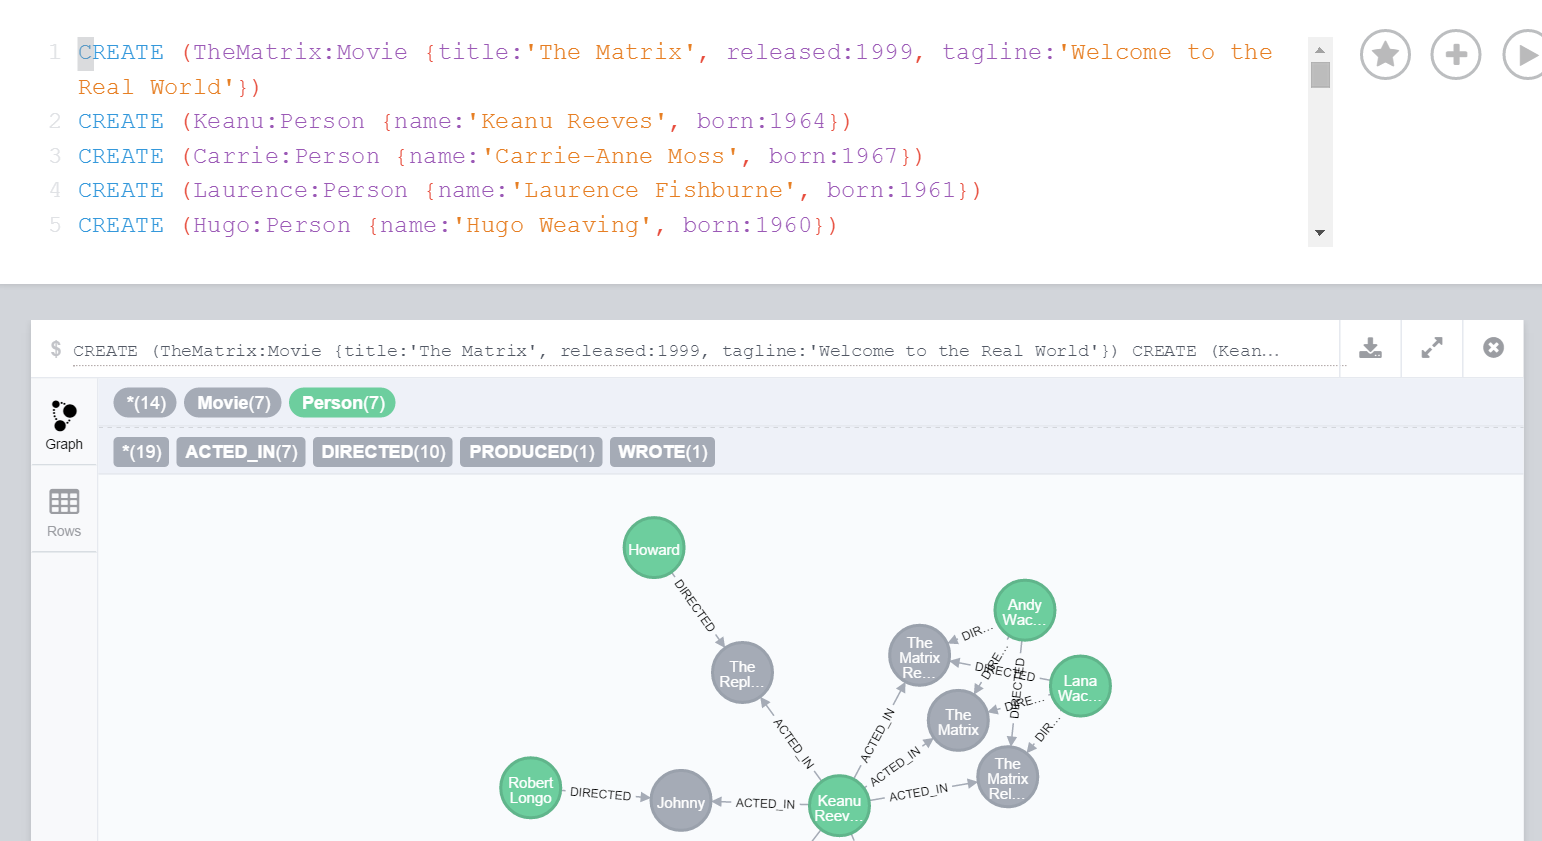
- Click on a query to get it back
Once you run a query, the query itself and its output is encapsulated in a separate window so you can browse through old queries. If you need to run a query again you can simply click on the query. As you can see in the image below, a dashed line appears under the query when you hover over it to indicate it’s a link. When you click the query it populates the query window so you don’t need to copy/paste it.
Conclusion
Currently the browser doesn’t allow editing data visually but for running Cypher queries it’s a great tool. If you have any tips and tricks to suggest or corrections to make, please leave a comment below.
UPDATE: I published this post using v2.2 M03 but as Michael Hunger kindly pointed out there were some changes in v2.2 M04 that made my post outdated from the get-go so I updated it accordingly. If you find any inconsistencies please let me know using the comments below.