Setting up RAID1 in Ubuntu 18.04 and Monitoring Disk Health

AWS and cloud computing are awesome but I still enjoy having a server at home. I’ve decided to reinstate my old desktop. Replaced the disks with shiny new ones (A 500GB SSD and 2 4TB drives for data) and installed Ubuntu 18.04.
My primary goals were:
- Partition SSD drive and use it for data that needs performance
- Set up RAID1 on 2 4TB disks so that 1 disk failure wouldn’t result in data loss
- Set up some sort of notifications to monitor SSD disk health
- Set up some sort of notifications to monitor RAID disk health
Having all these in place was important for me to have a solid, reliable system before I started building stuff on top of it.
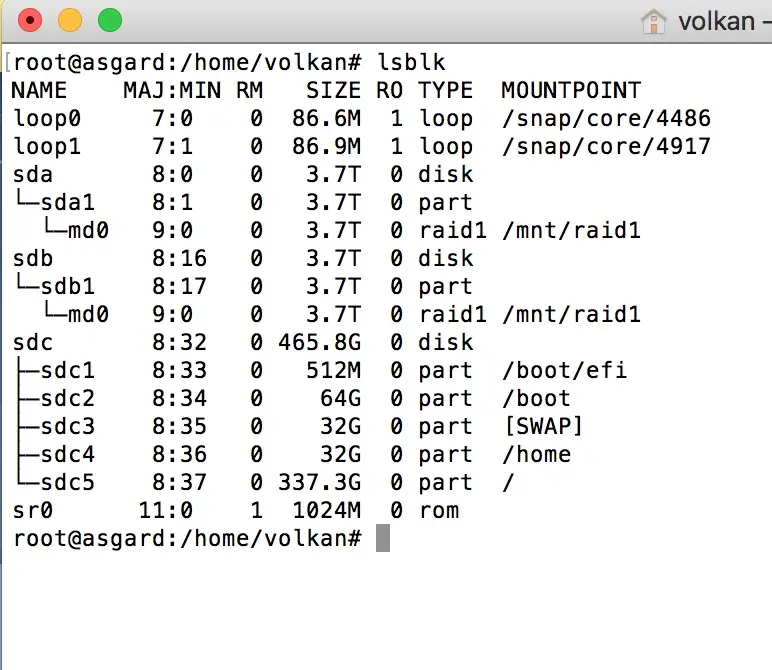
Partitioning
By default Ubuntu only adds a 512MB /boot/efi partition and leaves the rest for root (/). But since I recently had some free space issues in the boot drive recently I decided to create a boot partition as well. Also added a 32GB Swap partition. Swap is is virtual memory and it should have the same size as the computer’s memory.
So I ended up allocating 32GB for home as well and left the rest for the root. Going forward now I have more than 300GB to use for application data, Docker images etc.
RAID1
Now it’s time to set up a RAID array to have some redundancy. They are shiny new disks but you can never fully rely on them and they will eventually fail. Probably it’s not the best idea to install 2 identical disks at the same time as their lifecycle will likely end at similar times. So I’ll need to keep an eye on them and set up some monitoring and notifications (more on that later).
As my guide I started using this article called Setting up RAID 1 (Mirroring) using ‘Two Disks’ in Linux – Part 3 to set up my RAID.
This is a very nice article and explains everything step by step already so I’m not going to duplicate it here. But I bumped into an issue while following the guide: 4TB drives. My disks were MBR which only supported up to 2TB and I had to convert them into GPT disks.
The answer was parted. I followed the steps in this answer and managed to partition the drives to 4TB (3.7 to be exact!)
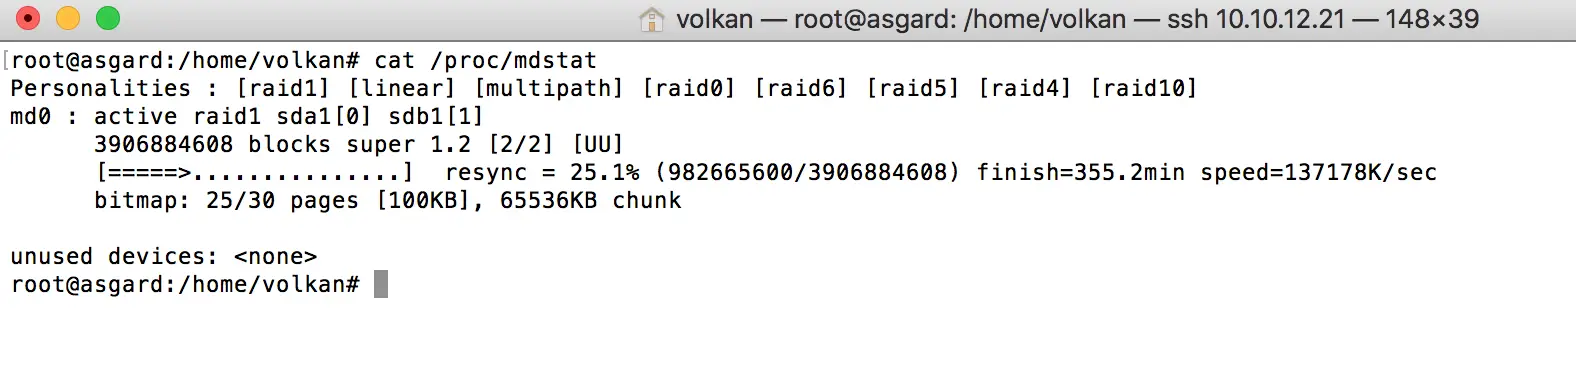
Testing RAID1
Now that I had a RAID it was time to go out and test it. First thing I wanted to see was it mounted automatically after a reboot. It did mount the drives but there was a problem with RAID. At boot the device was showing as md127 instead of md0 and it was failing to sync.
My mdadm.conf file looked like this when this was happening:
ARRAY /dev/md0 level=raid1 num-devices=2 metadata=1.2 name=asgard:0 UUID={device id}
   devices=/dev/sda1,/dev/sdb1
After some Googling I found the answere here
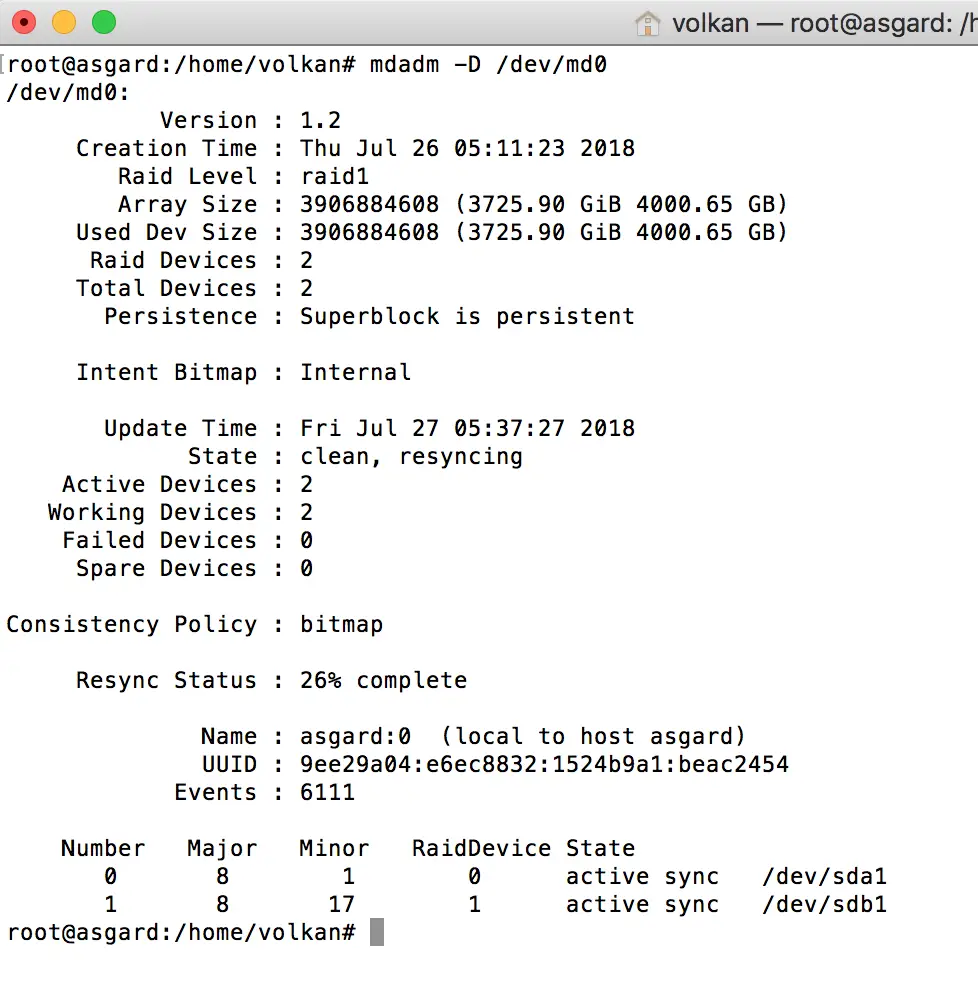
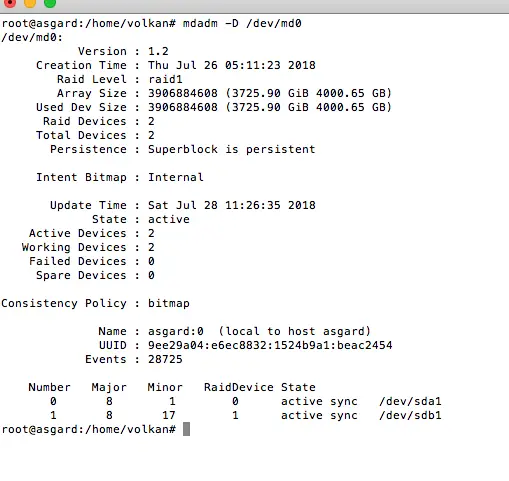
The solution was simply removing the name parameter from the file!. After that, when I rebooted and entered the following commands I was able to see a healthy RAID:
cat /proc/mdstat
and
mdadm -D /dev/md0
Monitoring System Disk with smartmontols
Now that everything looked in place, I needed to ensure it stays that way!
To achieve that goal, I edited this file /etc/smartd.conf and added this line:
DEVICESCAN -o on -H -l error -l selftest -t -m my.email@address.com -M test
Set up sending emails from server
When I first installed smartmontools, it asked Postfix configuration which looks like this:
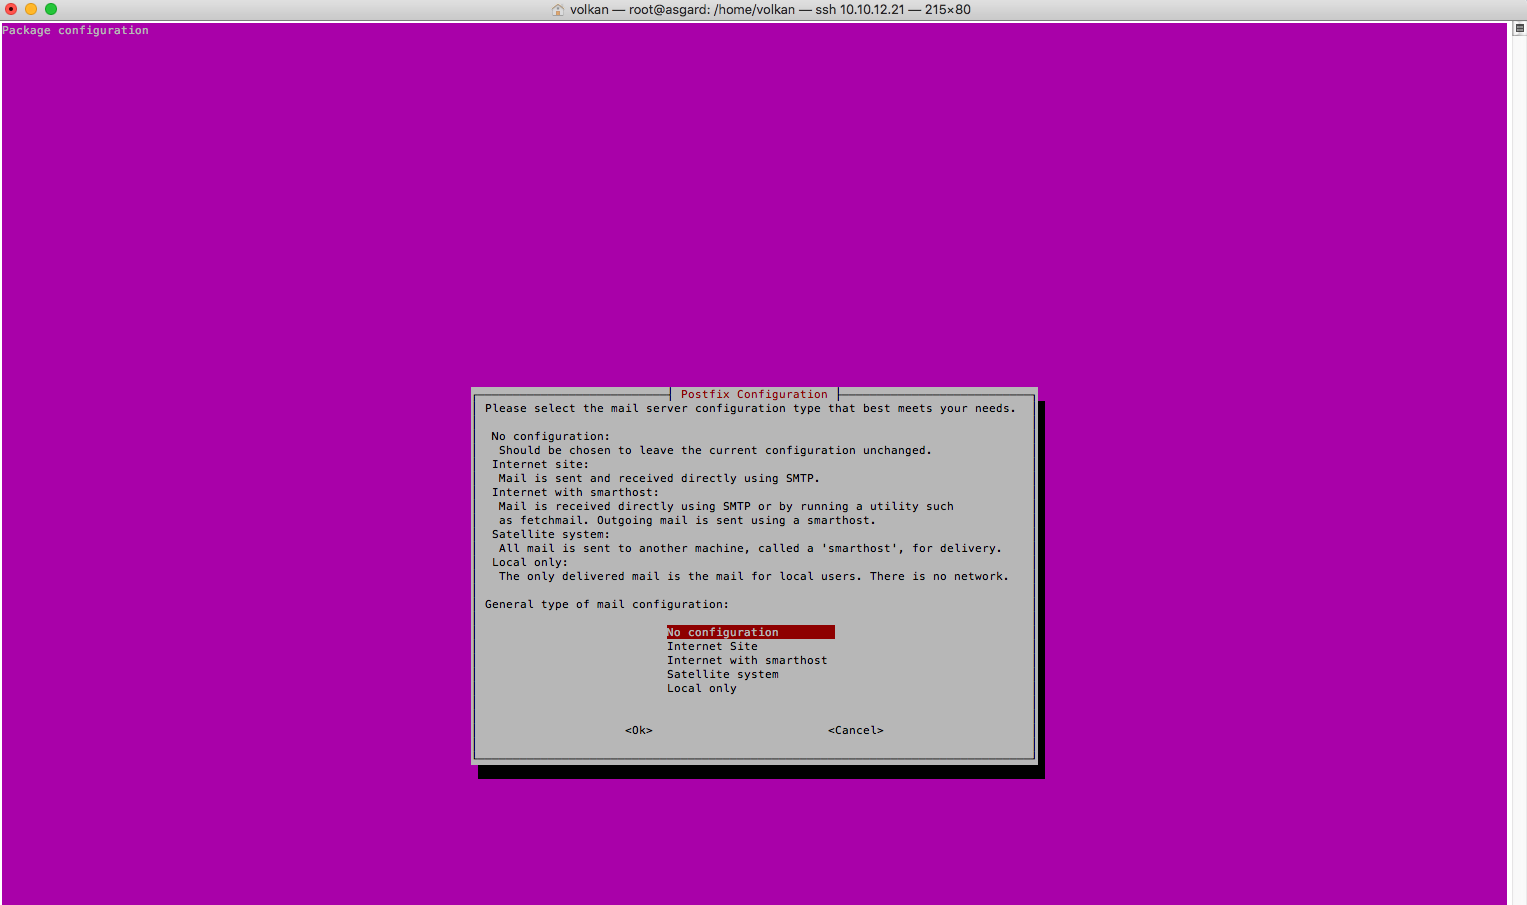
Since I was interested in getting results fast, I selected No Configuration and moved on. Now it’s time to configure it.
To bring up this screen again I entered the following command:
dpkg-reconfigure postfix
I followed the wizard, entered my email domain. Then followed this documentation from AWS: Integrating Amazon SES with Postfix
As always, I ended up having some issues :-).
First problem was it didn’t work! It wasn’t finding the SES SMTP server as relay server and was always trying to send emails from localhost. The solution was here
As the instructions say, I updated /etc/postfix/main.cf with the values below:
myhostname = localhost
mydestination = $myhostname, localhost.$mydomain, localhost, $mydomain
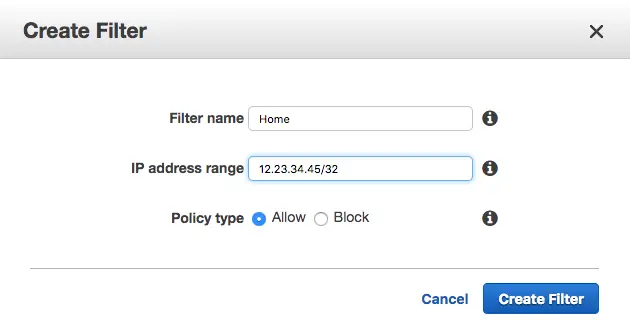
and I was able to send emails to the SMTP server. But the SES didn’t like my IP address and the email bounced. The solution to that was to create an IP filter in SES and allow the traffic from that address.
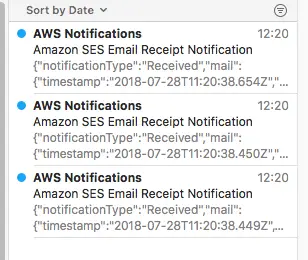
Then I restarted the service to test
service smartmontools restart
and received the notification. Actually received 3 emails for some reason.
The service runs at startup so this way I can be notified whenever it reboots too.
Monitoring RAID with mdadm
Took some time to complete synchronizing 4TB disks but finally I was ready to rock:
Apart from smartmontools, mdadm application is also capable of sending emails when a disk fails.
The documentation tells to add MAILADDR followed by an email address to specify target email address but in my tests adding the line didn’t change anything.
In fact, turns out by default it’s sending the notifications. As my server was set up to send emails now, by just entering the following command to send out a test email I was able to receive it
mdadm --monitor --scan --test -1
The problem is it’s now using root@mydomain.com all the time now. I wasn’t able to change it. But as long as that mailbox exists at least I can receive notifications.
Conclusion
All hardware eventually fails. Disk failure is especially annoying because it may cause some precious data loss. Apart from good backup practices, it’s also helpful to have a good monitoring system and redundancy on the disks we use.
It took me some time to set up my system but now at least I have 1 disk redundancy for large amounts of data and the ability to be notified whenever something goes wrong with the disks which gives me some peace of mind (not too much though :-)).
Resources
- Setting up RAID 1 (Mirroring) using ‘Two Disks’ in Linux – Part 3
- Create GUID partition table (GPT) during Ubuntu Server install
- RAID starting at md127 instead of md0
- Hard Drive Monitoring and E-mail Alerts Using smartd
- Smartmontools documentation
- Integrating Amazon SES with Postfix
- Can’t send mail to own domain. Postfix: status=bounced (unknown user: “user”)
- mdadm.conf (5) - Linux Man Pages