
Simple IDS with Nmap
One of the Nmap’s many usages is for asset management as it is very good at discovering devices in a network. I’m going to use it to develop a simple IDS (Intrusion Detection System). Of course IDS software is much more complex and I hope I will look into installing a proper one, like Snort, when I have the time but for now I’ll just roll out my own. My goals in this project are:
- Utilise the idle old Raspberry Pi: I used one to build a media server another one as a security camera. The 3rd one is one of the first releases. It has 256MB memory and failed to run various projects I tried in the past. Looks like it’s at least good enough to run Nmap so it may have a use after all.
- Practice more Powershell and discover XML parsing capabilities.
- Writing a Python version of the same script so that everything can run on Pi but I’ll defer that to a later date.
Basics
So like every Raspberry Pi project, first step is to download a distro suitable for Raspberry Pi and write to an SD/miroSD card. There is a Pi version of the (in)famous security distro Kali Linux. It’s convenient as it comes with all security tools pre-installed but for my purposes I just used a plain Raspbian as I only need Nmap.
Nmap that is installed from Linux repositories was a bit outdated (v6.00) so I decided to download the latest version (v6.47) and build it from source. Even though all I need is a simple command I like to keep my tools current!
How Does It Work
I placed the Pi near the switch so that it can use Ethernet. It gets results much faster so I recommend wired over wireless. So the initial version will work like this:
- A cron job runs on Pi every n minutes. Executes Nmap and uploads the results in XML format to AWS S3.
- A scheduled task runs on a Windows Server running Powershell. It gets the latest XML from S3 and gets the active hosts on the network.
- Compares the results to a device list and sends a notification if an intruder is detected.
Of course in order this to work first I need to assign static IPs to all my devices and record these addresses along with MAC addresses in the configuration.
Let’s get cracking!
I covered Nmap basics here. In this project all I need is host discovery so I’m not interested in the services, machine names, operating systems etc. I’ll just run this command:
sudo nmap -sn 172.16.1.0/24 -oX output.xml
Also I need my old friend s3cmd so I ran this
sudo apt-get install s3cmd
Then
s3cmd --configure
and entered the credentials for the new IAM user I created who has access only to a single S3 bucket.
So to put it together in a shell script I created the simple script below.
#!/bin/bash

echo "Running Nmap"
sudo nmap -sn 172.16.1.0/24 -oX /home/pi/output.xml

timestamp=$(date +%Y%m%d_%H%M%S)
s3FileName=nmap_output_$timestamp.xml

echo "Uploading the output to S3"
sudo s3cmd put /home/pi/output.xml s3://{BUCKET}/$s3FileName

sudo rm /home/pi/output.xml
Also to make the script executable so I ran this:
sudo chmod 755 my_script
Analyze and alert
So now I have a list of devices running on the network. The Nmap XML output looks something like this:
<?xml version="1.0"?>
<?xml-stylesheet href="file:///usr/bin/../share/nmap/nmap.xsl" type="text/xsl"?>
<!-- Nmap 6.47 scan initiated Mon Dec 15 13:30:01 2014 as: nmap -sn -oX /home/pi/output.xml 172.16.1.0/24 -->
<nmaprun scanner="nmap" args="nmap -sn -oX /home/pi/output.xml 172.16.1.0/24" start="1418650201" startstr="Mon Dec 15 13:30:01 2014" version="6.47" xmloutputversion="1.04">
  <verbose level="0"/>
  <debugging level="0"/>
  <host>
    <status state="up" reason="arp-response"/>
    <address addr="172.16.1.10" addrtype="ipv4"/>
    <address addr="AA:BB:CC:DD:EE:FF" addrtype="mac"/>
    <hostnames>
    </hostnames>
    <times srtt="1142" rttvar="5000" to="100000"/>
  </host>
  <runstats>
    <finished time="1418650208" timestr="Mon Dec 15 13:30:08 2014" elapsed="6.40" summary="Nmap done at Mon Dec 15 13:30:08 2014; 256 IP addresses (11 hosts up) scanned in 6.40 seconds" exit="success"/>
    <hosts up="11" down="245" total="256"/>
  </runstats>
</nmaprun>
And my configuration file looks like this:
<?xml version="1.0" encoding="utf-8"?>
<assetList>
  <host name="Dev" ip="172.16.1.10" mac="12:12:12:12:12:12" />
  <host name="Raspberry Pi XBMC" ip="172.16.1.11" mac="AA:AA:AA:AA:AA:AA" />
  <host name="Printer" ip="172.16.1.12" mac="BB:BB:BB:BB:BB:BB" />
  <host name="iPad" ip="172.16.1.13" mac="CC:CC:CC:CC:CC:CC" />
</assetList>
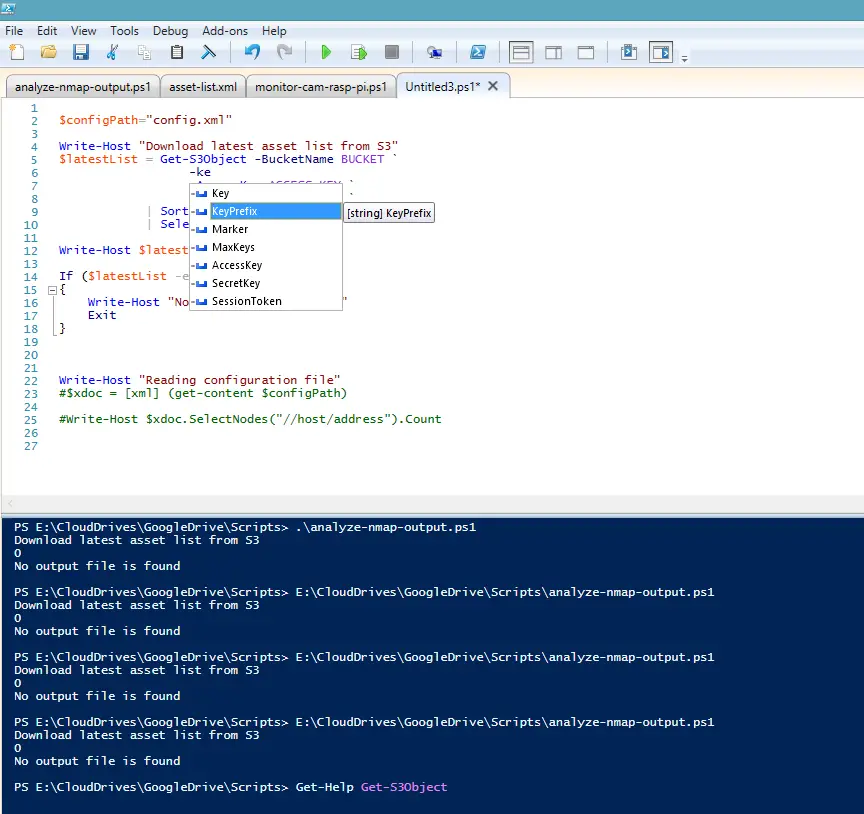
A gem I discovered about Powershell is the Powershell ISE (Integrated Shell Environment). It supports IntelliSense-type discovery so makes it much easier and faster to write and run scripts.
Into the Powershell
The script does the following
- Load the configuration
- Get the latest asset list from S3 and load
- Compare and see if there are any unknown devices on the network
- If there is send an email notification
Since Powershell is based on .NET framework, working with XML is nothing new. I just used standard XPath queries to match the MAC and IP addresses of the discovered devices to the ones I entered to the configuration file.
Here’s the script:
Time for some action
OK let’s see how we are doing now. After I recorded all the known devices the output of the script was like below:
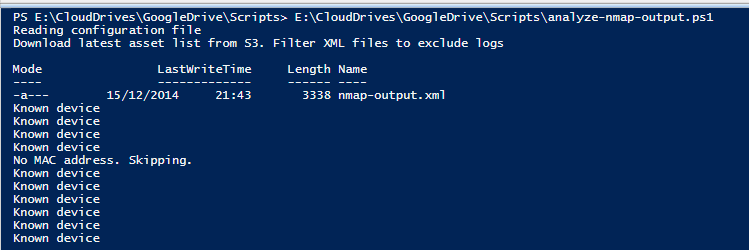
One interesting thing to note is Nmap cannot discover its own MAC address. I guess that’s because as it’s using ARP protocol to resolve MAC addresses on the local subnet and it doesn’t have its own MAC in its ARP table it cannot find it. I decided to skip the entry but may be a better choice to compare only the IP address if this is the case. Anyway, I will leave it as is for now.
To test it I turned on my old phone and connected to the network. Within 10 minutes I received the following notification email:

So far so good!
Conclusion
I would never trust such a thing as the ultimate defence mechanism but even so I believe it may come in handy in some situations. More importantly this was a fun little project for me as it involved bash scripting, Powershell, AWS and XML. I’m glad I finally came up with a use for the idle Raspberry Pi also happy to discover Powershell ISE.