256-bit SSL Support with Windows Server
I used to wonder what different key sizes meant when dealing with SSL. Also, I noticed that SSL certificate I had purchased said “128/256 bit encryption” in its feature list which only made me more confused. What does it actually mean and why should it use 128-bit if it supports 256 anyway? I checked the website that’s running on a Linux machine and saw that it used 256-bit encryption whereas another website of mine was running with 128-bit encryption. And I bought both certificates from the same vendor so it has to do something with the server.
What’s with the naming?
For the uninitiated, TLS is the new name for the protocol. SSL name was discontinued after version 3 and after that TLS 1.0 was released. As of this writing the latest version is TLS 1.2 which was released in 2008. So technically the name of the protocol is Transport Layer Security (TLS) but many people, including me, still refer to it as SSL.
Key Sizes
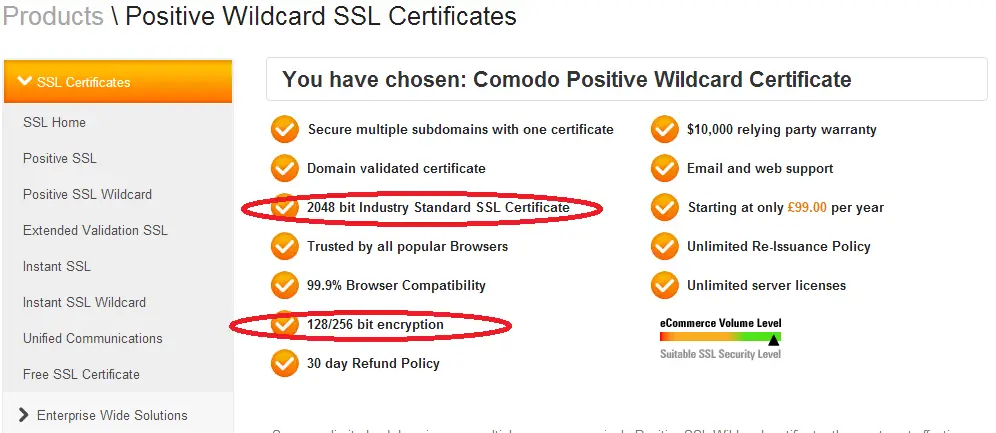
Basically the key size (2048 bit in the image) is the public/private key pair size. This size is determined when CSR is created for the certificate. This is what determines how vulnerable the key is to brute-force attacks. Currently 2048-bit is considered to be very strong.
128/256-bit is the length of the session key. A session key is generated during the handshake. A random data (of length 128 or 256 bit) is generated by the client and encrypted using the server’s public key. The server decrypts the message with its private key. Afterwards, server and client use this session key and use symmetric encryption. RSA keys are just used in the beginning of the communication.
Let’s see it in action
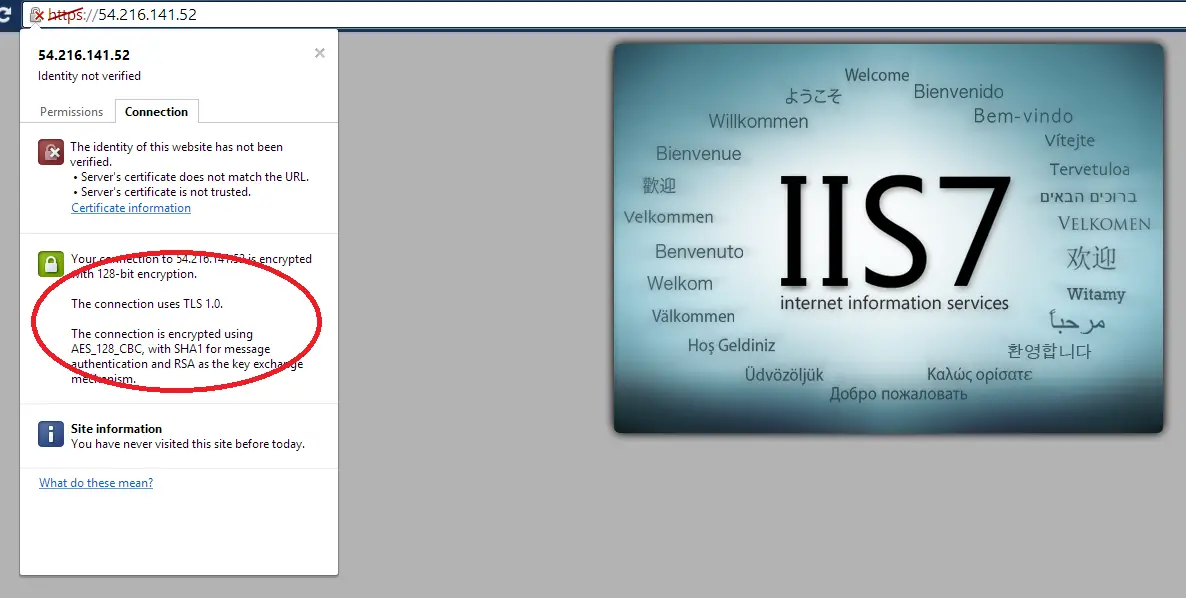
I might have had a better understanding after the research but I still I had to resolve my issue. I needed to see 256-bit encryption. Since this is a rather sensitive operation I wanted to test it on a completely expandable machine. So I created two new small instances running Windows 2008 and Windows 2012. I quickly installed the IIS to both instances and checked what they looked like. As I suspected they were using 128-bit out of the box.
The problem is AES-256 option is not high in the list in the cipher suite that the server supports. This requires some registry update and group policy changes. Normally all these have to be done manually. You can find a resource below that explains how to do it (I haven’t tested it myself). Instead, I decided to use a tool which makes the whole process a lot easier and less error-prone. It’s called IISCrypto.
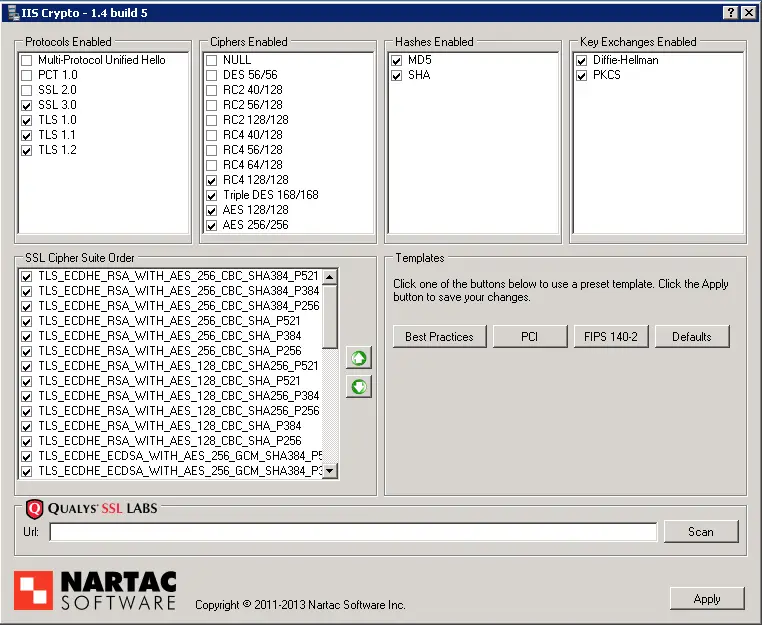
I just downloaded the tool and ran the best practices option. Restarted the server and here are the results:
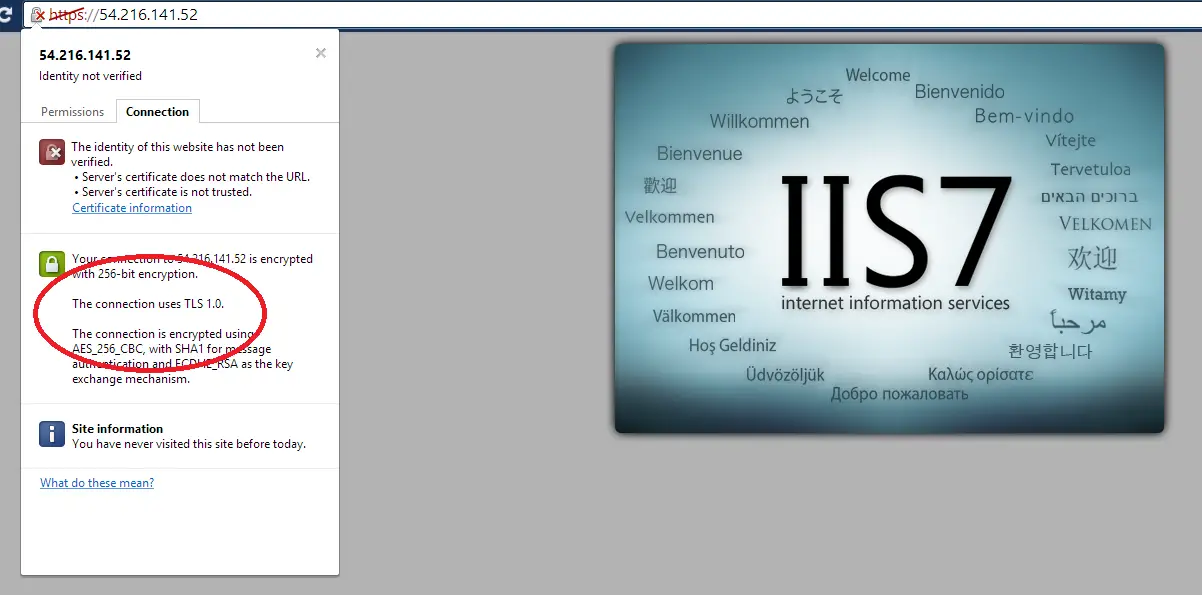
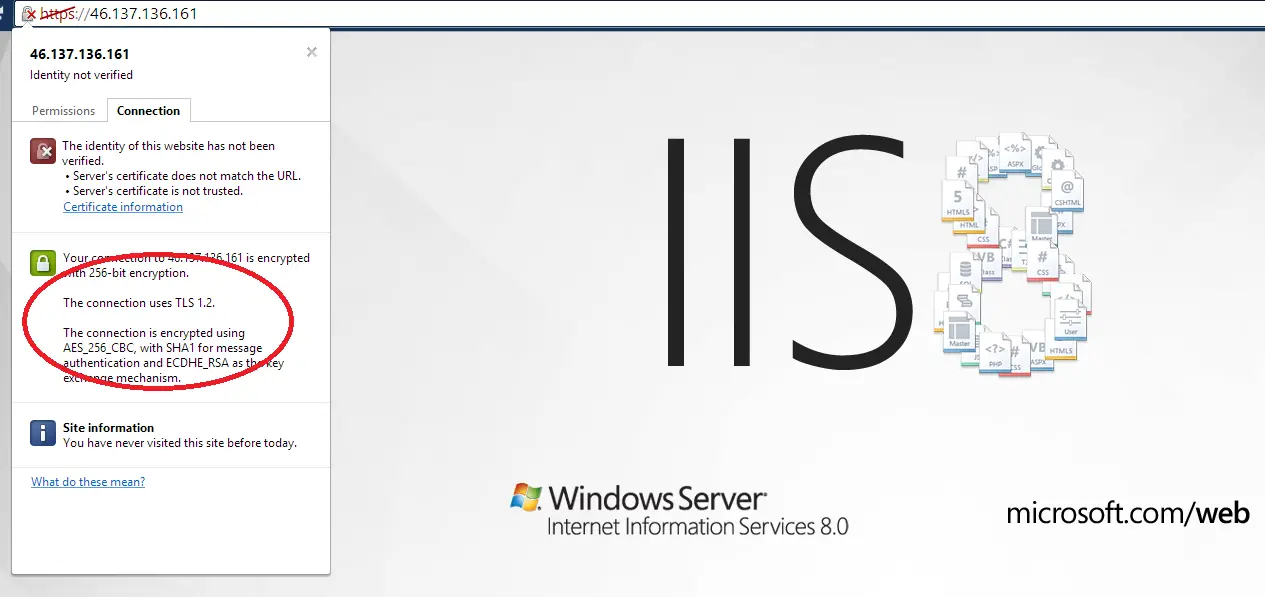
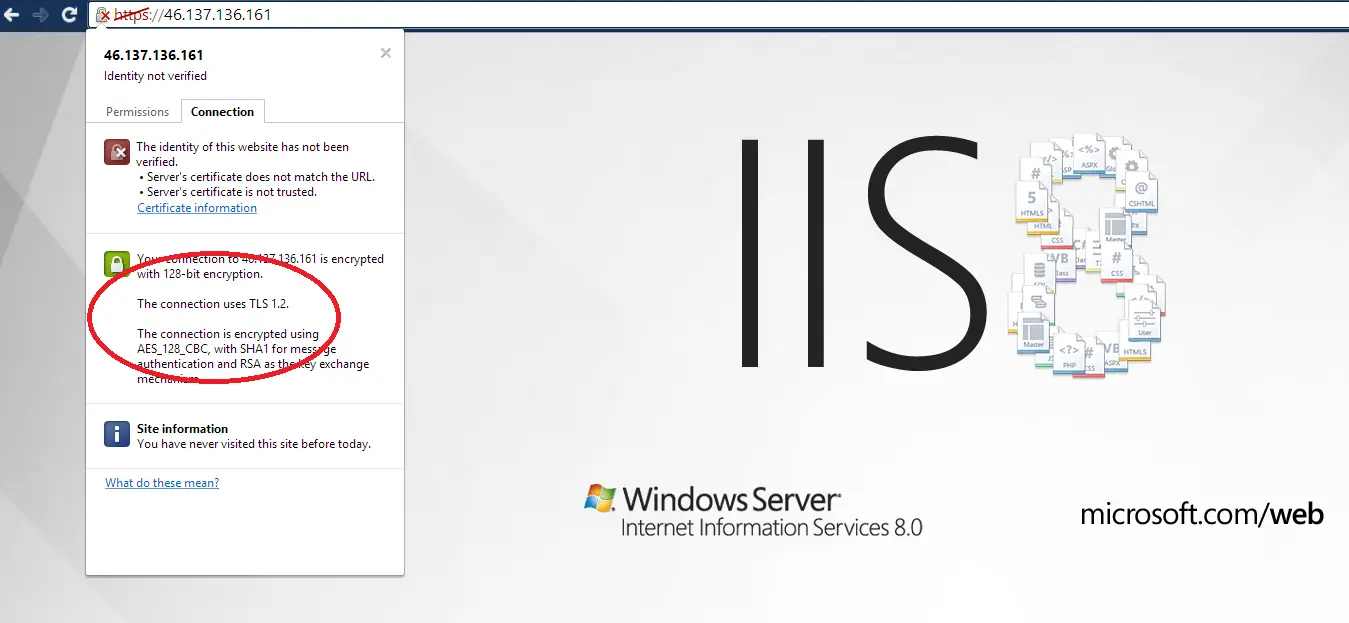
Windows 2012 version prioritize TLS 1.2 over TLS 1.0 so it uses the newer version of the protocol even the browser I used was the same for both tests.