
How to Run Komga Server on Synology NAS and Use Panels iOS App as Client
I’m a long time comic book fan and with a new Synology and iPad Pro I thought it is the right time to set up my own comic book server.
There are many different options for having your own ebook/comic book server in your homelab but my configuration will be as follows:
- Server hardware: Synology DS1821+
- Server software: Komga (as a Docker container)
- Client software: Panels
Getting Started
In the previous post, you learned the basics of running a Docker container on Synology NAS. In this article, we will take it a bit further and will create a container “project” in the Container Manager package (which corresponds to Docker Compose YAML file) and will use persistent data.
To get going, first log in to your Synology DSM and open the Container Manager.
Switch to Project tab and click the Create button.
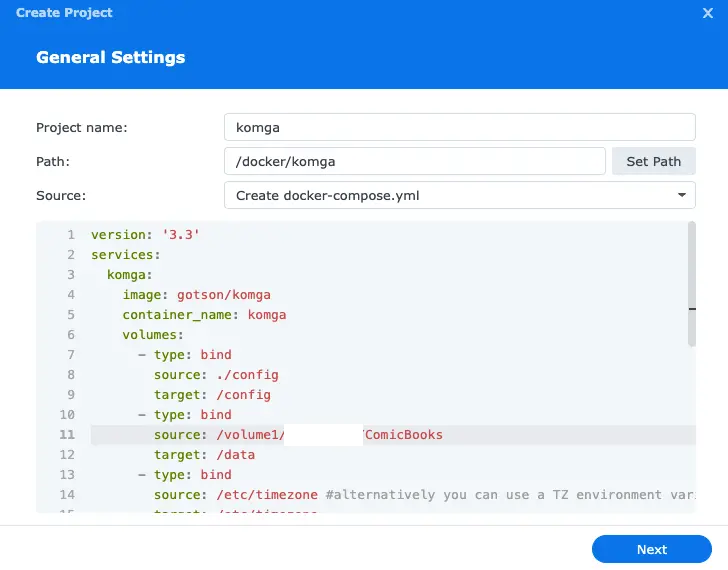
In Project name field, enter komga
In Path section, click Set Path button and create new folder under docker shared folder named komga or whatever you like to indicate that’s it’s your comic book server.
In the Source section, select Create docker-compose.yaml.
In the textarea, paste the following code:
---
version: '3.3'
services:
  komga:
    image: gotson/komga
    container_name: komga
    volumes:
      - type: bind
        source: ./config
        target: /config
      - type: bind
        source: ./data
        target: /data
    ports:
      - 25600:25600
    restart: unless-stopped
As you can see the paths are placeholders. First, open a File Station instance on the Synology DSM and create 2 folders under /docker/komga called config and data.
Alternatively, you can choose another path on your Synology and use that path. If you do that you will need to update the paths in your YAML configuration as well. The above snippet assumes compose.yaml will be stored under /docker/komga and the config and data folders will be subfolders on the same level.
Your configuration should look like this:
Click Next.
In Web portal settings, enable port and update if you want to serve your content on a different port.
If you get a prompt saying you have to install Webstation, click Install.
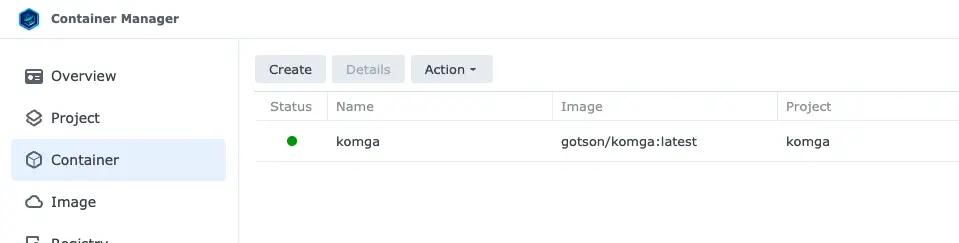
Once you’ve created your project and it’s running you should see the container with a green status:
Now you can visit your NAS local IP at port 25600 and you should see the default Komga login page:
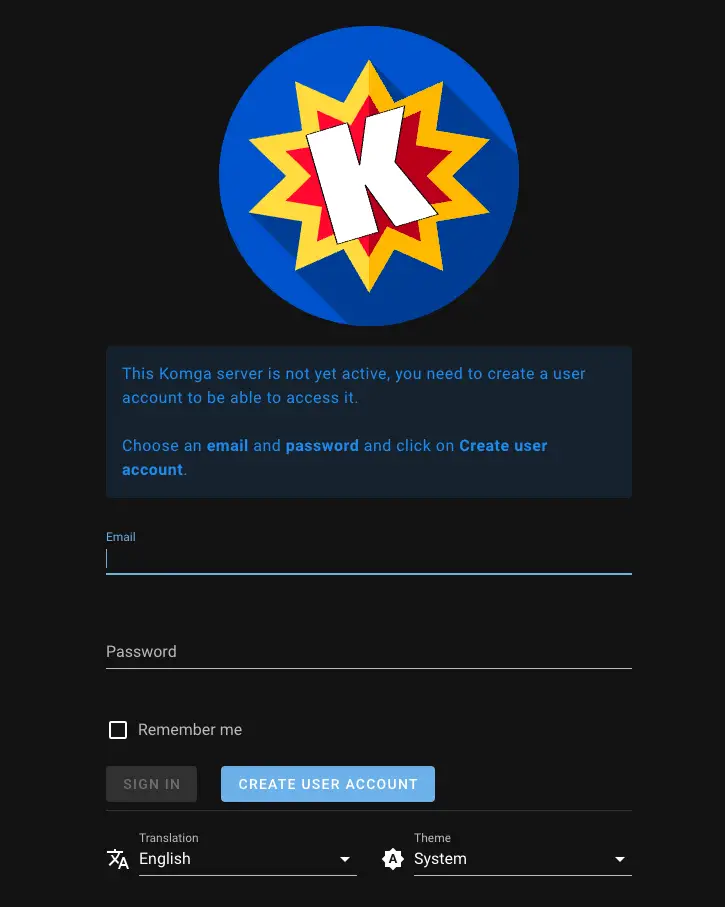
As the message explains, you now need to create your admin user.
Enter an email address and password to create your account and click Create User Account.
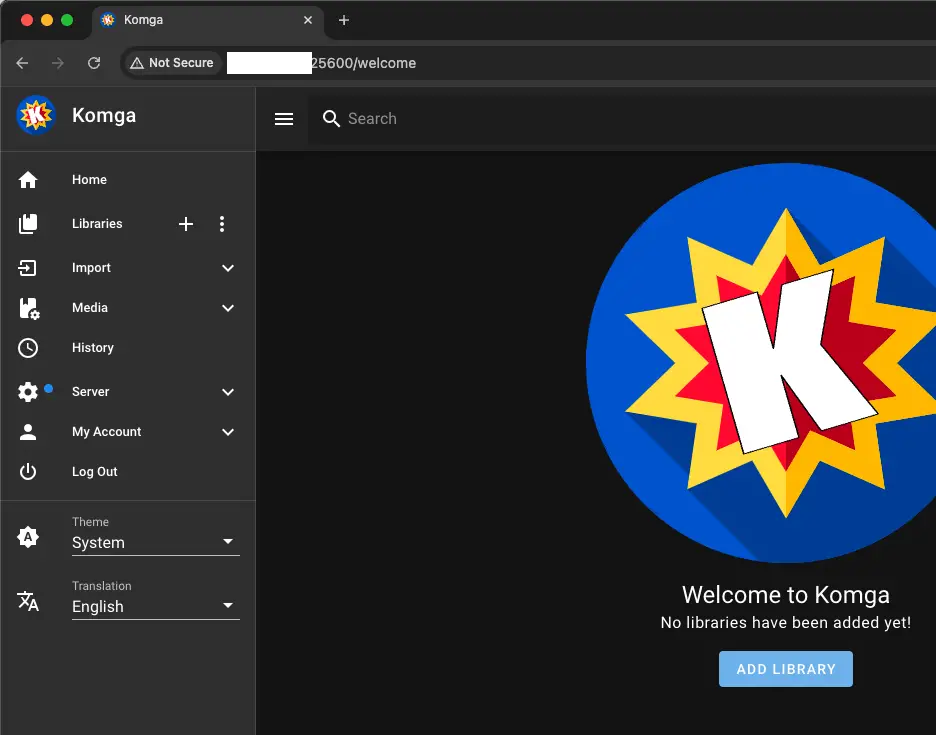
You should now see the dashboard:
Before you create your first library, createa folder called at /data/free. If you mapped your data folder to somewhere else, use that path.
Now create your first library called Free. This will be used to test your setup and will contain a free comic book that you’ll download. As Root Folder, enter /data/free.
Click Next in the following sections and create the library.
Now you need to add some comic books to your library. There are lots of free comics available on the Internet. For this demo, go to archive.org and search free comic book cbz
You can see below there are lots of options to download:
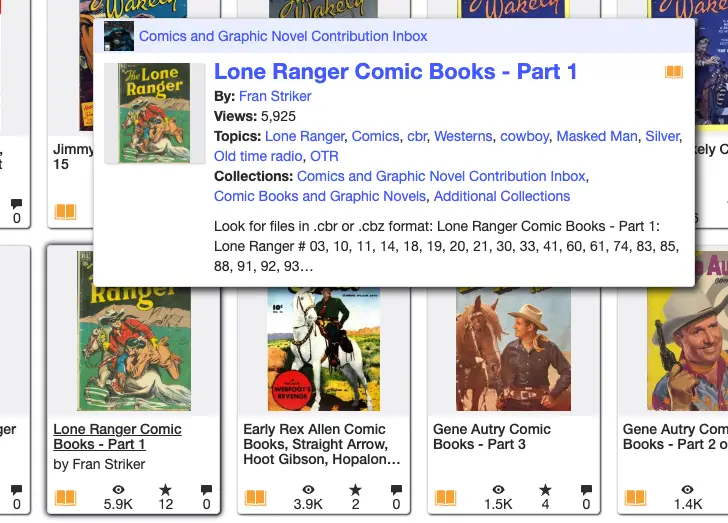
Now upload the downloaded file to your synology and click Scan library files (which is the first item on the context menu next to the library name)
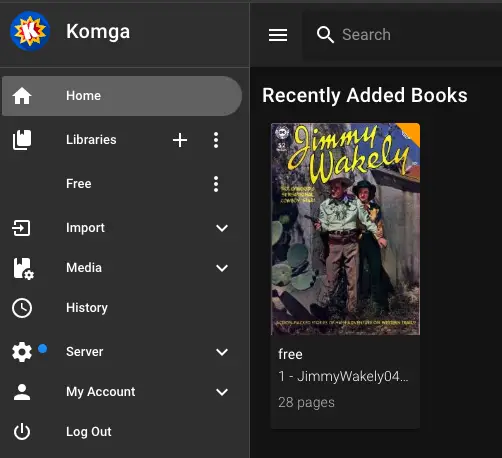
You should now be able to see your new comic book on your server:
Client Setup
You can click on your comic book on the web browser and read it that way. If that’s good enough for you, then you’re done. If you want more complicated readers, I recommend using Panels on iOS devices. It has free and paid options. I bough a lifetime subscription and quite happy with that.
To connect to your own Komga server from Panels, click menu and choose Connect Service. In the dialog, select OPDS.
In OPDS Configuraiton, add an Alias such as Komga on Synology
Enter the IP address, port, username and password and click Apply.
On the Import Services section you should see the newly added OPDS server. Click on that item.
Click Latest books and you should see your comic book listed.
Tap on the book and click Import
Choose a local library on your Panels app and click Add to Library. Once downloaded, click On My iPad and you should see the comicbook. This way now you can quickly browse your comic book library on your own server and read as you please.
## Summary In this article, you learned how to install a Komga server on a Synology NAS. You configured it and uploaded your first comic book. Then you configured the client iOS app and downloaded the comic which is now ready for your consumption. Enojy!