
Updated DynDns53 with .NET Core, Docker and Angular 5
A few years back I developed a project called DynDns53. I was fed up with the dynamic DNS tools available and thought could easily achieve the same functionality since I had already been using AWS Route53.
Fast forward a few years, due to some neglect on my part and technology moving so fast the project started to feel outdated and abandoned. So I decided to revise it.
Key improvements in this version are:
- Core library is now available in NuGet so anyone can build their own clients around it
- A new client built with .NET Core so that it runs on all platforms now
- A Docker version is available that runs the .NET Core client
- A new client built with Angular 5 to replace the legacy AngularJS
- CI integration: Travis is running the unit tests of core library
- Revised WPF and Windows Service clients and fixed bugs
- Added more detailed documentation on how to set up the environment for various clients
Also kept the old repository but renamed it to dyndns53-legacy. I might archive it at some point as I’m not planning to support it any longer.
Available on NuGet
NuGet is a great way of installing and updating libraries. I thought it would be a good idea to make use of it in this project so that it can be used without cloning the repository.
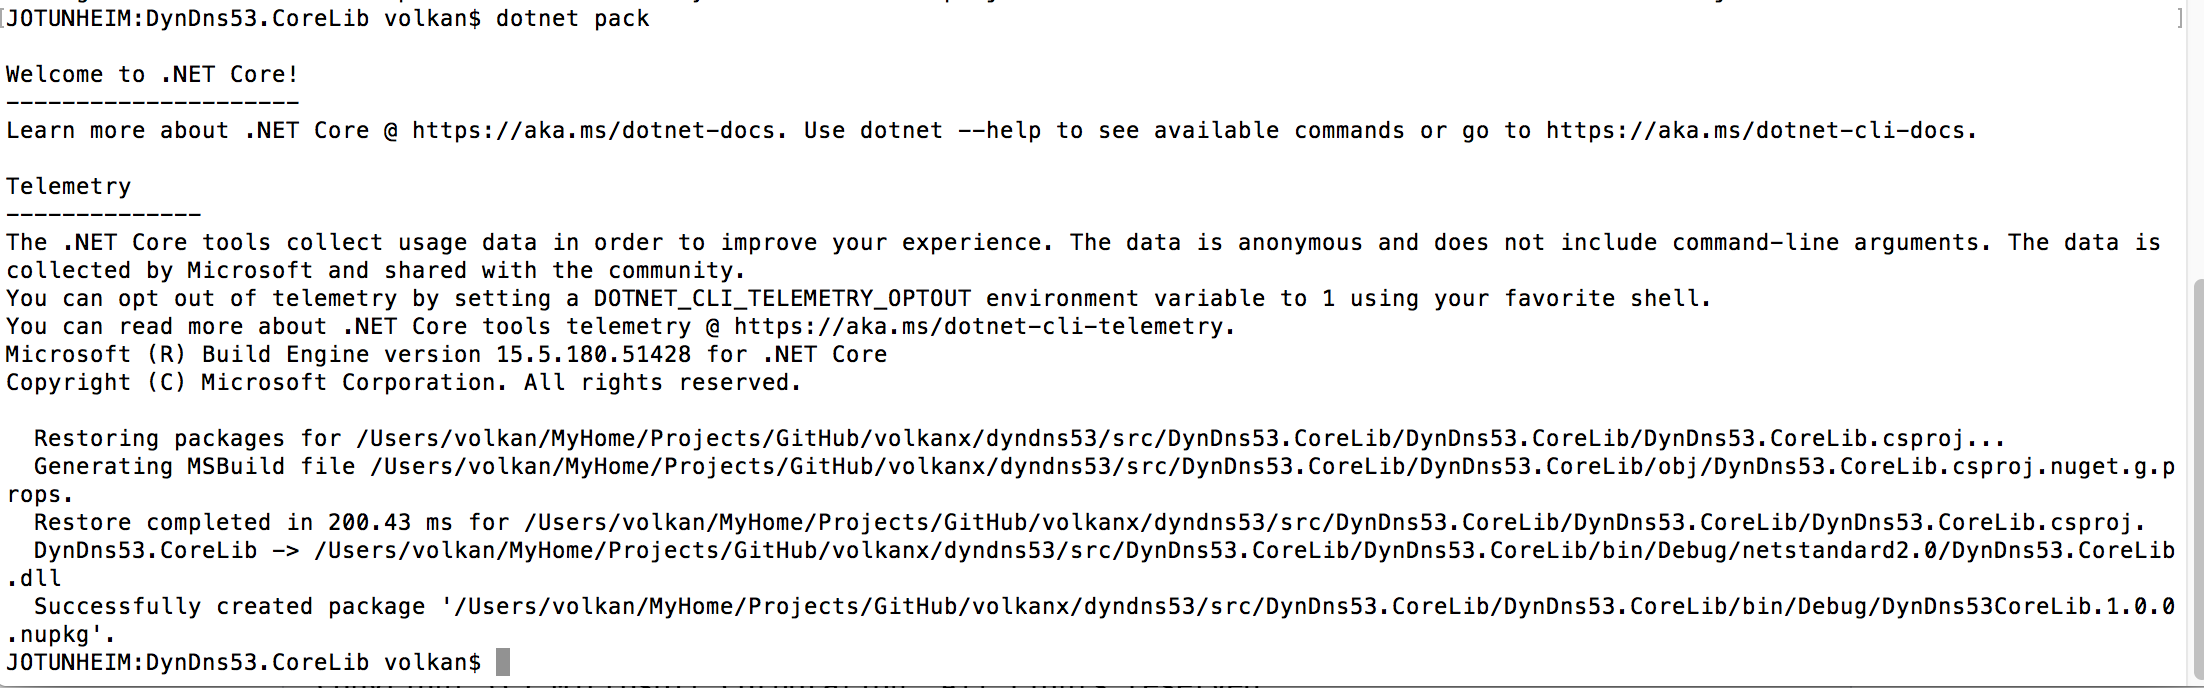
With DotNetCore it’s quite easy to create a NuGet package. Just navigate to project folder (where .csproj file is located) and run this:
dotnet pack -c Release
The default configuration it uses is Debug so make sure you’re using the correct build and a matching pack command. You should be able to see a screen similar to this
Then push it to Nuget
dotnet nuget push ./bin/Release/DynDns53.CoreLib.1.0.0.nupkg -k {NUGET.ORG API_KEY} -s https://api.nuget.org/v3/index.json

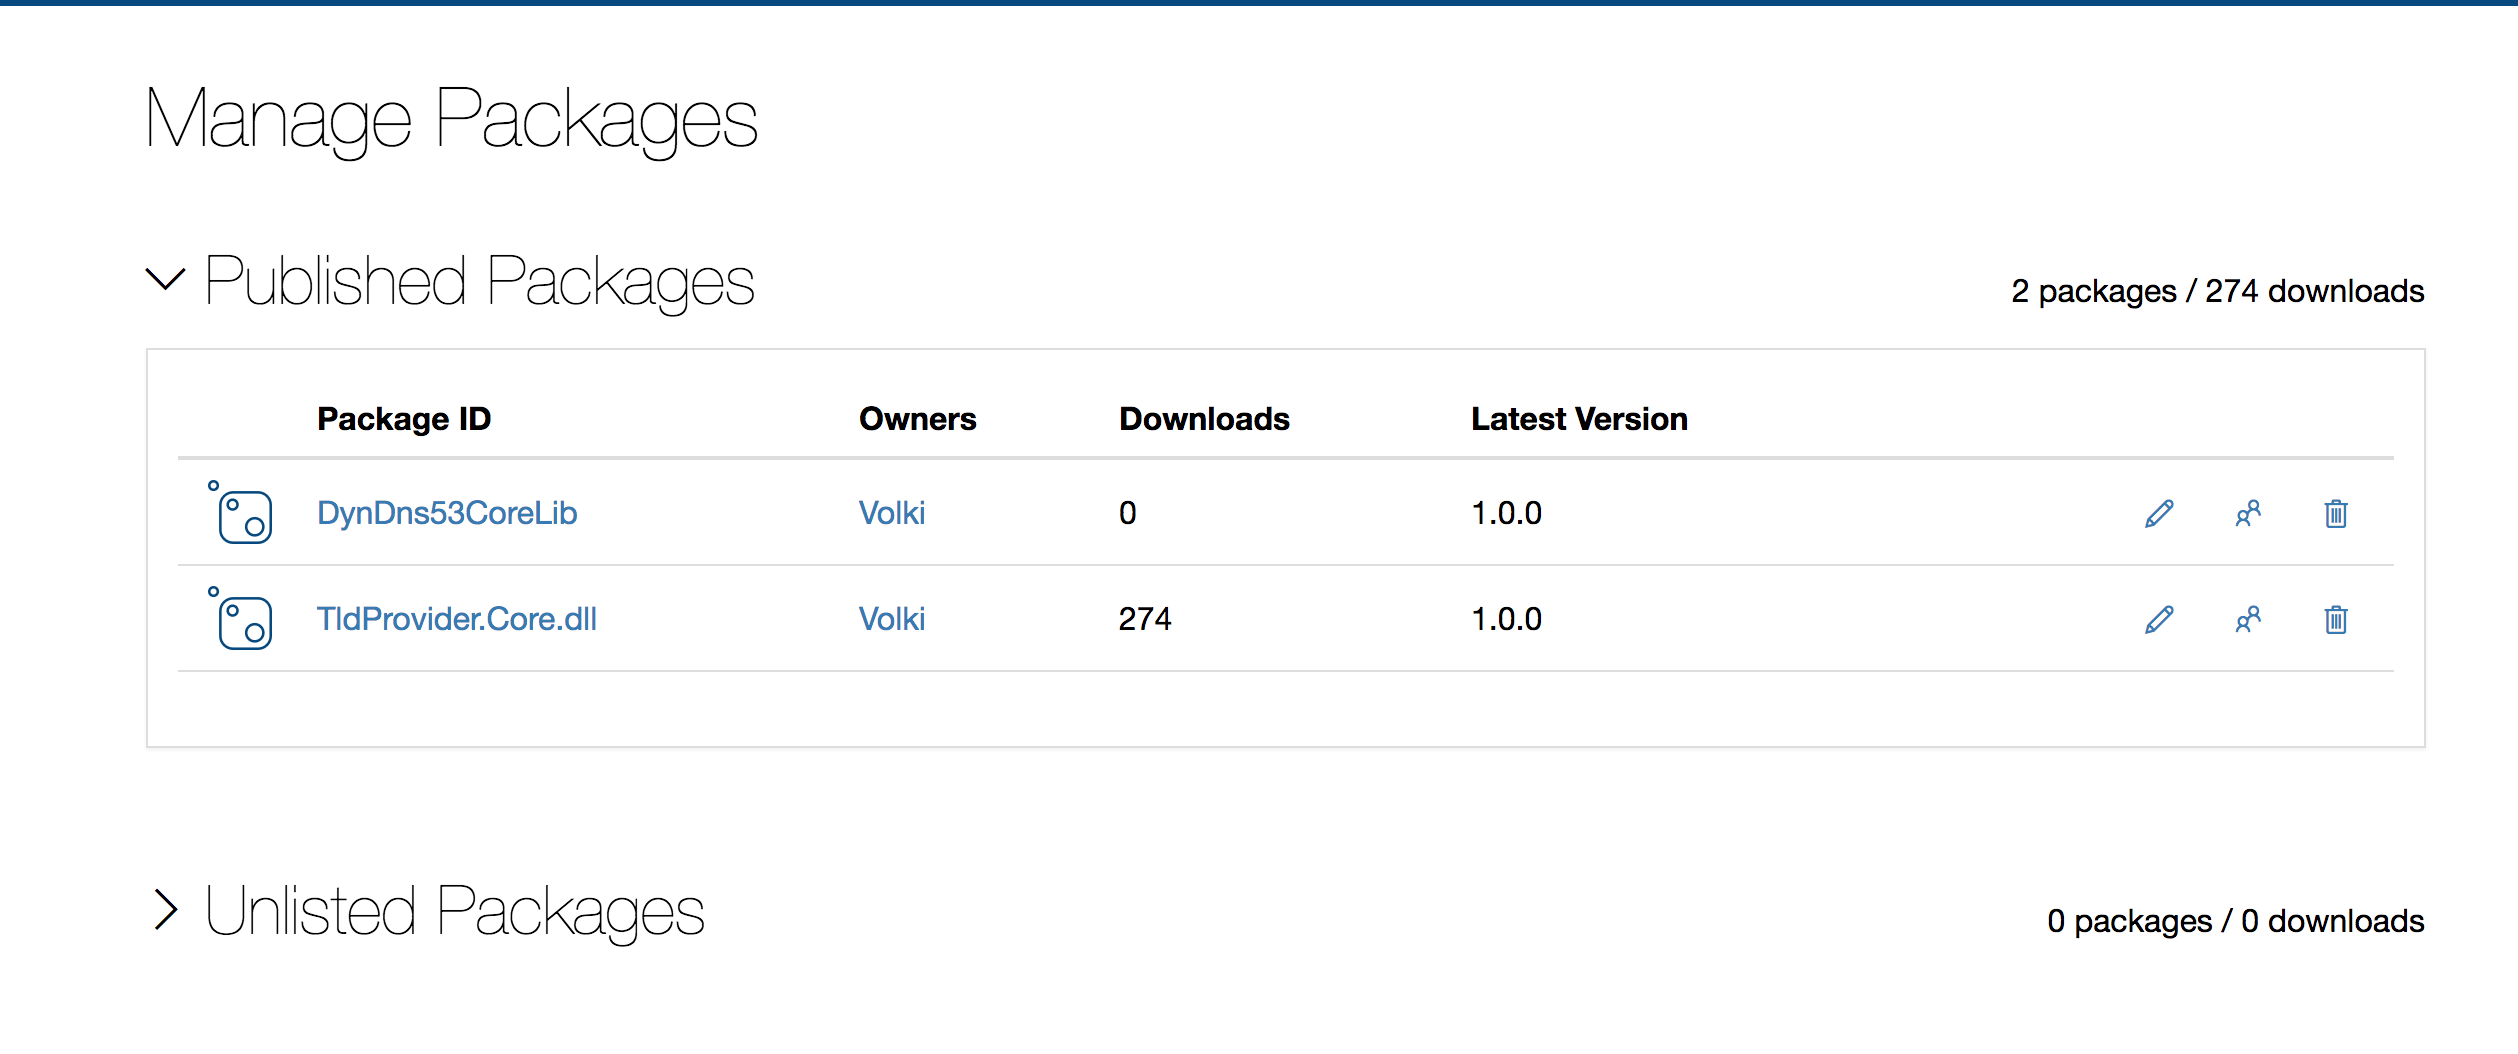
To double-check you can go to your NuGet account page and under Manage Packages you should be able to see your newly published package:
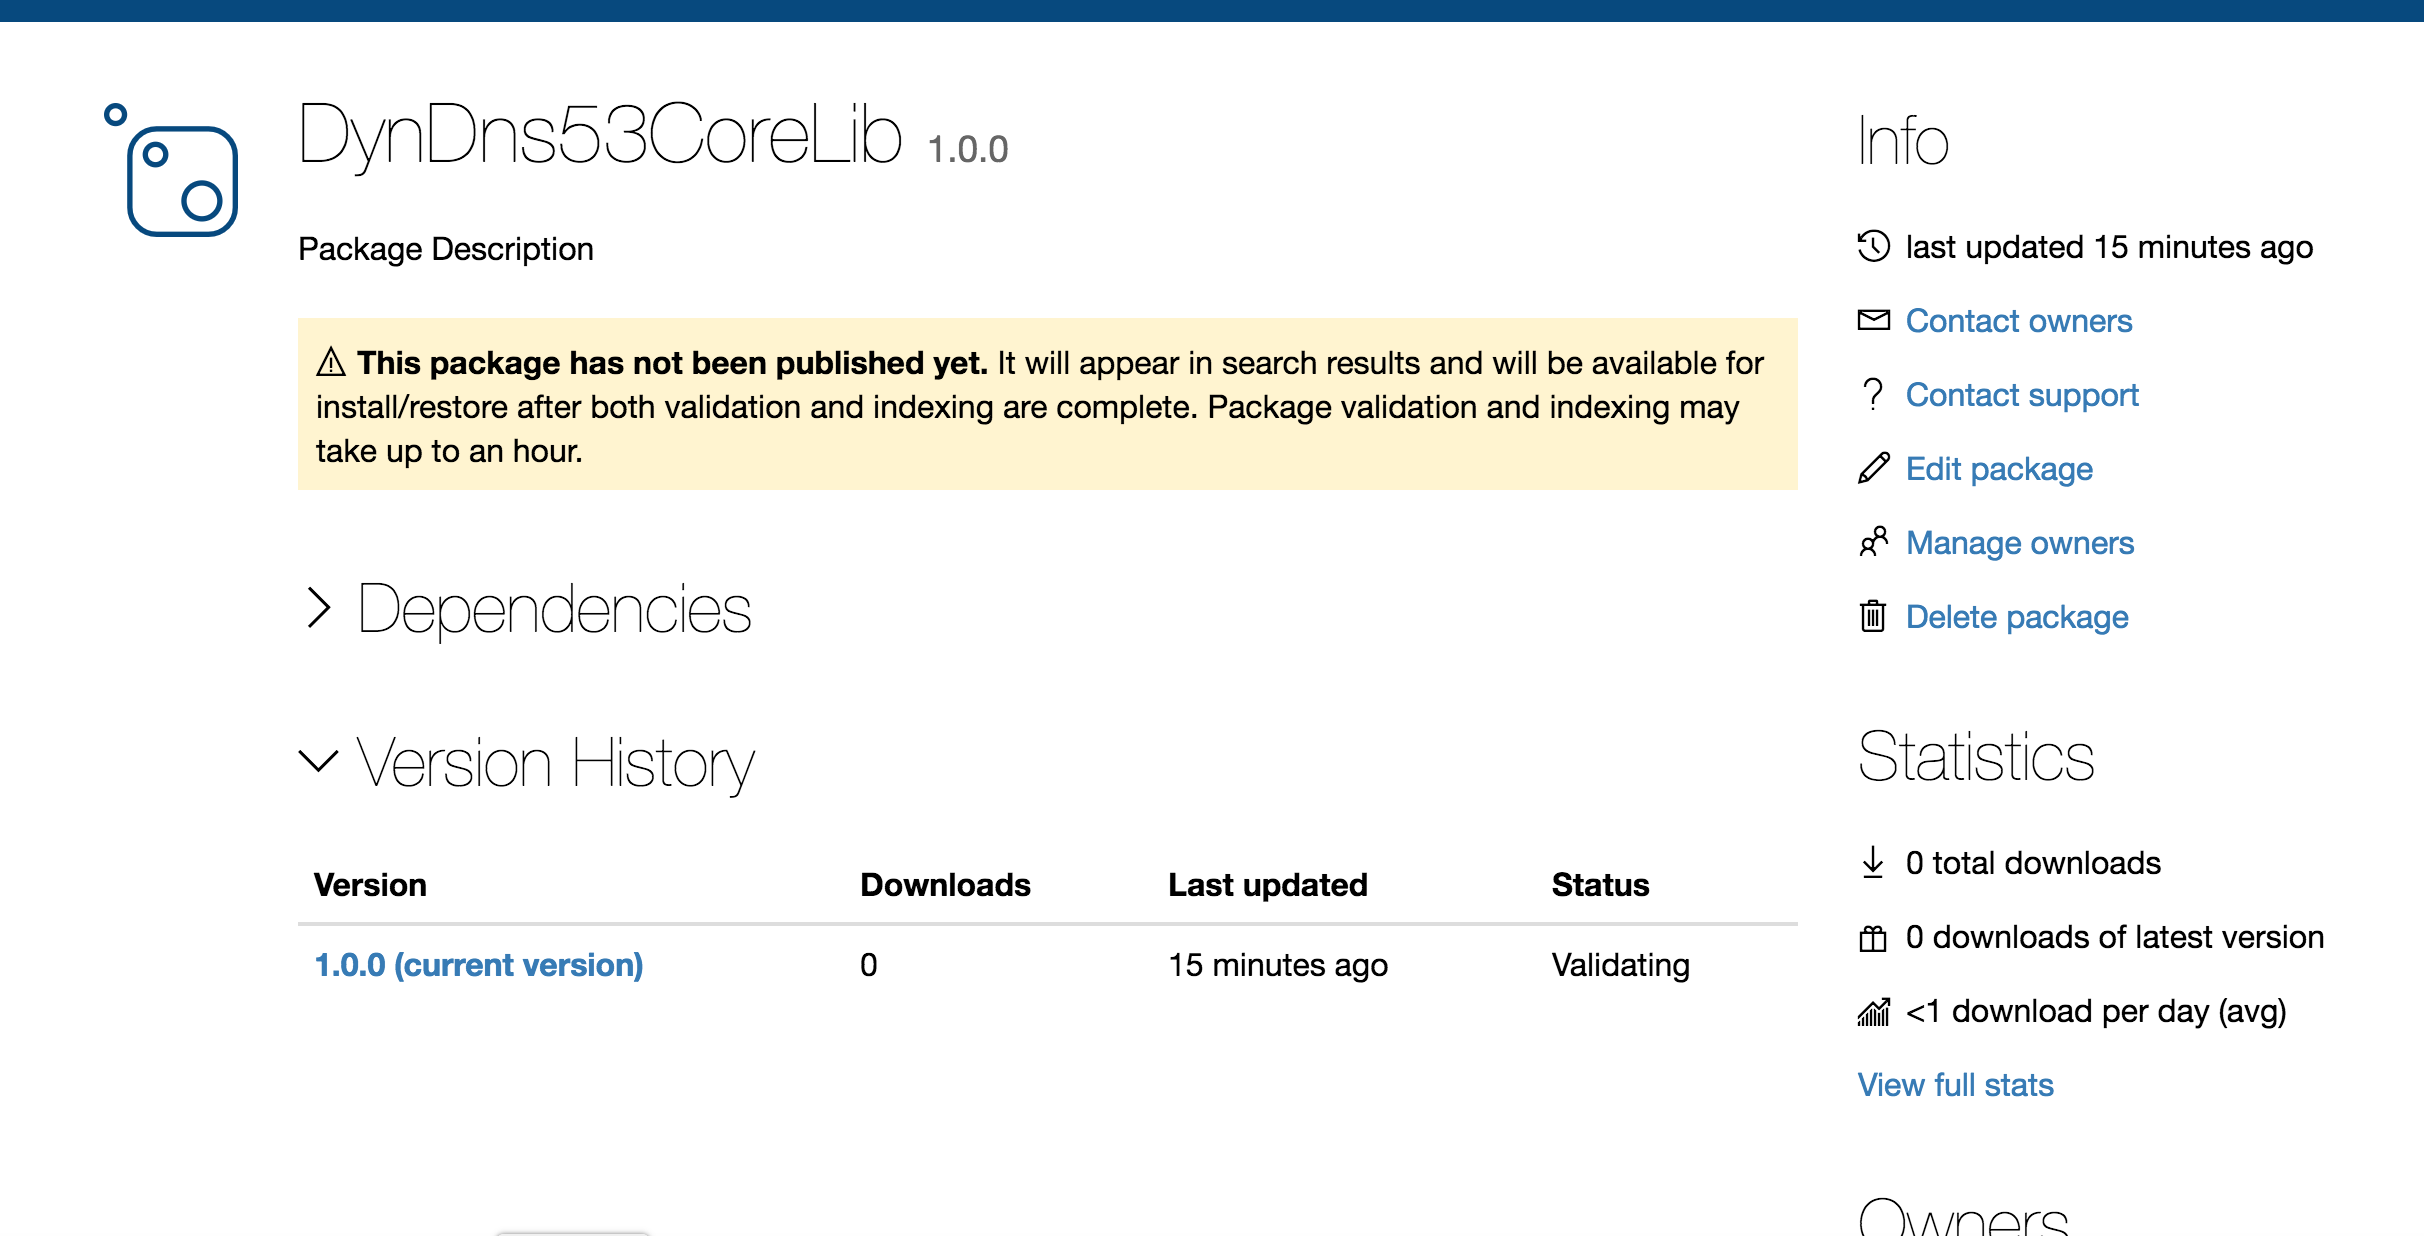
Now we play the waiting game! Becuase it may take some time for the package to be processed by NuGet. For exmaple I saw the warning shown in the screenshot 15 minutes after I pushed the package:
Generally this is a quick process but the first time I published my package, I got my confirmation email about 7 hours later so your mileage may vary.
If you need to update your package after it’s been published, make sure to increment the version number before running dotnet pack. In order to do that, you can simply edit the .csproj file and change the Version value:
  <PropertyGroup>
    <TargetFramework>netstandard2.0</TargetFramework>
    <PackageId>DynDns53.CoreLib</PackageId>
    <Version>1.0.1</Version>
    <Authors>Volkan Paksoy</Authors>
    <Company></Company>
  </PropertyGroup>
Notes
-
Regarding the NuGet API Key: They recently changed their approach about keys. Now you only have one chance to save your key somewhere else. If you don’t save it, you won’t be able to access ti via their UI. You can create a new one of course so no big deal. But to avoid key pollution you might wanna save it in a safe place for future reference.
-
If you are publishing packages frequently, you may not be able to get the updates even after they had been published. The reason for that is the packages are cached locally. So make sure to clean your cache before you try to update the packages. On Mac, Visual Studio doesn’t have a Clean Cache option as of this writing (unlike Windows) so you have to go to your user folder and remove the packages under {user}/.nuget/packages folder. After this, you update the packages and you should get the latest validated version from Nuget.
.NET Core Client
Prerequisites
First, you’d need an IAM user who has access to Route53. You can use the policy template below to give the minimum possible permissions:
{
    "Version": "2012-10-17",
    "Statement": [
        {
            "Effect": "Allow",
            "Action": [
                "route53:ListResourceRecordSets",
                "route53:ChangeResourceRecordSets"
            ],
            "Resource": "arn:aws:route53:::hostedzone/{ZONE ID}"
        }
    ]
}
Only 2 actions are performed so as long as you remmeber to update the policy with the new zone IDs if you need to manage other domains this should work fine work you.
Usage
Basic usage is very straightforward. Once compiled you can supply the IAM Access and Secret Keys and the domains to update with their Route53 Zone IDs as shown below:
dotnet DynDns53.Client.DotNetCore.dll --AccessKey {ACCESS KEY} --SecretKey {SECRET KEY} --Domains ZoneId1:Domain1 ZoneId2:Domain2
Notes
- .NET Core Console Application uses the NuGet package. One difference between .NET Core and classis .NET application is that the packages are no longer stored along with the application. Instead they are downloaded to the user’s folder under .nuget folder (e.g. on a Mac it’s located at /Users/{USERNAME}/.nuget/packages)
Available on Docker Hub
Even though it’s not a complex application I think it’s easier and hassle-free to run it in a self-contained Docker container. Currently it only supports Linux containers. I might need to develop a multi-architecture image in the future in need be but for now Linux only is sufficient for my needs.
Usage
You can get the image from Docker hub with the following command:
docker pull volkanpaksoy/dyndns53
and running it is very similar to running the .NET Core Client as that’s what’s running inside the container anyway:
docker run -d volkanpaksoy/dyndns53 --AccessKey {ACCESS KEY} --SecretKey {SECRET KEY} --Domains ZoneId1:Domain1 ZoneId2:Domain2 --Interval 300
The command above would run the container in daemon mode so that it can keep on updating the DNS every 5 minutes (300 seconds)
Notes
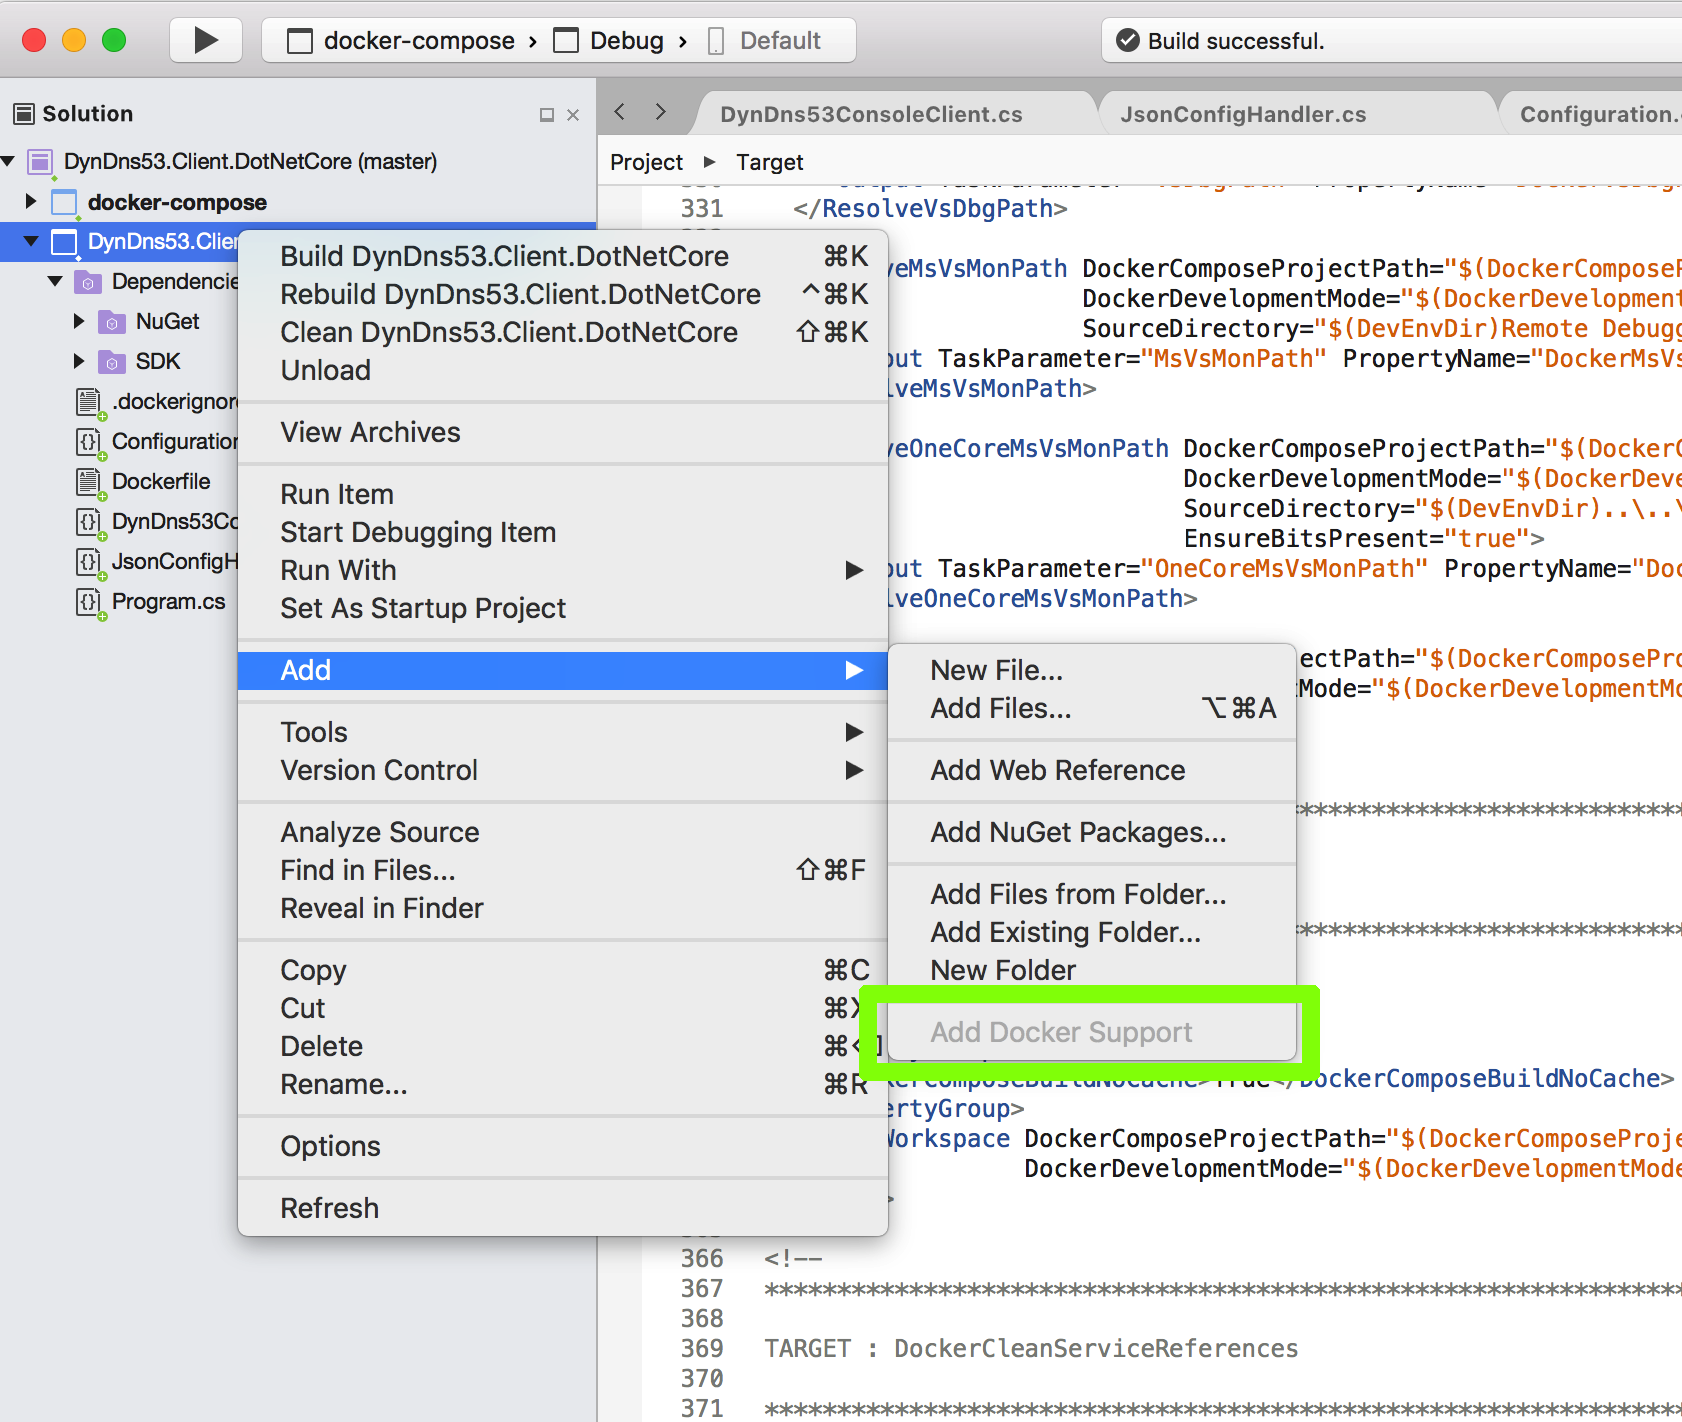
- I had an older Visual Studio 2017 for Mac installation and it didn’t have Docker support. The setup is not very granular to pick specific features. So my solution was to reinstall the whole thing at which point Docker support was available in my project.
-
After adding Docker support the default build configuration becomes docker-compose. But it doesn’t work straight away as it throws an exception saying
  ERROR: for dyndns53.client.dotnetcore  Cannot start service 	dyndns53.client.dotnetcore: Mounts denied:
  The path /usr/local/share/dotnet/sdk/NuGetFallbackFolder
  is not shared from OS X and is not known to Docker.
  You can configure shared paths from Docker -> Preferences... -> File Sharing.
  See https://docs.docker.com/docker-for-mac/osxfs/#namespaces for more info.
I added the folder it mentions in the error message to shared folders as shown below and it worked fine afterwards:

- Currently it only works on Linux containers. There’s a nice articlehere about creating multi-architecture Docker images. I’ll try to make mine multi-arch as well when I revisit the project or there is an actual need for that.
Angular 5 Client
I’ve updated the web-based client using Angular 5 and Bootstrap 4 (Currently in Beta) which now looks like this:
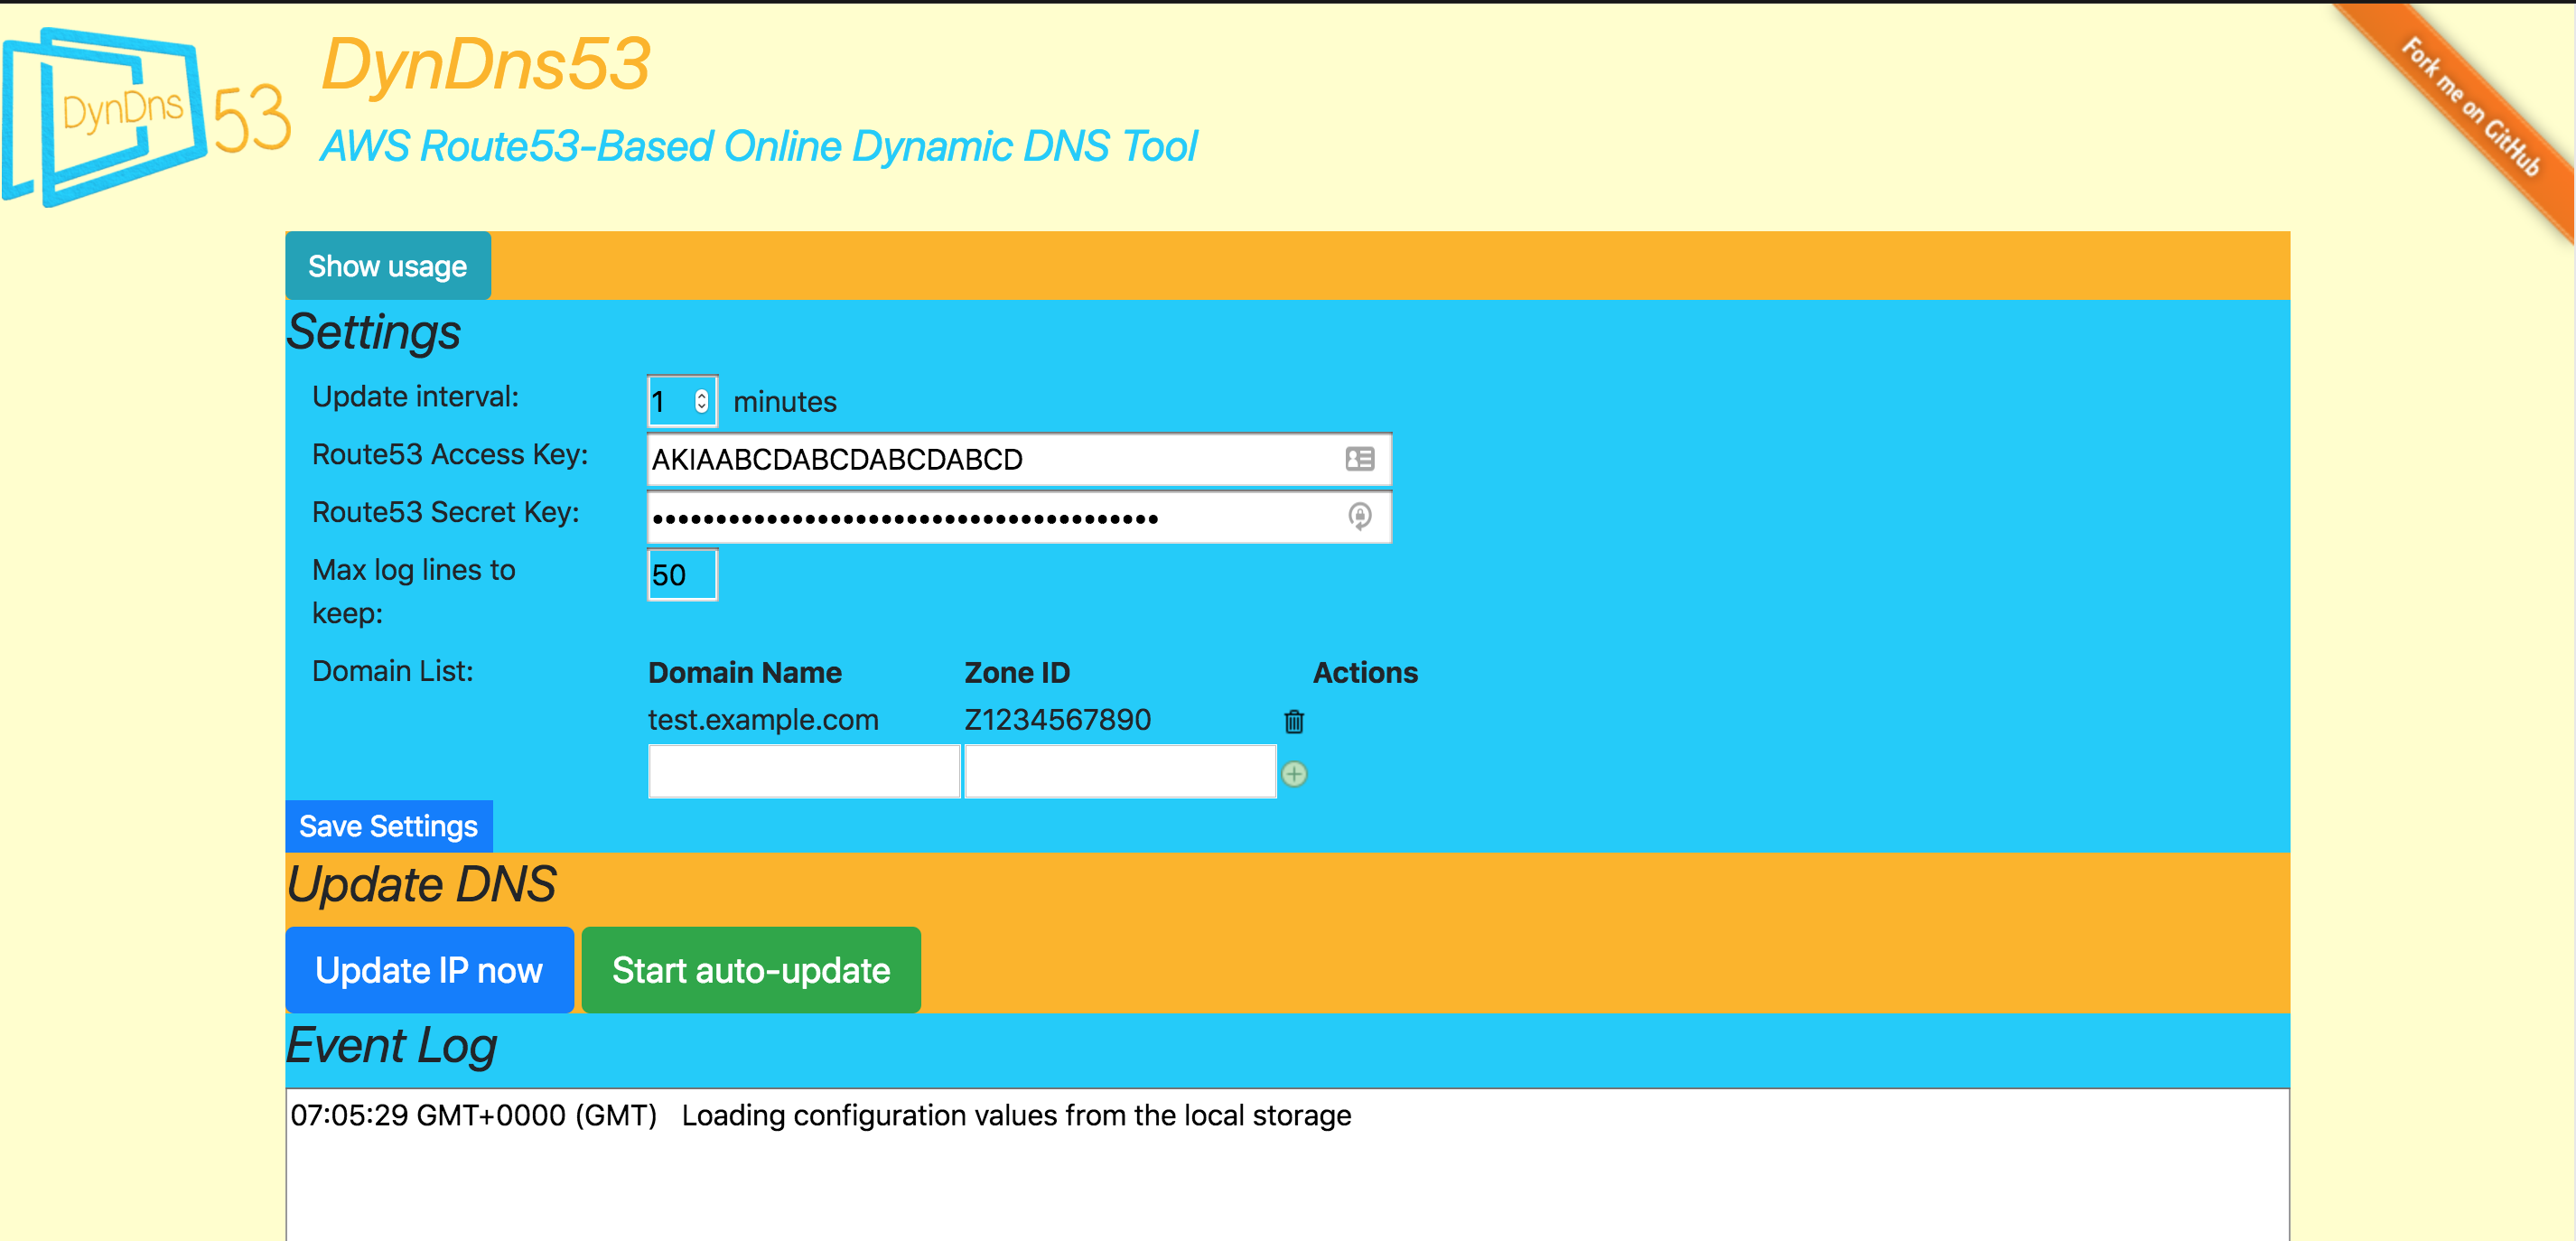
I kept a copy of the old version which was developed with AngularJS. It’s available at this address: http://legacy.dyndns53.myvirtualhome.net/
Notes
-
After I added AWS SDK package I started getting a nasty error:
ERROR in node_modules/aws-sdk/lib/http_response.d.ts(1,25): error TS2307: Cannot find module 'stream'.Fortunately the solution is easy as shown in the accepted answer here. Just remove “types: []” line in tsconfig.app.json file. Make sure you’re updating the correct file though as there is similarly named tsconfig.json in the root. What we are after is the tsconfig.app.json under src folder.
-
In this project, I use 3 different IP checkers (AWS, DynDns and a custom one I developed myself a while back and running on Heroku). Calling these from other clients is fine but when in the web application I bumped into CORS issues. There are possible solutions for this:
-
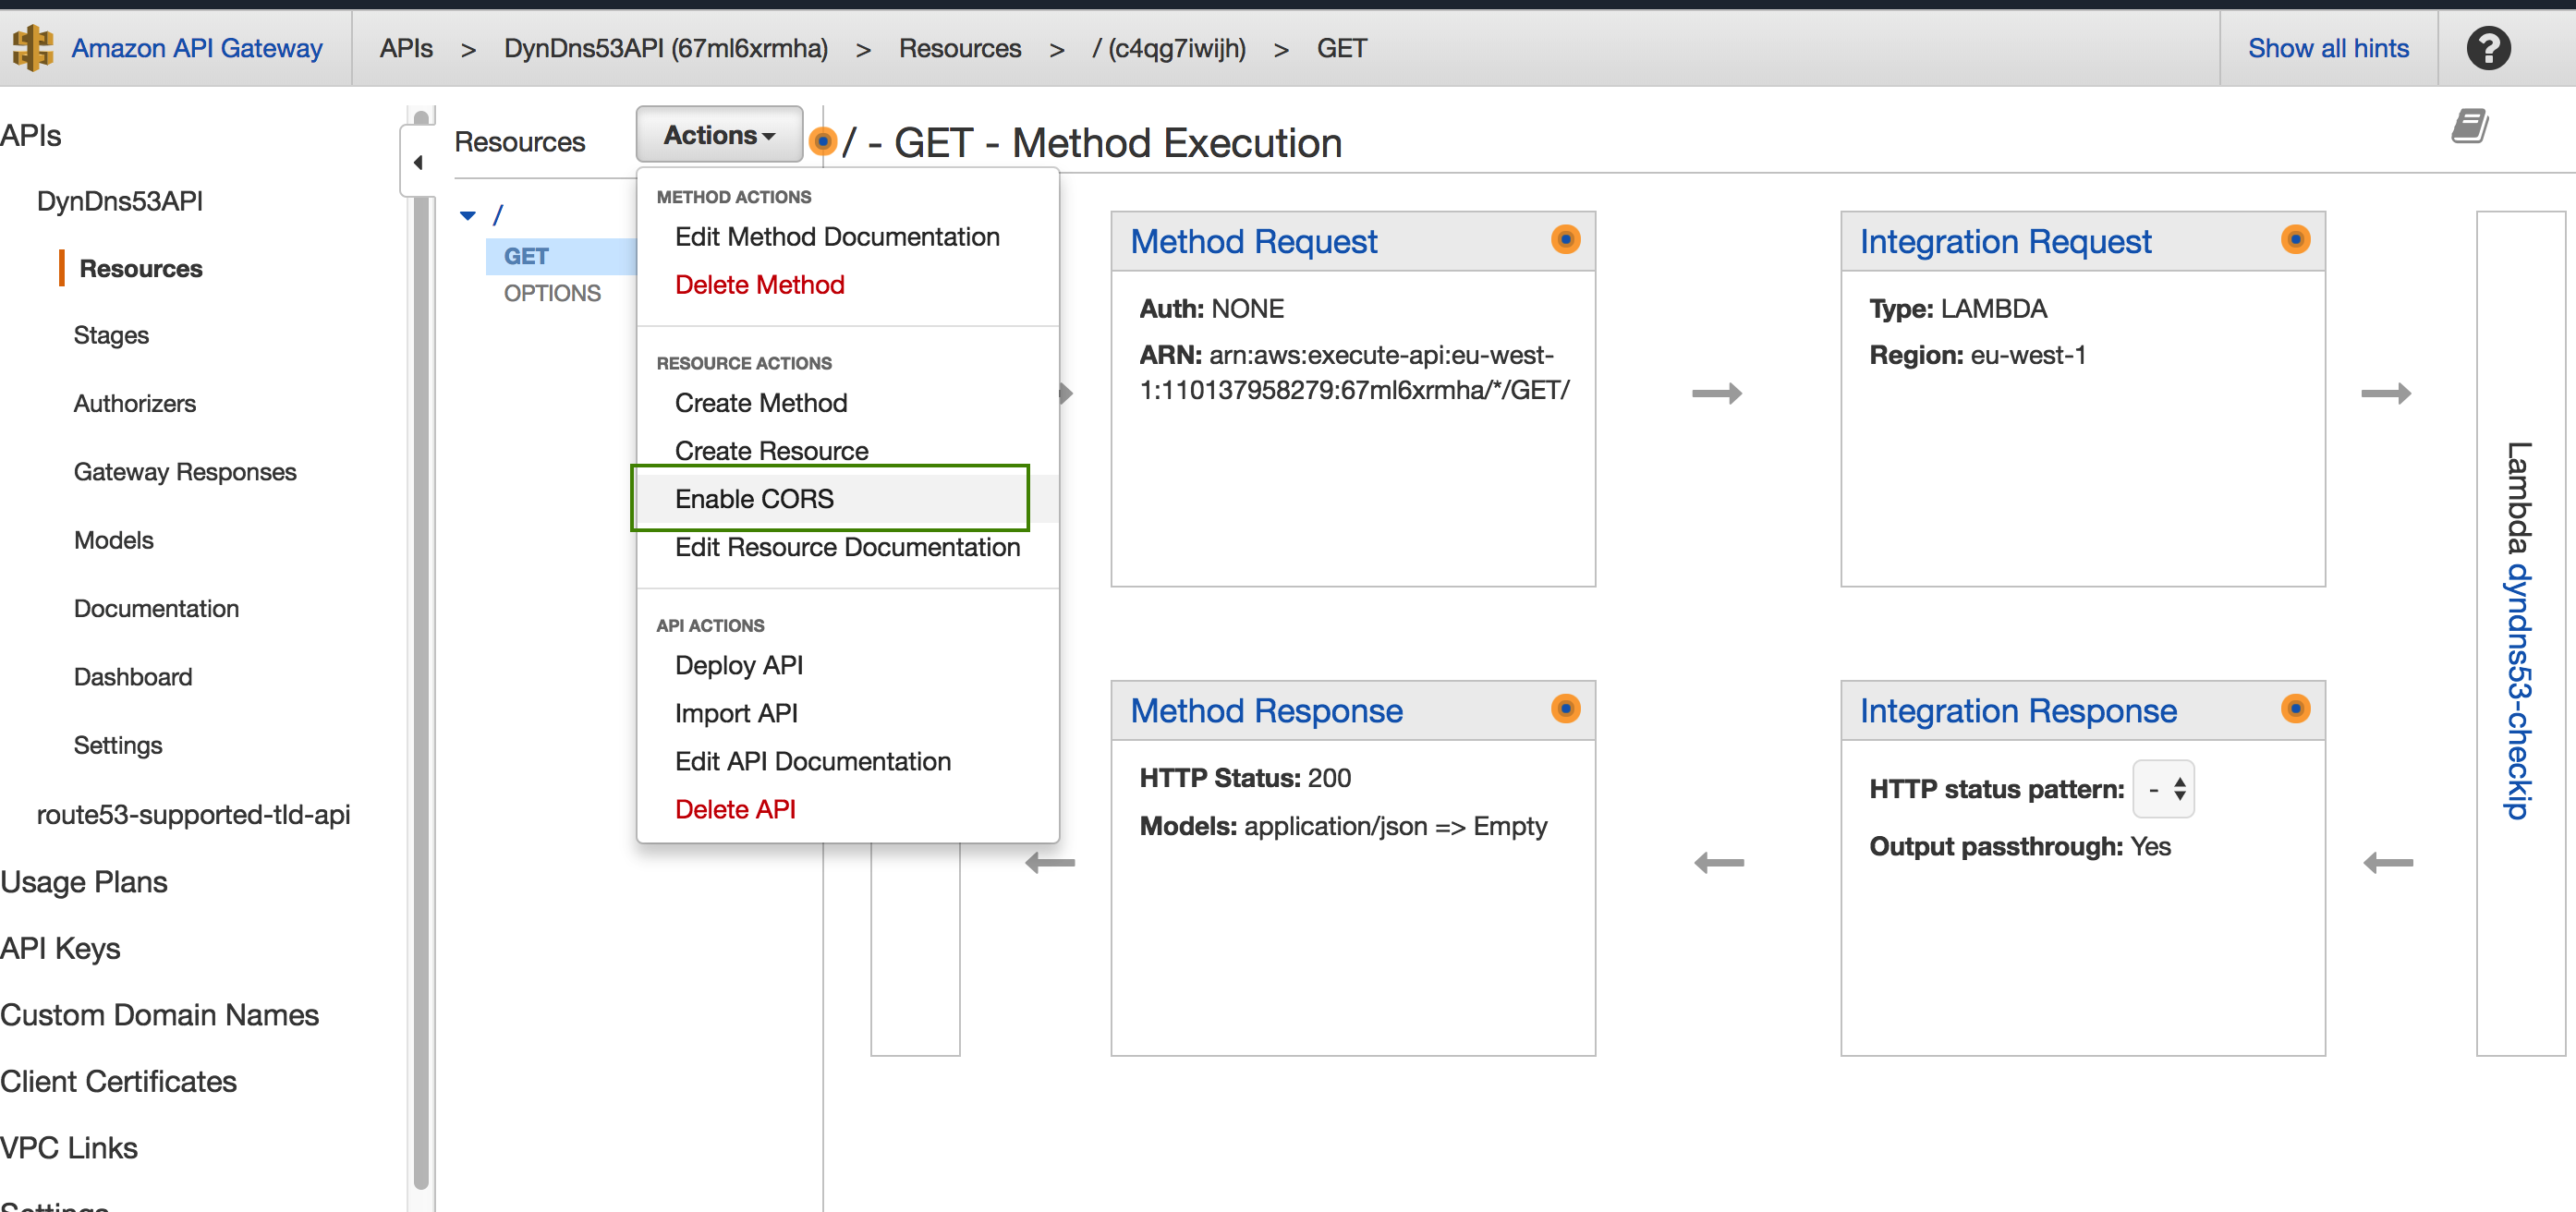
Create you own API to return the IP address: In the previous version, I created an API with AWS API Gateway which uses a very simple Lambda function to return caller’s IP address
 exports.handler = function(event, context) {
   	 context.succeed({
         "ip": event.ip
     })
 }
I create a GET method for my API and used the above Lambda function. Now that I had full control over it I was able to enable CORS as shown below:
-
The other solution is “tricking” the browser by injecting CORS headers by using a Chrome extension. There is an umber of them but I use the one aptly named “Allow-Control-Allow-Origin: *”
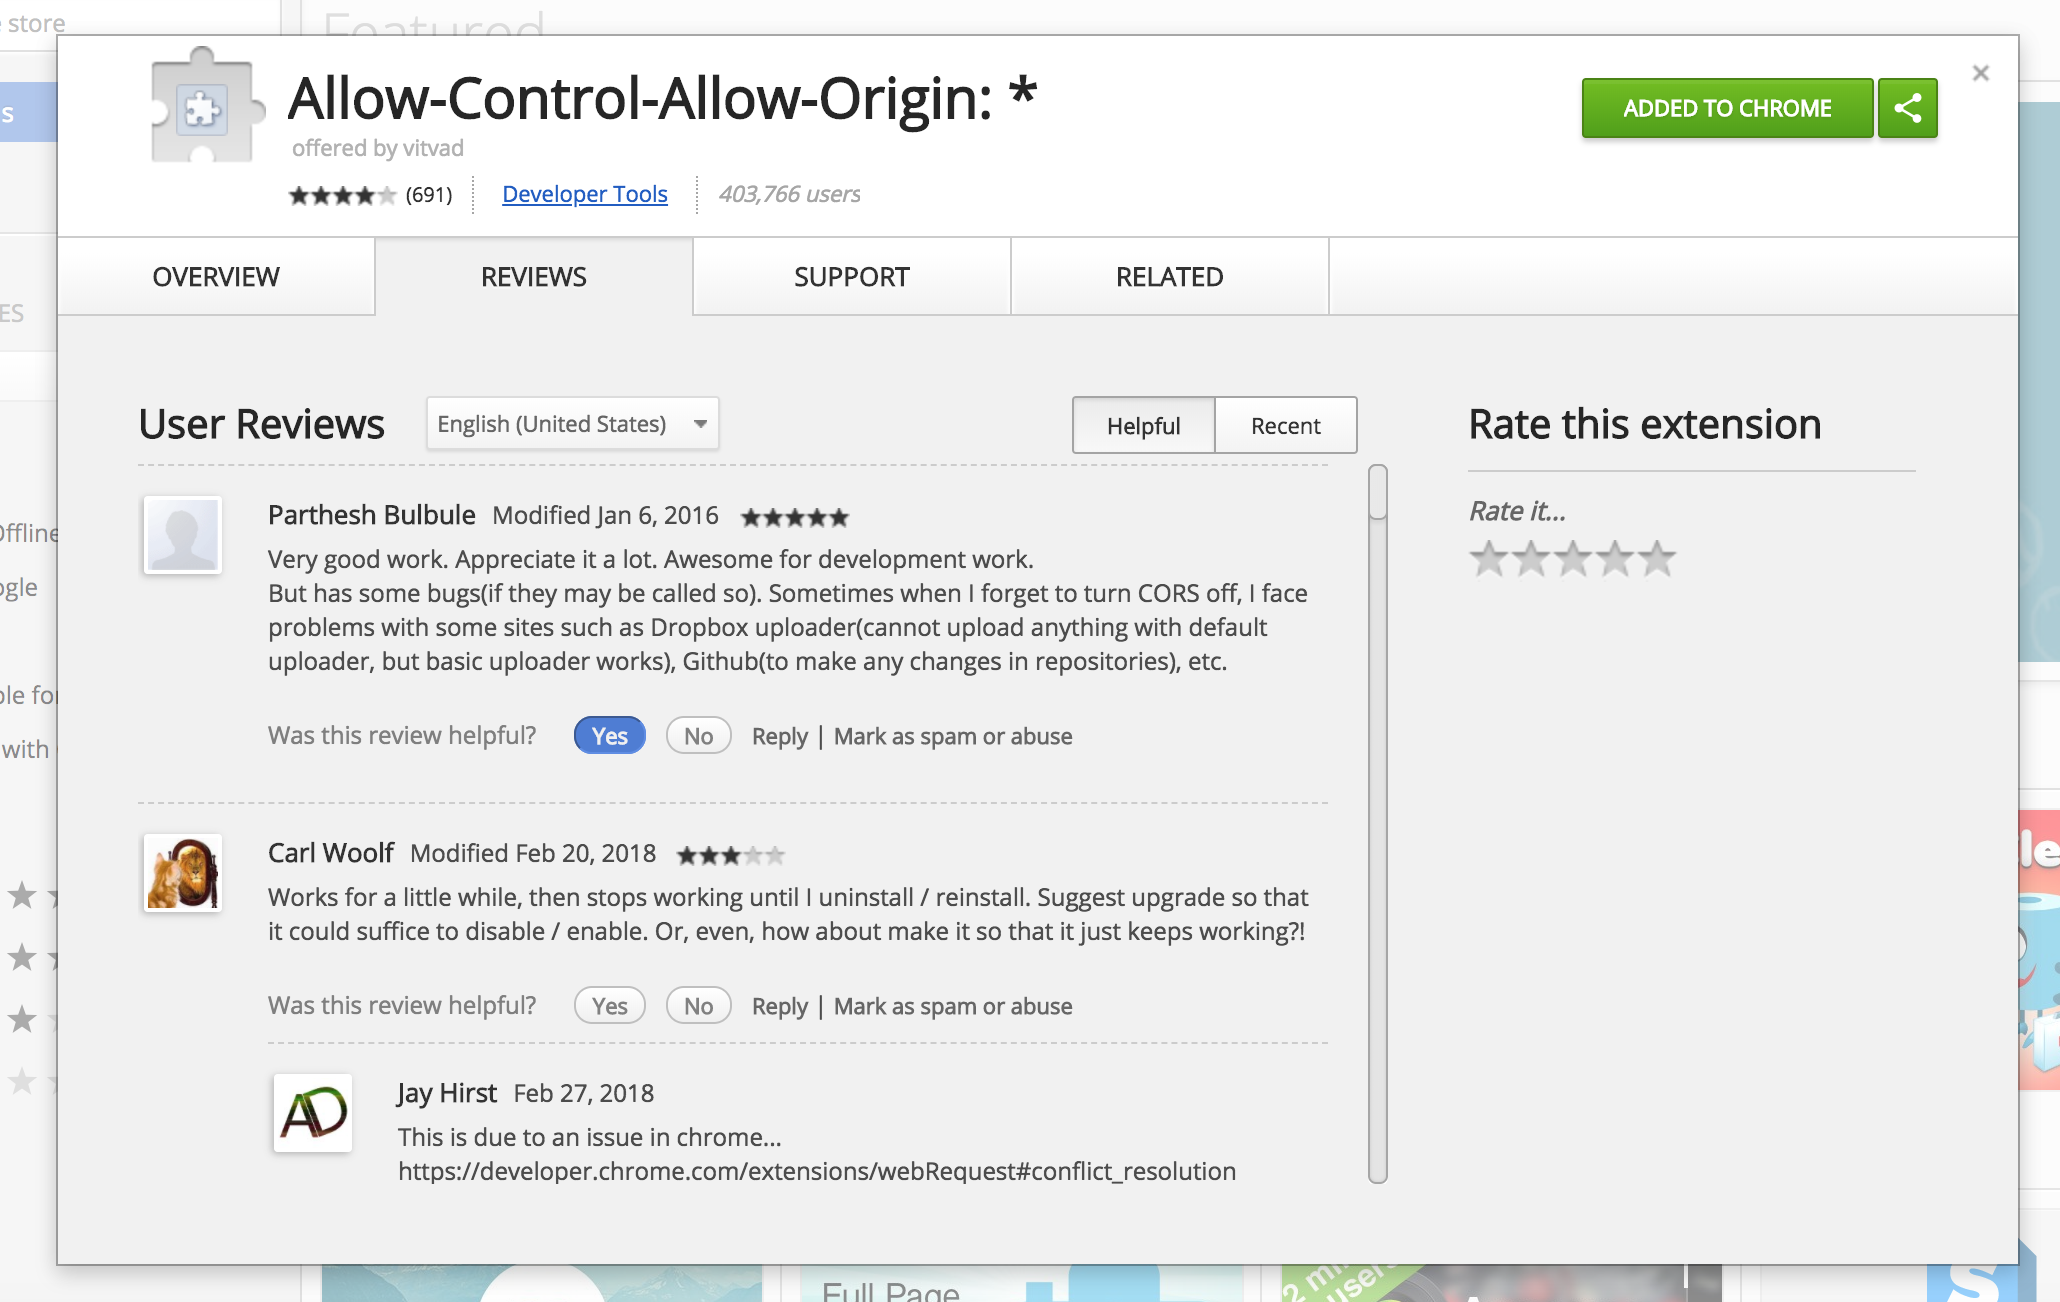
After installed you just enable it and the getting external IP works fine.
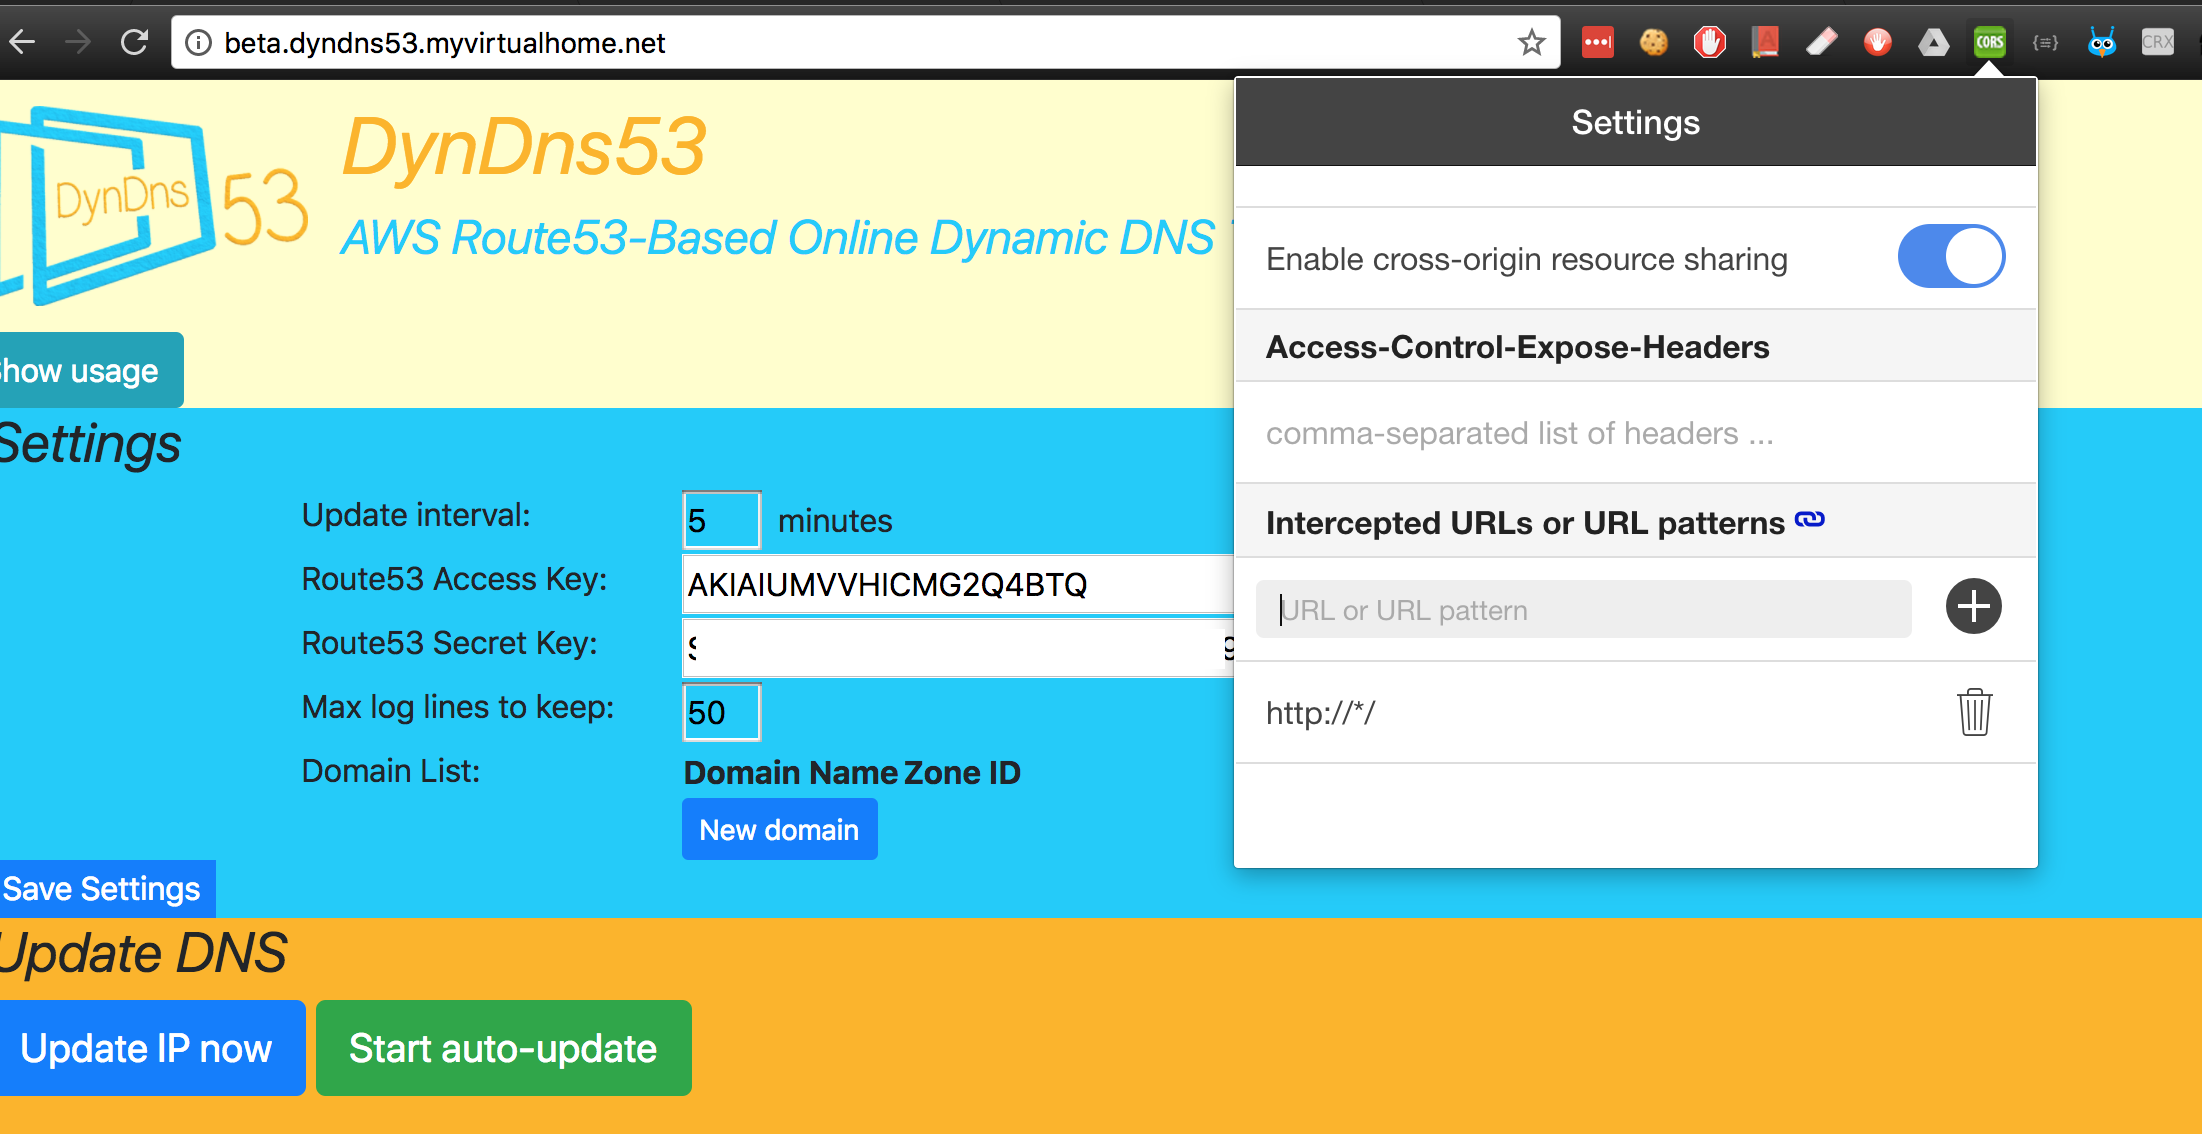
It’s a good practice to filter it for your specific needs so that it doesn’t affect other sites (I had some issues with Google Docs when this is turned on)
-
CI Integration
I created a Travis integration which is free since my project is open-source. It runs the unit tests of the core library automatically. Also added the shiny badge on the project’s readme file that shows the build status.