Playing with TFL API with C#, Xamarin and Swift
Recently I discovered that Transport for London (TFL) has some great APIs that I can play around with some familiar data. It’s very to use as an API key is not even mandatory. My main goal here is to discover what I can do with this data and build a few user interfaces consuming it. All source code is available on GitHub
Tube status
The API endpoint I will use returns the current status of tube lines, an array of the following JSON objects:
{
    "$type": "Tfl.Api.Presentation.Entities.Line, Tfl.Api.Presentation.Entities",
    "id": "central",
    "name": "Central",
    "modeName": "tube",
    "created": "2015-10-14T10:31:00.39",
    "modified": "2015-10-14T10:31:00.39",
    "lineStatuses": [
        {
            "$type": "Tfl.Api.Presentation.Entities.LineStatus, Tfl.Api.Presentation.Entities",
            "id": 0,
            "statusSeverity": 10,
            "statusSeverityDescription": "Good Service",
            "created": "0001-01-01T00:00:00",
            "validityPeriods": []
        }
    ],
    "routeSections": [],
    "serviceTypes": [
        {
            "$type": "Tfl.Api.Presentation.Entities.LineServiceTypeInfo, Tfl.Api.Presentation.Entities",
            "name": "Regular",
            "uri": "/Line/Route?ids=Central&serviceTypes=Regular"
        }
    ]
}
Visualizing the data - line colours
TFL have standard colours for tube lines which are documented here. So I created a small lookup json using that reference:
[
    { "id": "bakerloo", "CMYK": { "M": 58, "Y": 100, "K": 33 }, "RGB":  { "R": 137, "G": 78, "B": 36 } },
    { "id": "central", "CMYK": { "M": 95, "Y": 100 }, "RGB":  { "R": 220, "G": 36, "B": 31 } },
    { "id": "circle",  "CMYK": { "M": 16, "Y": 100 }, "RGB":  { "R": 255, "G": 206, "B": 0 } },
    { "id": "district", "CMYK": { "C":  95, "Y": 100, "K": 27 }, "RGB":  { "R": 0, "G": 114, "B": 41 } },
    { "id": "hammersmith-city", "CMYK": { "M": 45, "Y": 10 }, "RGB":  { "R": 215, "G": 153, "B": 175 } },
    { "id": "jubilee", "CMYK": { "C": 5, "K": 45 }, "RGB":  { "R": 134, "G": 143, "B": 152 } },
    { "id": "metropolitan", "CMYK": { "C": 5, "M": 100, "K": 40 }, "RGB":  { "R": 117, "G": 16, "B": 86 } },
    { "id": "northern", "CMYK": { "K": 100 }, "RGB":  { "R": 0, "G": 0, "B": 0 } },
    { "id": "piccadilly", "CMYK": { "C": 100, "M": 88, "K": 5 }, "RGB":  { "R": 0, "G": 25, "B": 168 } },
    { "id": "victoria", "CMYK": { "C": 85, "M": 19 }, "RGB":  { "R": 0, "G": 160, "B": 226 } },
    { "id": "waterloo-city", "CMYK": { "C": 47, "Y": 32 }, "RGB":  { "R": 118, "G": 208, "B": 189 } }
]
I was hoping to map status values to colours as well (i.e. “Severe delays” to red) but there is no official guide to that. The status codes and values can be retrieved from this endpoint: https://api.tfl.gov.uk/line/meta/severity which returns a collection of objects like this:
{
    "$type": "Tfl.Api.Presentation.Entities.StatusSeverity, Tfl.Api.Presentation.Entities",
    "modeName": "tube",
    "severityLevel": 2,
    "description": "Suspended"
}
I simplified it for my purposes (just the values for tube):
[
    { "severityLevel": 0, "description": "Special Service" },
    { "severityLevel": 1, "description": "Closed" },
    { "severityLevel": 2, "description": "Suspended" },
    { "severityLevel": 3, "description": "Part Suspended" },
    { "severityLevel": 4, "description": "Planned Closure" },
    { "severityLevel": 5, "description": "Part Closure" },
    { "severityLevel": 6, "description": "Severe Delays" },
    { "severityLevel": 7, "description": "Reduced Service" },
    { "severityLevel": 8, "description": "Bus Service" },
    { "severityLevel": 9, "description": "Minor Delays" },
    { "severityLevel": 10, "description": "Good Service" },
    { "severityLevel": 11, "description": "Part Closed" },
    { "severityLevel": 12, "description": "Exist Only" },
    { "severityLevel": 13, "description": "No Step Free Access" },
    { "severityLevel": 14, "description": "Change of frequency" },
    { "severityLevel": 15, "description": "Diverted" },
    { "severityLevel": 16, "description": "Not Running" },
    { "severityLevel": 17, "description": "Issues Reported" },
    { "severityLevel": 18, "description": "No Issues" },
    { "severityLevel": 19, "description": "Information" },
    { "severityLevel": 20, "description": "Service Closed" },
]
I will keep it around but in this initial version I won’t use it as description is returned with the status query anyway. But it was still a useful exercise to figure out there is no “official” colour for status values. After all what’s the colour of “No Step Free Access” or “Exist Only”? There is a also reason field that explains the effects of any delays etc. which should ne displayed along with the severity especially when there are some disruptions in the service.
‘Nuff said about the data! Let’s start building something with it!
Core library
As I will build several API call to retrieve tube status is encapsulated in the core library which basically has sends the HTTP request, parses the JSON and returns the LineInfo list:
public class Fetcher
{
    private readonly string _apiEndPoint = "https://api.tfl.gov.uk/line/mode/tube/status?detail=true";

    public List<LineInfo> GetTubeInfo()
    {
        var client = new RestClient(_apiEndPoint);
        var request = new RestRequest("/", Method.GET);
        request.AddHeader("Content-Type", "application/json");
        var response = (RestResponse)client.Execute(request);
        var content = response.Content;
        var tflResponse = JsonConvert.DeserializeObject<List<TflLineInfo>>(content);

        var lineInfoList = tflResponse.Select(t =>
            new LineInfo()
            {
                Id = t.id,
                Name = t.name,
                Reason = t.lineStatuses[0].reason,
                StatusSeverityDescription = t.lineStatuses[0].statusSeverityDescription,
                StatusSeverity = t.lineStatuses[0].statusSeverity
            }).ToList();

        return lineInfoList;
    }
}
LineInfo class contains the current status with the description. It also contains the colour defined by TFL for that tube line:
public class LineInfo
{
    public string Id { get; set; }
    public string Name { get; set; }
    public int StatusSeverity { get; set; }
    public string StatusSeverityDescription { get; set; }
    public string Reason { get; set; }
    public RGB LineColour
    {
        get
        {
            return TubeColourHelper.GetRGBColour(this.Id);
        }
    }
}
As the line colours aren’t returned by the service I have to populate it by a helper class:
public class TubeColourHelper
{
    private static Dictionary<string, RGB> _tubeColorRGBDictionary = new Dictionary<string, RGB>();

    static TubeColourHelper()
    {
        _tubeColorRGBDictionary = new Dictionary<string, RGB>();

        string json = File.ReadAllText("./data/colours.json");
        var tubeColors = JArray.Parse(json);
        foreach (var tubeColor in tubeColors)
        {
            _tubeColorRGBDictionary.Add(tubeColor["id"].Value<string>(), new RGB(
                tubeColor["RGB"]["R"]?.Value<int>() ?? 0,
                tubeColor["RGB"]["G"]?.Value<int>() ?? 0,
                tubeColor["RGB"]["B"]?.Value<int>() ?? 0));
        }
    }

    public static RGB GetRGBColour(string lineId)
    {
        if (!_tubeColorRGBDictionary.ContainsKey(lineId))
        {
            throw new ArgumentException($"Colour for line [{lineId}] could not be found in RGB colour map");
        }

        return _tubeColorRGBDictionary[lineId];
    }
}
The static constructor runs only the first time it is accessed, reads the colours.json and populates the dictionary. From then on it’s just a lookup in memory.
First client: C# Console Application on Windows
Time to develop our first client and see some actual results. As it’s generally the case with console applications this one is pretty simple and hassle-free. I decided to start with that one just to see the core library is working as expected.
class Program
{
    static void Main(string[] args)
    {
        var fetcher = new Fetcher();
        var viewer = new ConsoleViewer();

        bool exit = false;

        viewer.DisplayTubeStatus(fetcher.GetTubeInfo());

        do
        {
            ConsoleKeyInfo key = System.Console.ReadKey();
            switch (key.Key)
            {
                case ConsoleKey.F5:
                    viewer.DisplayTubeStatus(fetcher.GetTubeInfo());
                    break;
                case ConsoleKey.Q:
                    exit = true;
                    break;
                default:
                    System.Console.WriteLine("Unknown command");
                    break;
            }
        }
        while (!exit);
    }
}
Displays the results when it’s first run. You can refresh by pressing F5 or quit by pressing Q. The output looks like this:
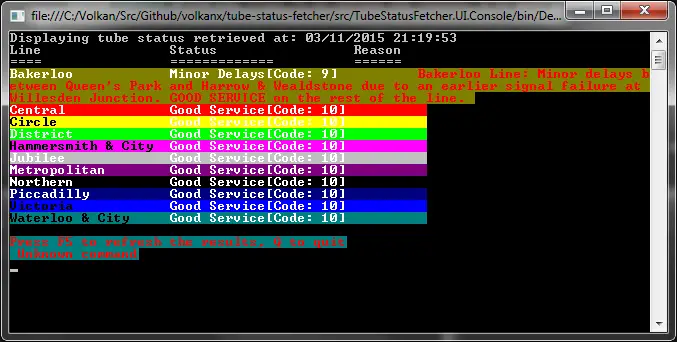
The problem with console application is that I wasn’t able to use RGB values directly as the console only supports an enumeration called ConsoleColor.
Second client: WPF Application on Windows
Now let’s look at a more graphical UI, a WPF client:
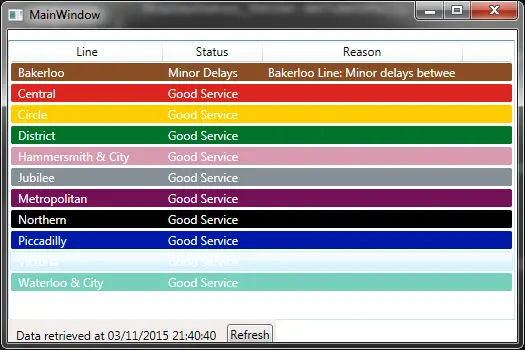
Same idea, display the results upon first run then call the service again on Refresh button’s click event.
Third client: iOS App with Xamarin
I’ve recently subscribed to Xamarin and one of the main reasons for starting this project was to see it in action. What I was mostly curious about was if I could use my C# libraries using NuGet packages on an iOS application developed with Xamarin. This would allow me build apps significantly faster.
It didn’t work out of the box because I used C# 6.0 and .NET Framework 4.5.2 on the Windows side but it wasn’t available on the Mac.
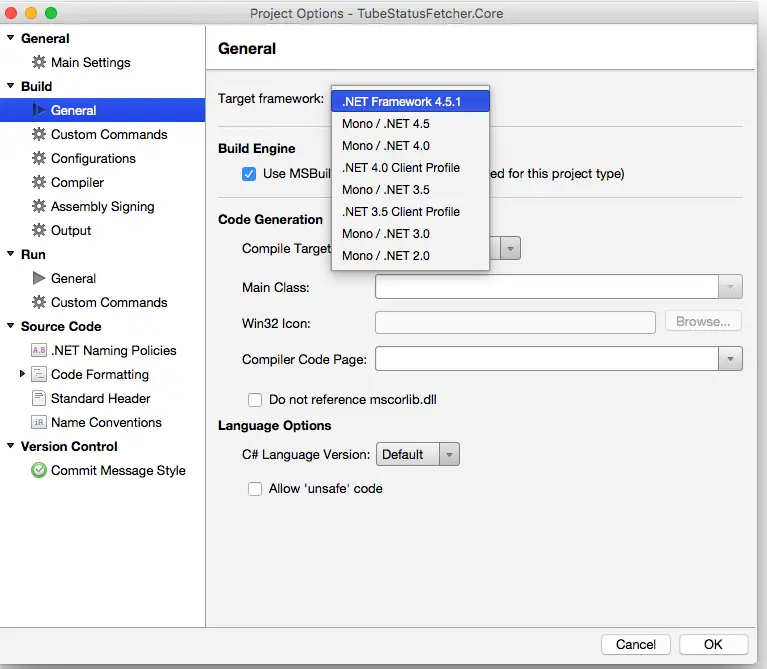
But wasn’t too hard to change the framework and make some small modifications to make it work. Good news is that it supports NuGet and most common libraries have Mono support including RestSharp and Newtonsoft.Json which I used in this project
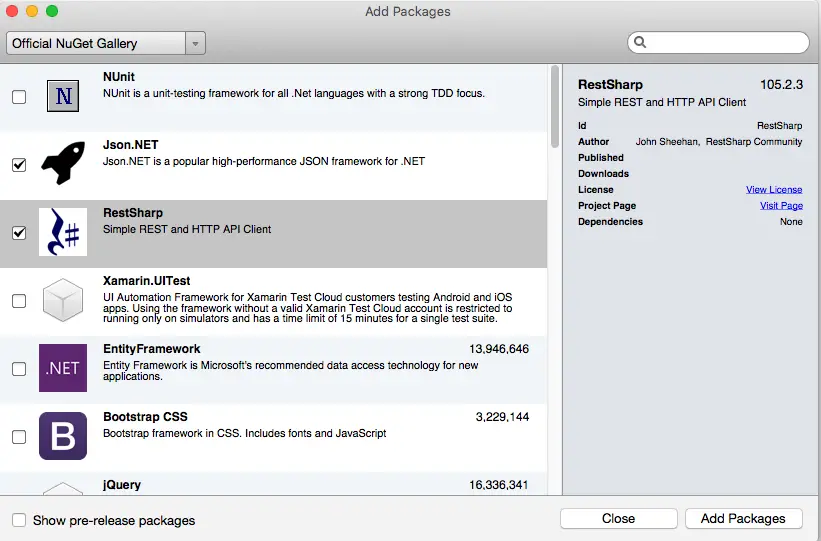
I had to remove and add them but finally they worked fine so I didn’t have to change anything in the code.
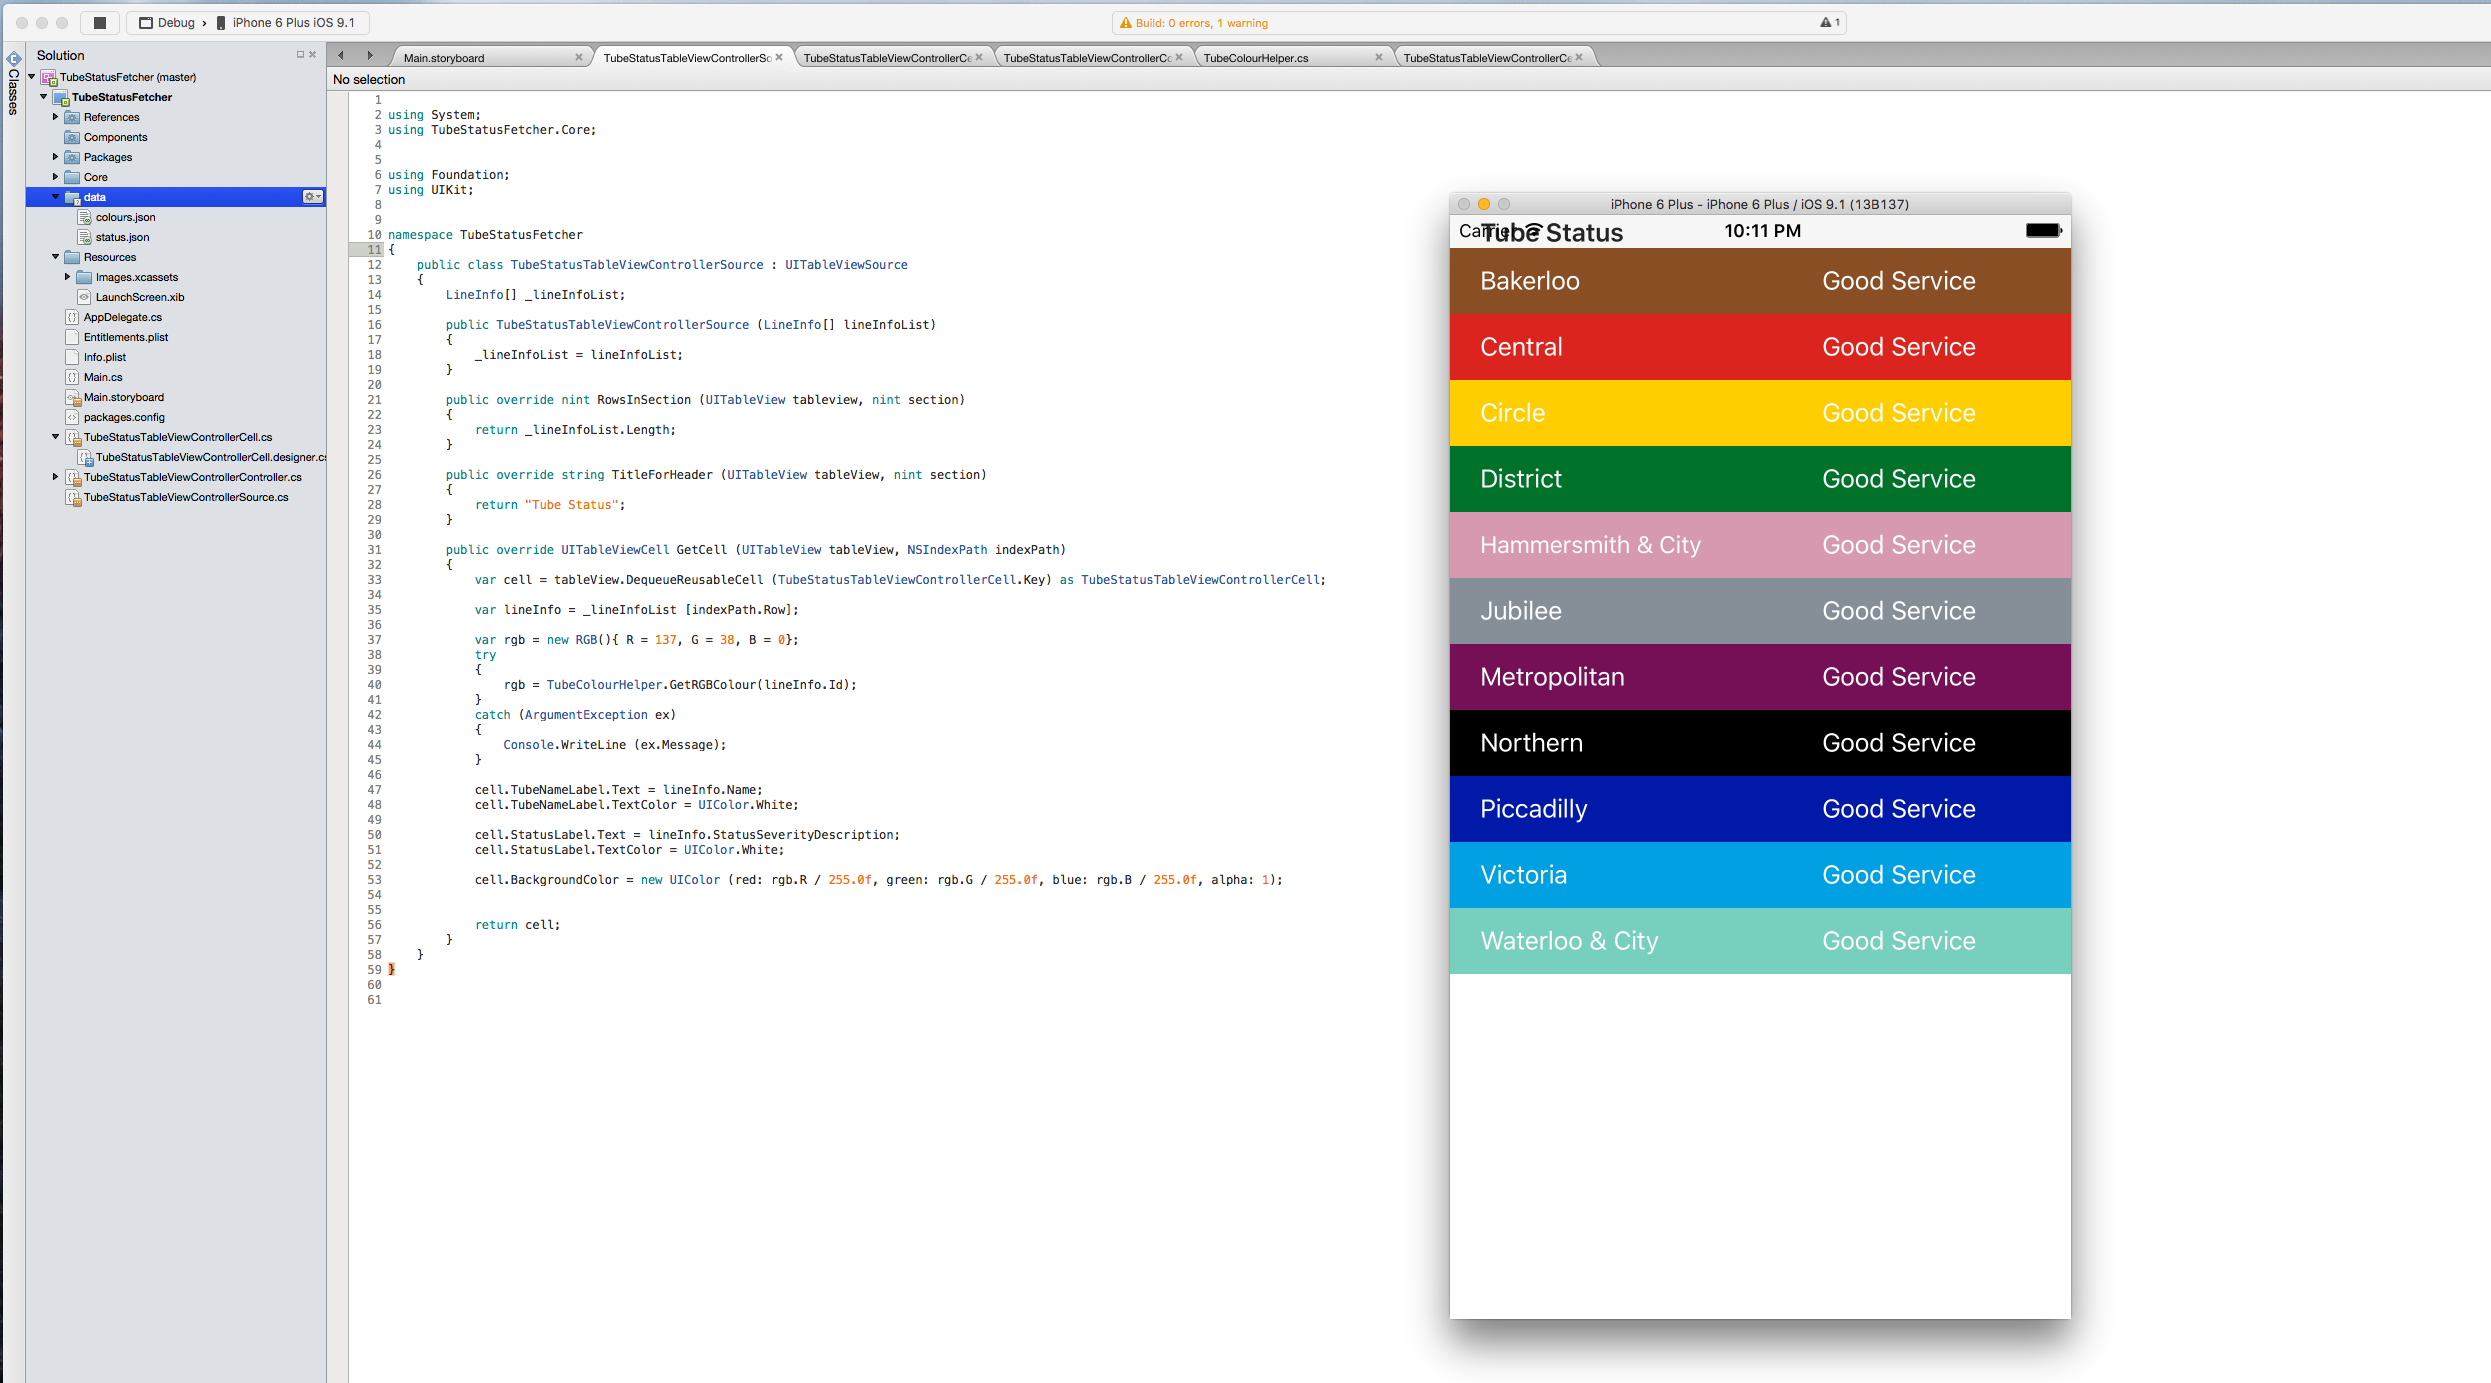
I won’t go into implementation details as there’s not much change. The app has one table view controller and it calls the core library to get the results and assigns them to the table’s data source. It’s a relief that I could have the same functionality as Windows with just minor changes.
public override void ViewDidLoad()
{
    base.ViewDidLoad();

    var fetcher = new Fetcher();
    var lineInfoList = fetcher.GetTubeInfo();
    TableView.Source = new TubeStatusTableViewControllerSource(lineInfoList.ToArray());
    TableView.ReloadData();
}
Anyway, more on Xamarin later after I cover the Swift version.
Fourth client: iOS App with Swift
Last but not least, here comes Swift client built with XCode. Naturally this one cannot use the core library that the first 3 clients shared (which is good because I was looking for a chance to practice handling HTTP requests and parsinng JSON with Swift anyway).
I didn’t use any external libraries so the implementation is a bit long but mainly it sends the request using NSURLSession and NSSessionDataTask.
func getTubeStatus(completionHandler: (result: [LineInfo]?, error: NSError?) -> Void) {
    let parameters = ["detail" : "true"]
    let mutableMethod : String = Methods.TubeStatus

    taskForGETMethod(mutableMethod, parameters: parameters) { JSONResult, error in
        if let error = error {
            completionHandler(result: nil, error: error)
        } else {
            if let results = JSONResult as? [AnyObject] {
                let lineStatus = LineInfo.lineStatusFromResults(results)
                completionHandler(result: lineStatus, error: nil)
            }
       }
    }
}
Then constructs the LineInfo objects by calling the static lineStatusFromResults method:
static func lineStatusFromResults(results: [AnyObject]) -> [LineInfo] {
    var lineStatus = [LineInfo]()
    for result in results {
        lineStatus.append(LineInfo(status: result))
    }

    return lineStatus
}
which creates a new LineInfo and adds to resultset:
init(status: AnyObject) {

    Id = status["id"] as! String
    Name = status["name"] as! String
    StatusSeverity = status["lineStatuses"]!![0]!["statusSeverity"] as! Int
    StatusSeverityDescription = status["lineStatuses"]!![0]!["statusSeverityDescription"] as! String
    LineColour = RGB(R: 0, G: 0, B: 0)
}
JSON parsing is a bit nasy because of unwrapping the optionals. I’ll look into SwiftyJSON later on which is a popular JSON library for Swift.
Finally the controller displays the results:
override func viewWillAppear(animated: Bool) {
    super.viewWillAppear(animated)

    TFLClient.sharedInstance().getTubeStatus { lineStatus, error in

        if let lineStatus = lineStatus {
            self.lineInfoList = lineStatus
            dispatch_async(dispatch_get_main_queue()) {
                self.tableView!.reloadData()
            }
        } else {
            print(error)
        }
    }
}
And the custom cells are created when data is loaded and the text and colours are set:
override func tableView(tableView: UITableView, cellForRowAtIndexPath indexPath: NSIndexPath) -> UITableViewCell {
    let cell = tableView.dequeueReusableCellWithIdentifier("TubeInfoCell", forIndexPath: indexPath) as! TubeInfoTableViewCell
    let lineStatus = lineInfoList[indexPath.row]

    cell.backgroundColor = colourHelper.getTubeColor(lineStatus.Id)

    cell.lineName?.text = lineStatus.Name
    cell.lineName?.textColor = UIColor.whiteColor()
    cell.severityDescription?.text = lineStatus.StatusSeverityDescription
    cell.severityDescription?.textColor = UIColor.whiteColor()

    return cell
}
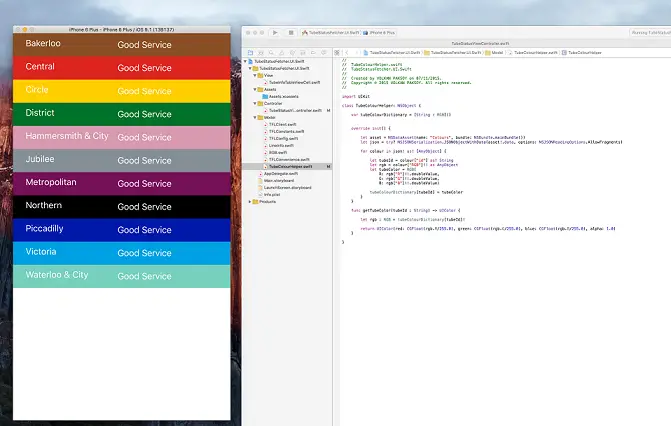
And here’s the output:
Xamarin vs Swift
Here’s a quick overview and comparison of both platforms based on my (limited) experiences with this toy project:
- XCode is much faster when building and deploying
- XamarinStudio doesn’t seem to be very intuitive at times. For examples the code snippets use Java-notation
-
The more I use Swift the more I like it and it doesn’t slow me down terribly. Once you get used to it the difference is syntax more or less. For example the following two methods do the same thing:
Xamarin:
  public override nint RowsInSection (UITableView tableview, nint section)
  {
      return lineInfoList.Length;
  }
Swift:
  override func tableView(tableView: UITableView, numberOfRowsInSection section: Int) -> Int {
          return lineInfoList.count
      }
I can even argue I’d be more comfortable with the Swift version here as I have no idea what a “nint” is as it’s an input parameter in the Xamarin version.
- The idea behind Xamarin subscription was to develop iOS apps quickly as I’m a seasoned C# developer and feel comfortable with it. But turns it, I can’t move as fast as I expected. With the Indie subscription you can only use Xamarin Studio. Enabling Visual Studio is only allowed with the business version which costs $1000/year. And Xamarin Studio is a brand new IDE for me so it definitely has a learning curve. Also I’m getting used to XCode now (besides the fact that it crashes hundred times a day on average!)
Conclusion
This was just a reconnaisance mission to explore the TFL API, iOS development with Xamarin and Swift. It was a fun exercise for me, I hope anyone who reads this can benefit from it too.