
Continuous Integration with TFS Express 2015 from scratch
Setting up continuous integration environment with TFS is quite easy and free. In this post I’ll go over the details of setting up a CI environment. The tools I will use are:
- Visual Studio 2015 Community Edition
- TFS 2015 Express
- AWS EC2 instance (To install TFS)
- AWS SES (To send notification mails)
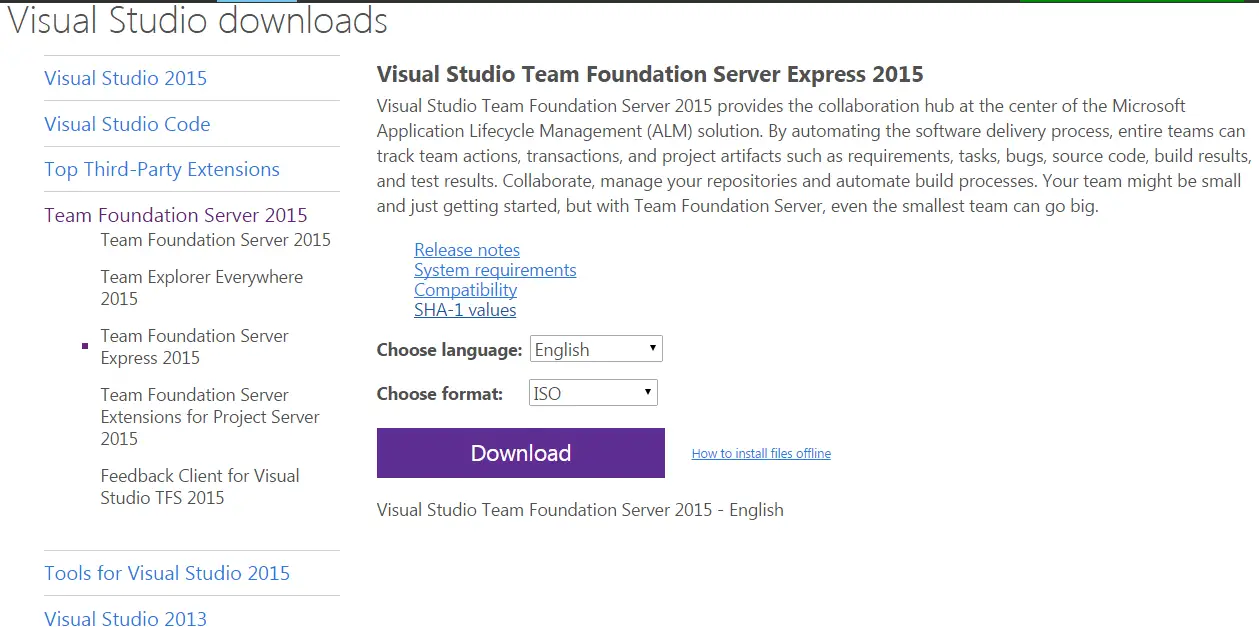
Step 01: Download and install TFS Express 2015
I always prefer the offline installer so download the whole ISO just in case (it’s 891MB so it might be a good time for a coffee break!)
Installation is standard next-next-finish so nothing particular about it. Accepting all defaults yields a working TFS instance.
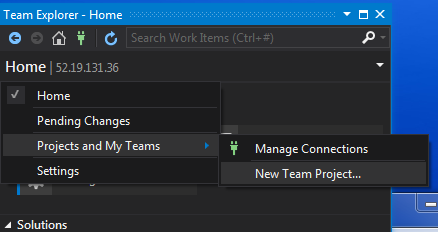
Step 02: Connect to TFS
From the Team menu select Manage Connections. This will open Team Explorer on which we can choose the TFS instance.
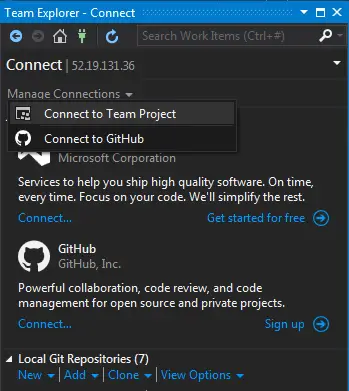
It can connect to TFS Online or Github. For this example I will use the hosted TFS we have just installed. We first need to add it to TFS server list.
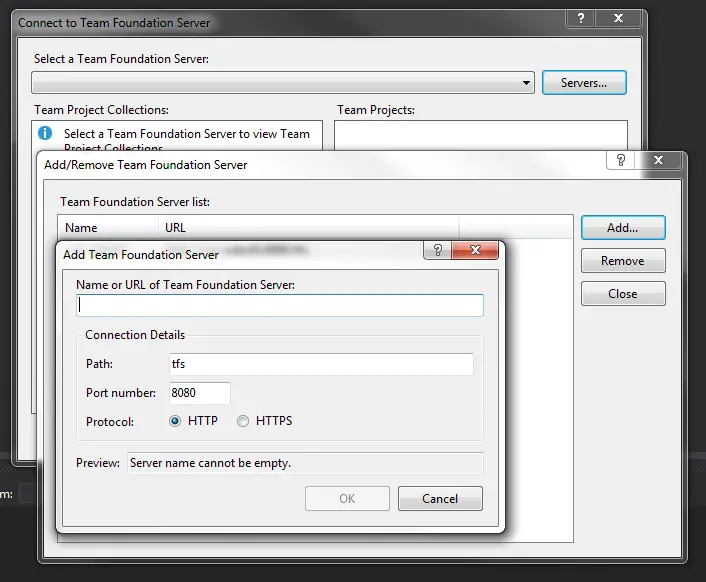
If you are using EC2 like I did don’t forget to allow inbound traffic on port 8080 beforehand.
Note that we don’t have a Team Project yet, what we have connected is the Project Collection. A collection is an additional abstraction layer used to group related projects. Using Default Collection generally works out just fine for me.
Step 03: Configure workspace
Since a local copy needs to be stored locally we have to map it to the project
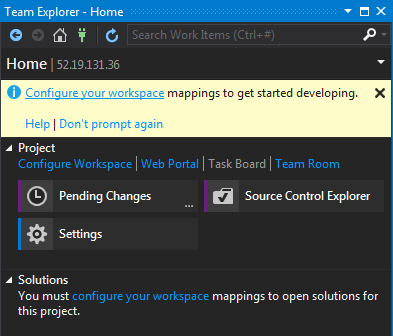
Just pick a local empty folder. Leaving “$/” means the entire collection will be mapped to this folder.
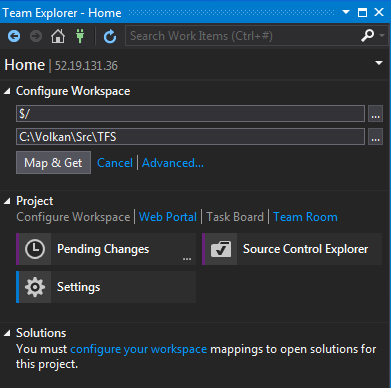
Click Map & Get and you will have a blank workspace.
Step 04: Create team project
Now we can create a team project on TFS. click on Home -> Projects and My Teams then New Team Project.
Just following the wizard selects Scrum methodology and Team Foundation Version Control as the source control system. Starting with TFS 2013, Git is also supported now.
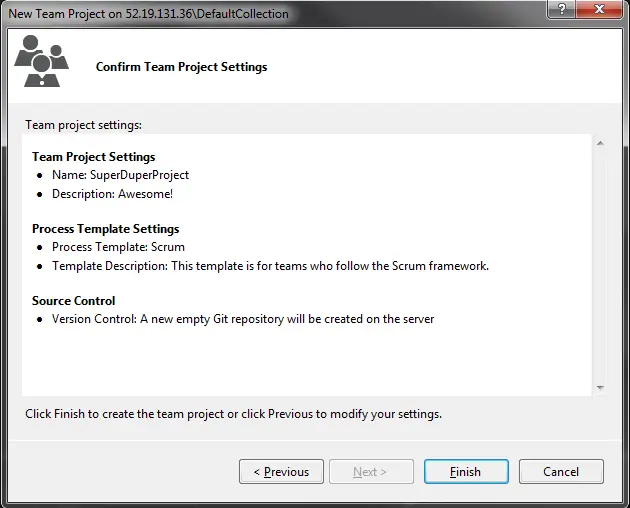
After several minutes later, our team project is ready.
Step 05: Clone and start developing
I chose Git as the version control system. If you use TFSVC the terminology you’ll see is a bit different but since the main focus of this post is establishing continuous integration it doesn’t matter much as long you as you can check-in the source code.
So now that we have a blank canvas let’s start painting! I added a class library with a single class like the one below:
public class ComplexMathClass
{
    public int Add(int x, int y)
    {
        return x + y;
    }

    public double Divide(int x, int y)
    {
        return x / y;
    }
}
and 3 unit test projects (NUnit, XUnit and MSTest).
NUnit tests:
public class ComplexMathClassTests
{
    [TestCase(1, 2, ExpectedResult = 3)]
    [TestCase(0, 5, ExpectedResult = 5)]
    [TestCase(-1, 1, ExpectedResult = 0)]
    public int Add_TwoIntegers_ShouldCalculateCorrectly(int x, int y)
    {
        var cmc = new ComplexMathClass();
        return cmc.Add(x, y);
    }

    [Test]
    // [ExpectedException(typeof(DivideByZeroException))]
    public void Divide_DenominatorZero_ShouldThrowDivideByZeroException()
    {
        var cmc = new ComplexMathClass();
        double result = cmc.Divide(5, 0);
    }
}
XUnit tests:
public class ComplexMathClassTests
{
    [Theory]
    [InlineData(1, 2, 3)]
    [InlineData(0, 5, 5)]
    [InlineData(-1, 1, 0)]
    public void Add_TwoIntegers_ShouldCalculateCorrectly(int x, int y, int expectedResult)
    {
        var cmc = new ComplexMathClass();
        int actualResult = cmc.Add(x, y);
        Assert.Equal<int>(expectedResult, actualResult);
    }

    [Fact]
    public void Divide_DenominatorZero_ShouldThrowDivideByZeroException()
    {
        var cmc = new ComplexMathClass();
        cmc.Divide(5, 0);
    //  Assert.Throws<DivideByZeroException>(() => cmc.Divide(5, 0));
    }
}
MSTest tests:
[TestClass]
public class ComplexMathClassTests
{
    [TestMethod]
    // [ExpectedException(typeof(DivideByZeroException))]
    public void Divide_DenominatorZero_ShouldThrowDivideByZeroException()
    {
        var cmc = new ComplexMathClass();
        cmc.Divide(5, 0);
    }
}
Unfortunately MSTest still doesn’t support parametrized tests which is a shame IMHO. That’s why I was never a big fan of it but added to this project for the sake of completeness.
I commented out the lines that expect exception in all tests to fail the tests. So now the setup is complete: We have a working project with a failing test. Our goal is to get alert notifications about the failing test whenever we check in our code. Let’s proceed to the next steps to accomplish this.
Step 06: Building on the server
As of TFS 2015 they renamed the Build Configuration to XAML Build Configuration for some reason and moved it under Additional Tools and Components node but everything else seems to be the same.
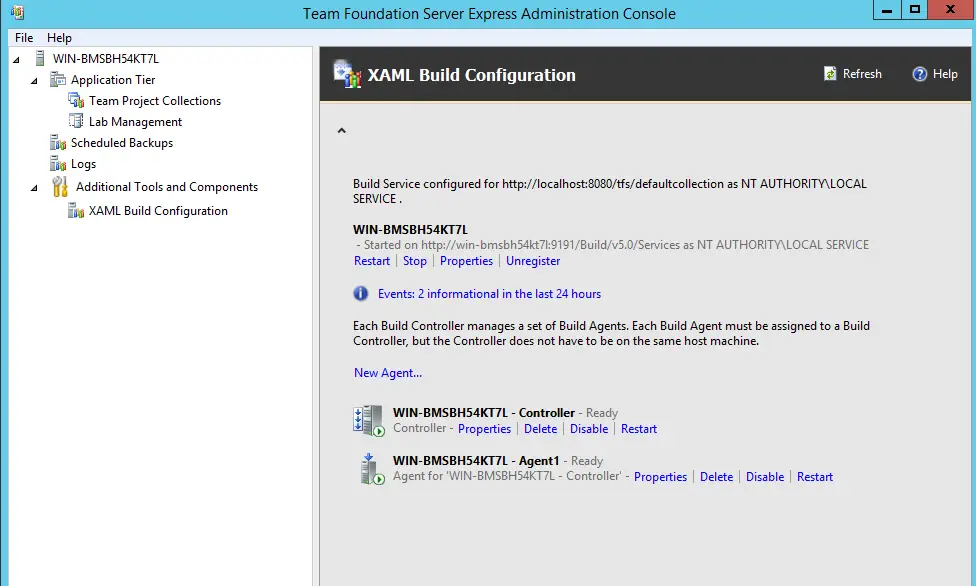
Default configuration installs one build controller and one agent for the Default Collection so for this project we don’t have to do add or change anything.
Each build controller is dedicated to a team project collection. Controller performs lightweight tasks such as determining the name and reporting the status of the build. Agents are the heavy-lifters and carry out processor-intensive work of the build process. Each agent is controlled by a single controller.
In order to build our project on the build server we need a build definition first. We can create one by selecting Build -> New build Definition
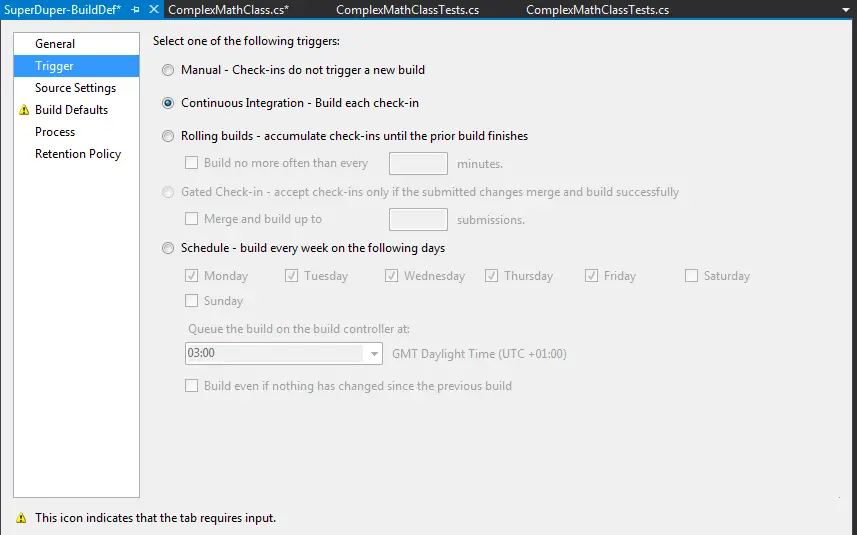
- One important setting is the trigger: By default the build is not triggered automatically which means soon enough it will wither and die all forgotten! To automate the process we have to select Continuous Integration option.
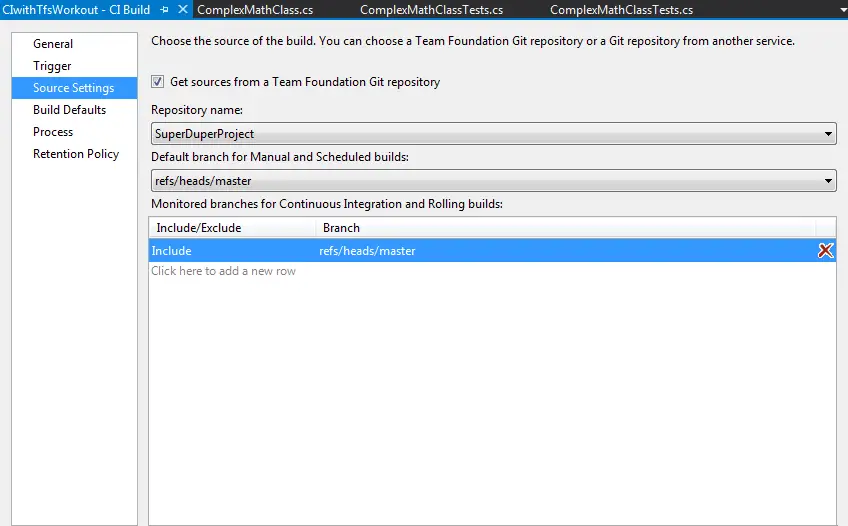
- In order to automatically trigger the build, the branch that is to be built must be added to monitored branches list in the Source Settings tab.
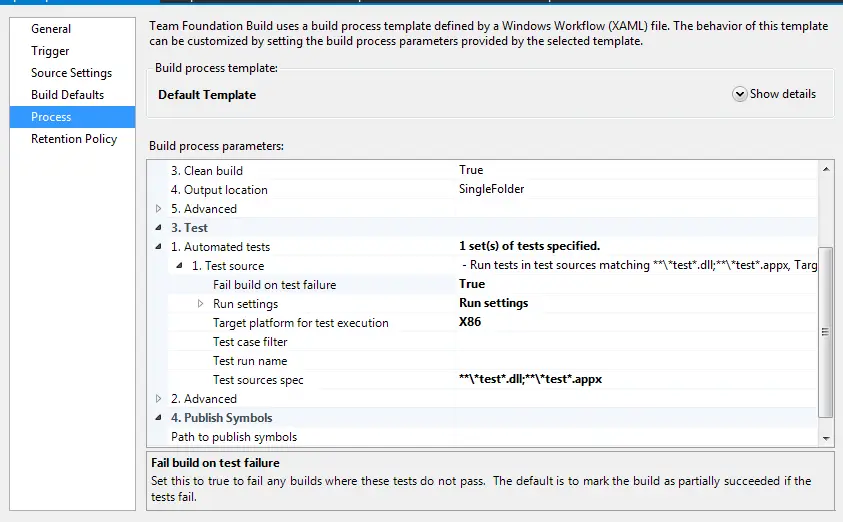
- Last required setting is failing the build when a test fails. It’s a bit buried so you have to go 3.1.1 Test Source and set “Fail build on test failure” to true.
Step 07: Notifications
At this point, our build definition is triggered automatically but we don’t get any notifications if the build fails (due to a compilation error for example). TFS comes with an application called Build Notifications. It pops up an alert but it requires to be installed on the developer machine so I don’t like this solution.
A better approach is enabling E-Mail notifications. In order to do that first we need to set up Email Alert Settings for TFS. In the Team Foundation Server Express Administration Console select Application Tier and scroll down to the “Email Alert Settings” section. enter the SMTP credentials and server info here.
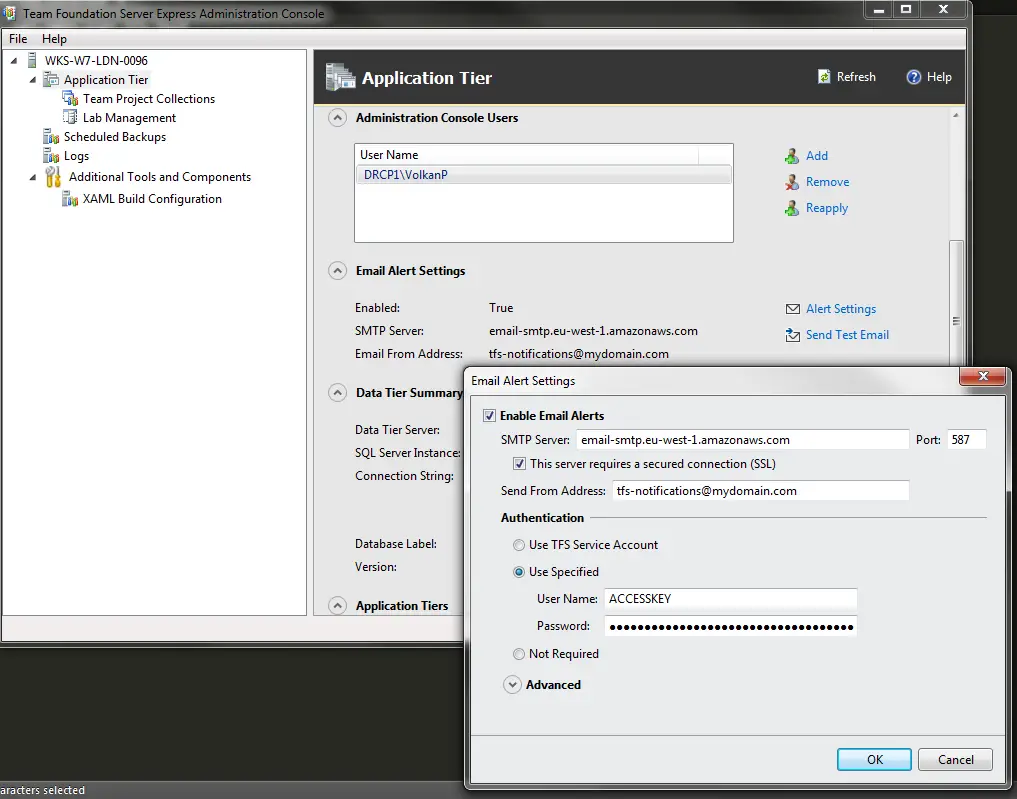
You can also send a test email to verify your settings.
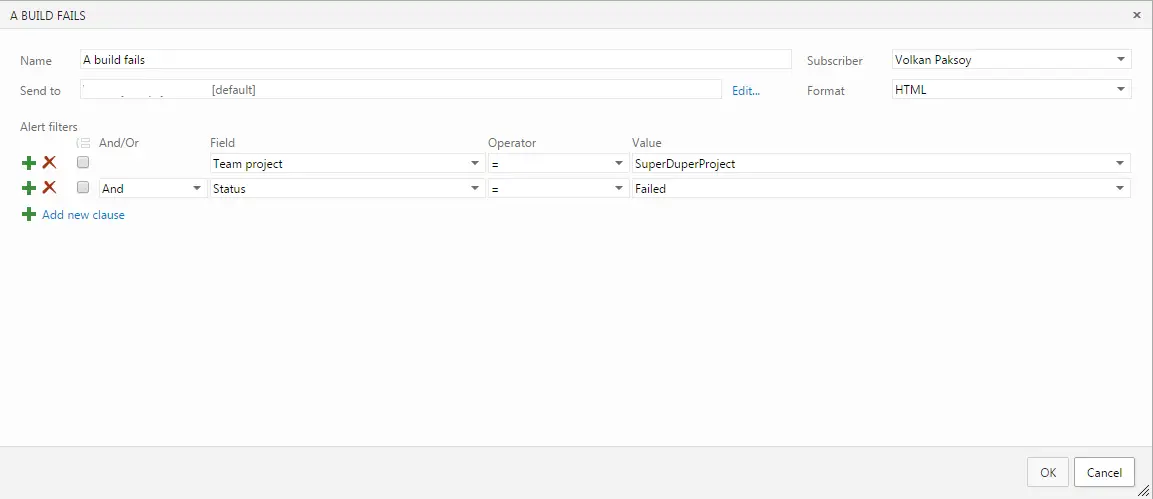
Second and final stage is to enable the project-based alerts. In Visual Studio Team Explorer window select Home -> Settings -> Project Alerts. This will pop up a browser and redirect to alert management page. Here select “Advanced Alert Management Page”. In the advanced settings page there are a few pre-set notification conditions and the build failure is at the top of the list!
I intentionally broke the build and checked in my code and in a minute, as expected I received the following email:
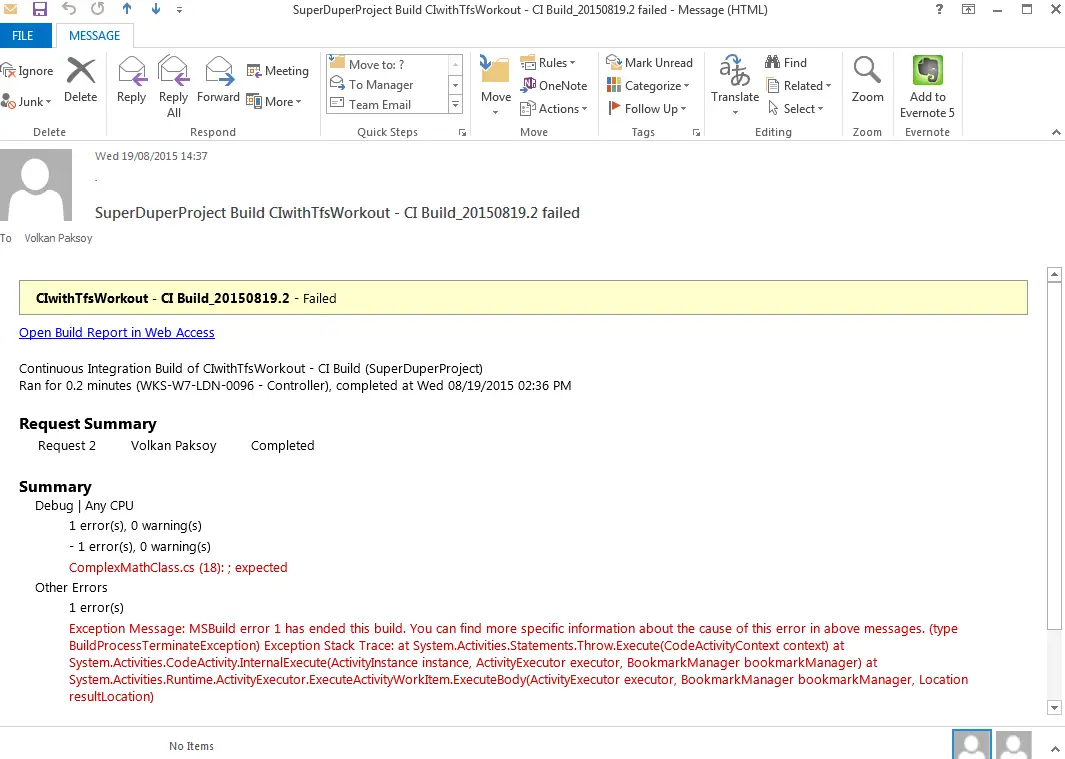
With that we have automated the notifications. We already set the build to fail upon test failure in the previous step. Final step is to run the tests on the build server to complete the circuit.
Step 08: Run tests on build server
Running tests on the server is very simple. For NUnit all we have to do is install the NUnitTestAdapter package:
Install-Package NUnitTestAdapter
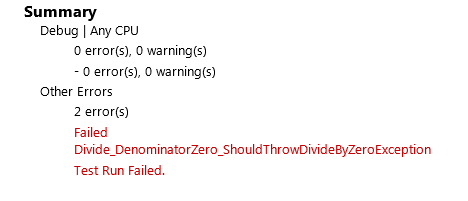
After I committed and pushed my code with the failing test I got the notification in a minute:
Uncommented the ExpectedException line and the build succeeded.
For xUnit the solution is similar, just install the xUnit runner NuGet package and checkin the code
Install-Package xunit.runner.visualstudio
For MSTest it works out of the box so you don’t have to install anything.
In the previous version of TFS I had to install Visual Studio on the build server as advised in this MSDN article. Seems like in TFS 2015 you don’t have to do that. The only benefit of using MSTest (as far as I can see at least) is that it’s baked in so you don’t have to install extra packages. You create a Unit Test project and all your tests are immediately visible in the test explorer and automatically run on the server.
Wrapping up
Continuous Integration is a crucial part of the development process. Team Foundation Server is a powerful tool with lots of features. In this post I tried to cover basics from installation to setting up a basic CI environment. I’ll try to cover more features in the future but my first priority will be new AWS services CodeDeploy, CodeCommit and CodePipeline. As I’m trying to migrate everything to AWS having all projects hosted and managed on AWS would make more sense in my case.