Generating high-quality test data can have an impact on the accuracy of the tests overall. In this post I’ll show using a helpful C# library called Bogus
Showcase project: Bank Statement Generator
In this example I’ll generate fake bank statements. Normally they come in CSV files and have the following model:
public class BankStatementLine
{
    public DateTime TransactionDate { get; set; }
    public string TransactionType { get; set; }
    public string SortCode { get; set; }
    public string AccountNumber { get; set; }
    public string TransactionDescription { get; set; }
    public decimal? DebitAmount { get; set; }
    public decimal? CreditAmount { get; set; }
    public decimal Balance { get; set; }
}
I’ll use Bogus to generate realistic fake statement lines and finally save it as a CSV and see if it looks real.
Rules and restrictions
I want the fields in the model above conform to certain set of rules to be realistic:
- Transaction Date must be within a certain range I provide as bank statements are generated for a date range.
- Dates should be incremental and not random
- Sort Code must be in the following format: NN-NN-NN and must be the same for the entire statement.
- Account number must be an 8-digit number and same for the entire statement.
- Transaction Description must be free text
- Debit Amount and Credit Amount must be decimal numbers but only one of them can be present at any given line
- Transaction Type must be one of the pre-defined values and also some types can be for credit and some for debit only.
- Balance should be sum of all debit and credit amounts plus the first balance in the statement. So this value is dependent on the values that come before it.
- The number of lines in a statement should be random.
Rule implementations
Some rules stated above are very straightforward and easy to implement. These are some samples of what Bogus is capable of. For the full documentation check out the GitHub repository.
Date range support
Generating a date between a range is simple:
.RuleFor(x => x.TransactionDate, f => f.Date.Between(startDate, endDate))
Enum and array support
For Transaction Type I want to select a random value from a list of set values. This can be done in 2 ways: By using an enum or an IEnumerable.
var transactionTypes = new[] { "FPO", "DEB", "DB", "FPI" };
and in the rule description it can be used as
.RuleFor(x => x.TransactionType, f => f.PickRandom(transactionTypes) )
Another way is using enums such as:
public enum TransactionType
{
    FPO,
    DEB,
    DB,
    FPI
}
and the rule becomes:
.RuleFor(x => x.TransactionType, f => f.PickRandom<TransactionType>().ToString())
In my final implementation I used selecting from a list of objects. You can check out the sample code to see that version.
Number range
For the account number I need an 8-digit number which can be achieved with something like this rule:
.RuleFor(x => x.AccountNumber, f => f.Random.Long(100000000, 99999999).ToString())
Bogus API also has builtin support for account number so the following is a more elegant and expressive way of achieving the same:
.RuleFor(x => x.AccountNumber, f => f.Finance.Account())
Formatting Sort Code can be achieved by Field.Random.Replace method
.RuleFor(x => x.SortCode, f => f.Random.Replace("##-##-##"))
Similar to account number, it also has built-in support for sort code:
.RuleFor(x => x.SortCode, f => f.Finance.SortCode())
Null values
In my case in some fields I’d like to have null values too. This can be achieved by OrNull extension method. For example, in the code below it generates %20 of DebitAmount values null.
.RuleFor(x => x.DebitAmount, f => f.Random.Decimal(0.00m, 9999.00m).OrNull(f, 0.2f))
Common fields
In my case some values in each statement line repeat throughout the entire statement such as account number and sort code. To achieve that I created a “base” statement line and every fake statement line used these shared fields instead of generating new ones.
var commonFields = new Faker<BankStatementLine>()
    .RuleFor(x => x.AccountNumber, f => f.Finance.Account())
    .RuleFor(x => x.SortCode, f => f.Finance.SortCode())
    .Generate();


var fakeTransactions = new Faker<BankStatementLine>()
    .StrictMode(true)
    .RuleFor(x => x.AccountNumber, commonFields.AccountNumber)
    .RuleFor(x => x.SortCode, f => commonFields.SortCode)
	...
	...
Random number of objects
It’s more realistic to have varying number of lines in statements. With Generate method you can specify the exact number of items you want to generate which is good for unit tests. For my purposes I just wanted to create random of rows in each statement as I only needed the data to be imported. This can be achieved by GenerateBetween:
var statementLines = fakeTransactions.GenerateBetween(10, 20);
Dependent values
The tricky part in this scenario was the dependent values. Normally when you use RuleFor extension method it generates the value for that field alone in isolation. In my case, one restriction was Debit Amount and Credit Amount could not both have values in the same line. Also Balance depends on these values and needs to be calculated in each line.
As far as I can tell there’s no built-in support to define these dependencies. Based on my tests I was able to achieve this in 2 ways
- Update the values accordingly in FinishWith extension method
- Use Rules extension method to define multiple rules at once and implement the restrictions inside it.
I think the latter is a better solution as FinishWith sounds more like clean up, logging or similar extra activity where Rules sound more like actual business logic implementation.
So with that in mind my rules for Debit Amount, Credit Amount and Balance fields looked like this:
.Rules((f, x) =>
{
    var debitAmount = (decimal?)f.Random.Decimal(1, 100).OrNull(f, 1.0f - statementconfig.DebitTransactionRatio);
    if (debitAmount.HasValue) // Is it a debit transaction?
    {
        x.CreditAmount = null;
        x.DebitAmount = debitAmount.Value;
        balance -= x.DebitAmount.Value;

        x.TransactionType = f.PickRandom(TransactionType.AllTransactionTypes
            .Where(tt => tt.Direction == TransactionDirection.Debit || tt.Direction == TransactionDirection.DebitOrCredit)
            .Select(tt => tt.Code));
    }
    else
    {
        var creditAmount = f.Random.Decimal(1, 100);
        x.DebitAmount = null;
        x.CreditAmount = creditAmount;

        balance += x.CreditAmount.Value;

        x.TransactionType = f.PickRandom(TransactionType.AllTransactionTypes
            .Where(tt => tt.Direction == TransactionDirection.Credit || tt.Direction == TransactionDirection.DebitOrCredit)
            .Select(tt => tt.Code));
    }

    x.Balance = balance;
});
A caveat with this approach is that I cannot use StrictMode anymore as it complains about those 3 fields having null values. It specifically mentions that in the exception. If you use Rules you’re on your own to ensure that all fields are populated properly.
Another drawback of setting multiple rules at once is that it can easily make the code harder to read. Fortunately for me, the author of the library Brian Chavez kindly reviewed the code and suggested some refactorings one of which proved it was still possible to use RuleFor method and strict mode. I’ve updated the final source code with these refactorings. So with individual rules the implementation looks like this:
.RuleFor(x => x.DebitAmount, f =>
{
    return (decimal?)f.Random.Decimal(1, 100).OrNull(f, 1.0f - statementconfig.DebitTransactionRatio);
})
.RuleFor(x => x.CreditAmount, (f, x) =>
{
    return x.IsCredit() ? (decimal?)f.Random.Decimal(1, 100) : null;
})
.RuleFor(x => x.TransactionType, (f, x) =>
{
    if (x.IsCredit())
    {
        return RandomTxCode(TransactionDirection.Credit); ;
    }
    else
    {
        return RandomTxCode(TransactionDirection.Debit);
    }

    string RandomTxCode(TransactionDirection direction)
    {
        return f.PickRandom(TransactionType.AllTransactionTypes
            .Where(tt => tt.Direction == direction || tt.Direction == TransactionDirection.DebitOrCredit)
            .Select(tt => tt.Code));
    }
})
.RuleFor(x => x.Balance, (f, x) =>
{
    if (x.IsCredit())
        balance += x.CreditAmount.Value;
    else
        balance -= x.DebitAmount.Value;

    return balance;
});
IsDebit and IsCredit methods referred to above are extension methods defined like this:
public static class Extensions
{
   public static bool IsCredit(this BankStatementLine bsl)
   {
      return bsl.DebitAmount is null;
   }
   public static bool IsDebit(this BankStatementLine bsl)
   {
      return !IsCredit(bsl);
   }
}
Random text
For the transaction description for now I’ll go with random Lorem Ipsum texts. Bogus has support for this too
.RuleFor(x => x.TransactionDescription, f => f.Lorem.Sentence(3))
I probably will need to use a fixed list of descriptions soon but for the time being it’s fine. Also as shown below it’s very easy to switch to that too.
Incremental values
Similar to balance being dependent on the previous values, transaction date is also dependent as it needs to go in an incremental fashion. I couldn’t find built-in support for this so implemented it using my own shared variable like this:
.RuleFor(x => x.TransactionDate, f =>
{
    lastDate = lastDate.AddDays(f.Random.Double(0, statementconfig.TransactionDateInterval));
    if (lastDate.Date > statementconfig.EndDate)
    {
        lastDate = statementconfig.EndDate;
    }
    return lastDate;
})
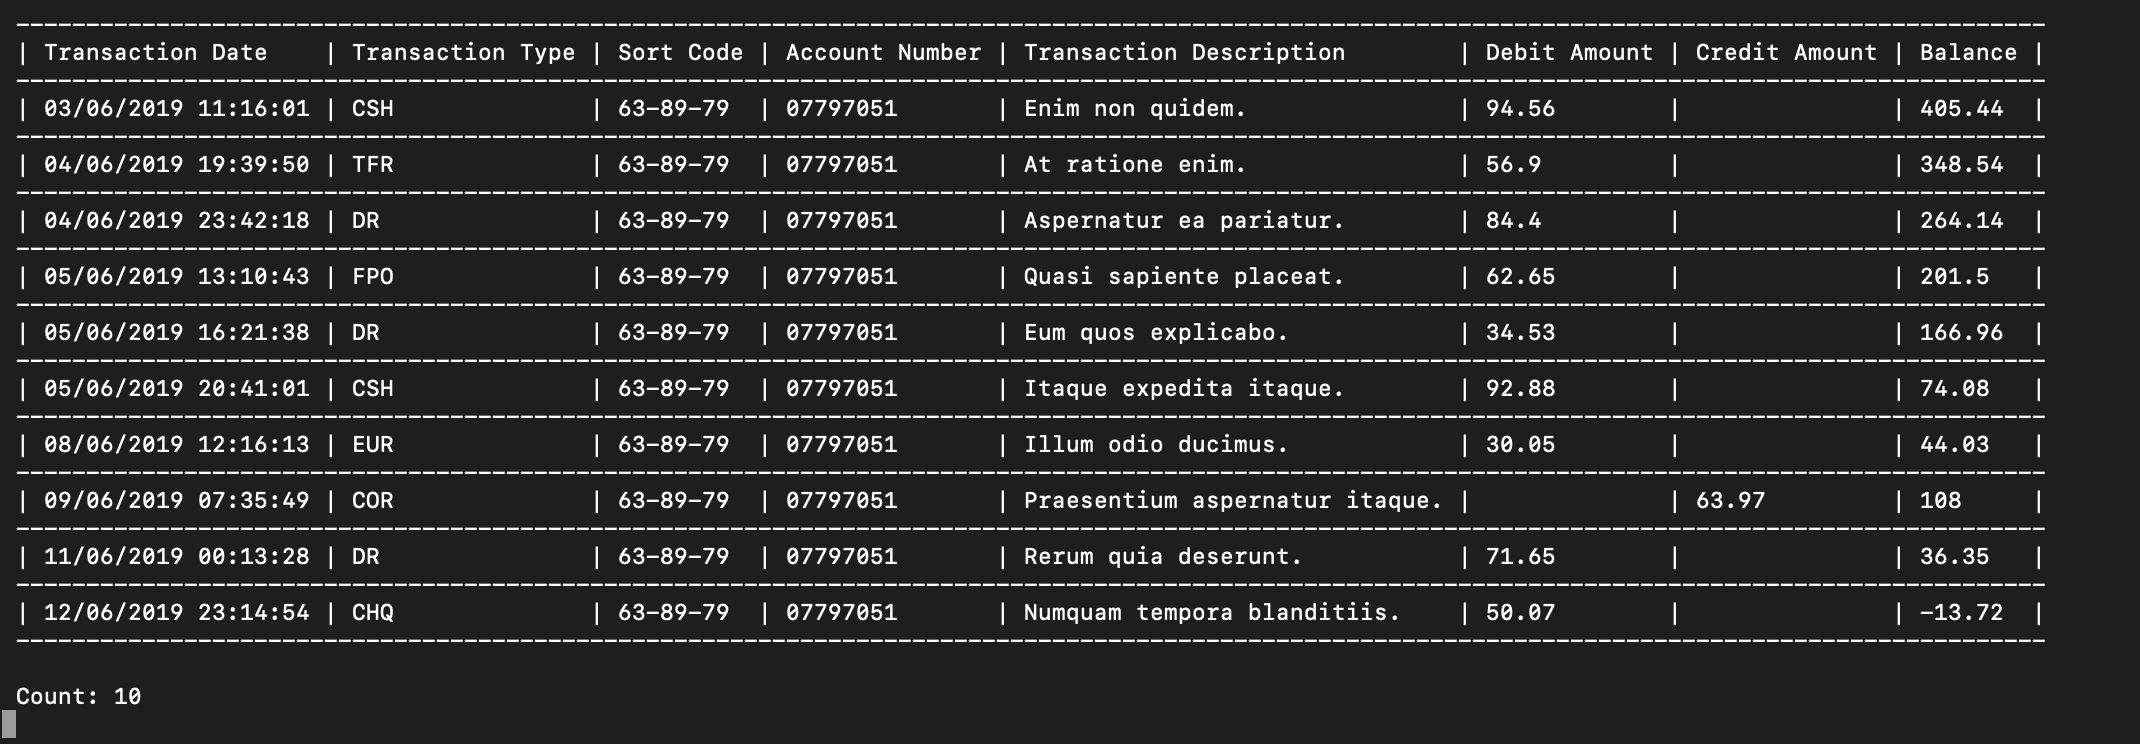
Putting It All Together
So let’s see the output with the help of another nice library called Console Tables
Source Code
Sample application can be found under blog/GeneratingTestDataWithBogus folder in the repository.
Resources