Powershell Gotcha: Contains Operator
I was working on a WordPress project recently. The project is to set up a WordPress blog using Amazon Lightsail service. I ended up blogging it here, but I want to talk about something else in this post.
Use Case: Filter results using -Contains operator
Amazon Lightsail comes with pre-packed applications, and you can create an instance by providing the blueprint id. You can search for blueprints by using the Get-LSBlueprintList cmdlet. It returns a list like this:
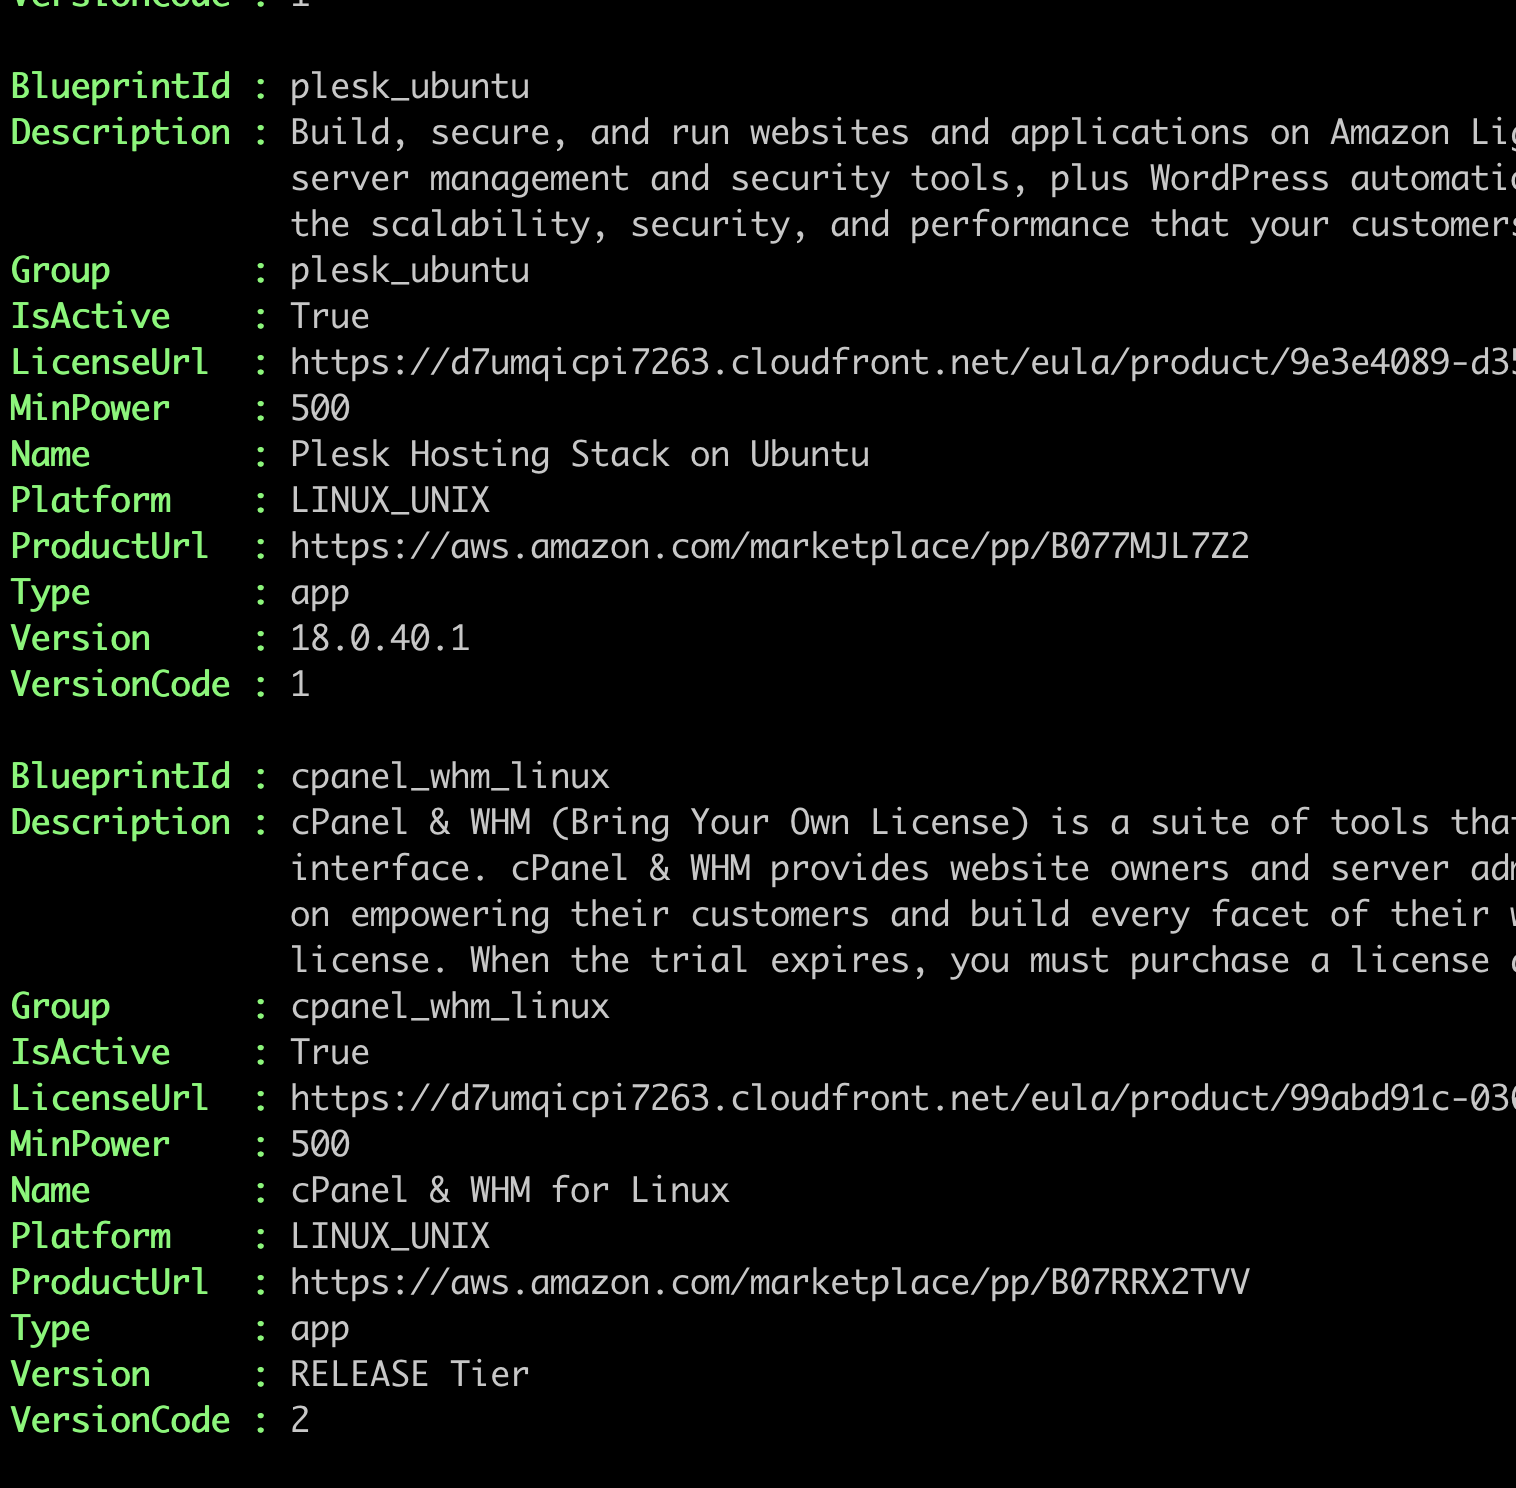
WordPress comes in two different blueprints: Single-site vs multi-site.
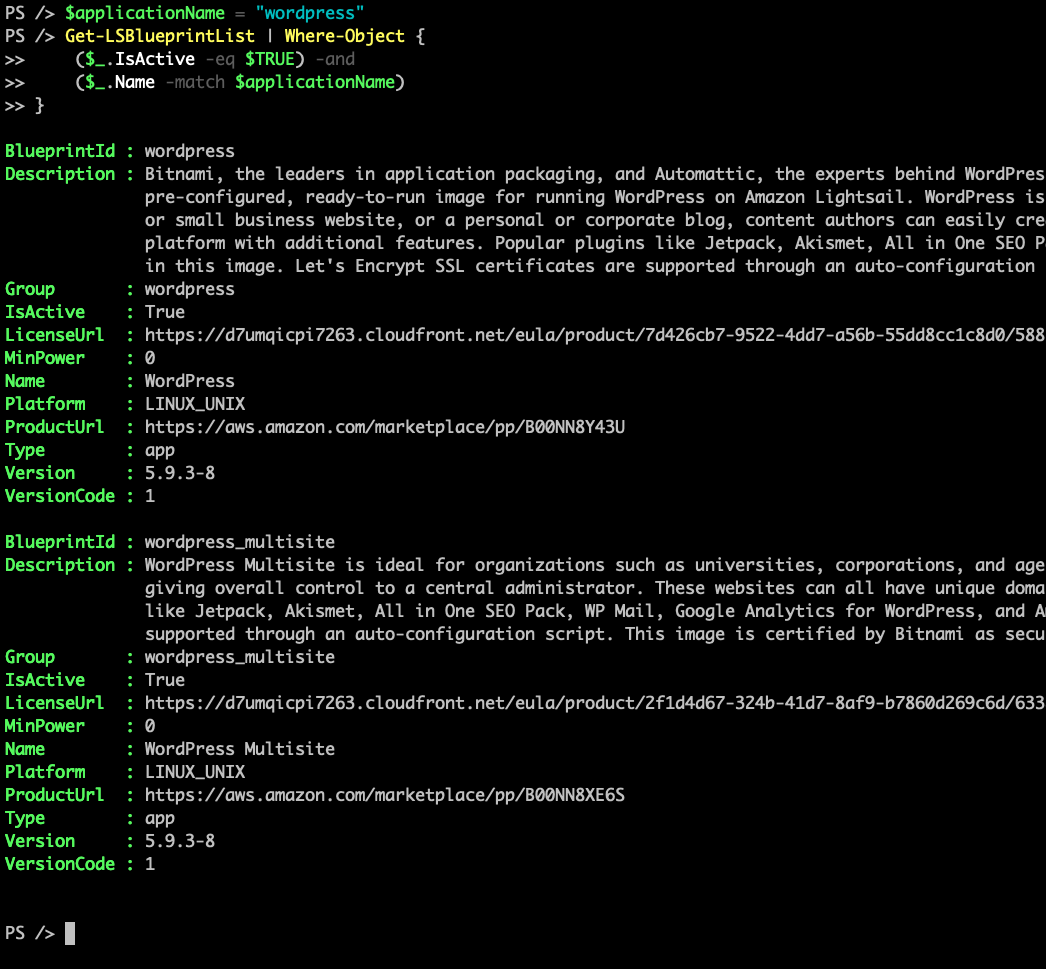
So my initial action was to filter the list based on the name containing the word “wordpress”. So I ran this script to get the results:
$applicationName = "wordpress"
Get-LSBlueprintList | Where-Object {
    ($_.IsActive -eq $TRUE) -and
    ($_.Name -contains $applicationName)
}
To my surprise, this command returned the following result:

The problem: Missing Wordpress blueprint
In the Amazon Lightsail dashboard, I can see the Wordpress Multisite exists:

I even captured the API call the dashboard makes when creating a WordPress Multisite instance and it looks like this:
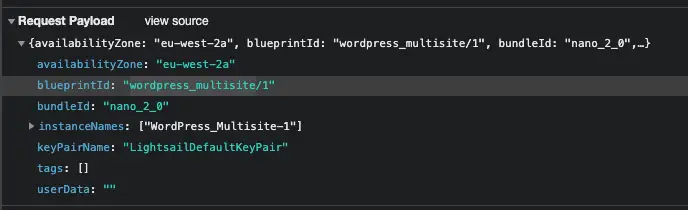
So how was it possible that wordpress_multisite blueprint id existed but I couldn’t get it via Get-LSBlueprintList? I thought there was something wrong with the cmdlet and even created a supported ticket for AWS!. To my surprise the problem was somewhere else.
The root cause: Contains operator works in mysterious ways!
As a C# developer, when I see “Contains”, I think of checking the existence of a substring in a string.
For example, check out this simple example:

It’s checking whether or not the word “wordpress_multisite” contains the word “wordpress” and the answer is yes!
Now, let’s take a look at the Powershell-equivalent:
$wordpressMultisite = "wordpress_multisite"
$containsWordpress = $wordpressMultisite -contains "wordpress"
$containsWordpress
and here is the result:

In this case, the answer is no!
The reason is contains operator is by design meant to be used to search collections for a string. For example, the following example illustrates the intended use:
$listOfApplications = "wordpress", "lamp", "nodejs"
$listOfApplicationsContainsWordpress = $listOfApplications -contains "wordpress"
$listOfApplicationsContainsWordpress
and the result is:

The solution: Match Operator
The solution is using the match operator for substrings. In my original script, all I had to do was replace contains with match and got the expected results.
Final script:
$applicationName = "wordpress"
Get-LSBlueprintList | Where-Object {
    ($_.IsActive -eq $TRUE) -and
    ($_.Name -match $applicationName)
}
Output of the script:
Conclusion
So there you have it: Always read the documentation!
As Powershell is based on the .NET framework, I instinctively assumed contains would search a string for substrings, but it works entirely differently.
I lost some time but learned a valuable lesson. I hope you find this post useful too, and it prevents the same thing from happening to you too.