DIY - Network cables
There aren’t too many reasons why someone would like to make their own Ethernet cables. Sheer fun, learning the nitty-gritty (and useless in most cases) details of how they are made are to name a few. Also as I have too many gadgets making my own cables at any length I please would be convenient and can save a few bucks in the long run. So let’s get started.
The toolkit
Cable:
CAT6: http://www.amazon.co.uk/gp/product/B002SQPDXS/ref=oh_details_o00_s00_i00
CAT5: http://www.amazon.co.uk/gp/product/B000HWY304/ref=wms_ohs_product
For the obvious reasons! It’s best to get the latest version generally. I will use CAT6 all around my network but I also bought CAT5e as I was anticipating some errors at the beginning so I’d better make them by wasting cheaper cable.
RJ45 Modular Connectors:
http://www.amazon.co.uk/gp/product/B004HTK30M/ref=oh_details_o01_s00_i00
I’ve watched a lot of tutorial videos. When an expert is showing it, it looks quite easy but I quickly found out it’s not. Aligning all 8 cables and placing them in the correct order is not as easy as it seems. So I definitely recommend two-piece crimps that come with a “guide”. It’s a small piece that allows you to insert all the cables relatively easily and then you insert the whole block into the crimp.
RJ45 Crimp Tool: http://www.amazon.co.uk/gp/product/B004J02DRU/ref=oh_details_o00_s00_i00
The set I bought comes with a crimper and a cutter. It looks good enough to do tis job and quite cheap. After the cables are inserted in the connector, the crimper is used to press them all in and connect with the
Tester:
http://www.amazon.co.uk/gp/product/B007CJUEDA/ref=wms_ohs_product
Altough it is easy to test the cable by connecting to a machine, it is generally recommended to use a tester. I guess it makes sense especially when you have to make lots of cables. I bought one for £4 so I guess it’s good deal. The downside is doesn’t support CAT6 which I didn’t notice at the or ordering. If manual testing doesn’t prove to be helpful I would consider buying a better product.
Boots:
http://www.amazon.co.uk/gp/product/B009EPCOP6/ref=wms_ohs_product
These are plastic sleeves over the connector. They are helpful sometimes to avoid the connector clip from getting broken
Technical Details
CAT5 vs. CAT5e vs. CAT6: The difference is that CAT6 supports 1000Base-T/1000Base-TX (Gigabit Ethernet). CAT5 and CAT5e supports 10Base-T/100Base-TX (Maximum 100Mbit/s) CAT5e is an improvement over CAT5. It introduces new crosstalk specifications. (Crosstalk means a signal creating a detrimental effect on another channel)
T568A vs. T568B: The order of the cables matters and they have to be in the same order in both ends. These specific orders are named as T568A and B. What I understand you can use as long as you use it for both ends but all resources I’ve found favoured using T568B so I’ll use that one as well.
Crossover cable: When you connect one end in T568A and the other T568B it becomes a crossover cable (Regular ones are called patch cables). Crossover cables are used to connect two computers instead connecting a computer to a switch or router. I’ll test creating one of these as well.
Action!
I think we have everything ready to get started. Here’s what I did step-by-step:
- Cut the required length of cable.
- Remove the outer jacket.
- Arrange the wires by referring to the wiring standard (T568B) and insert them into the guide of the connector.
- Insert the guide into the connector.
- Insert the connector to the crimp tool and press it firmly.
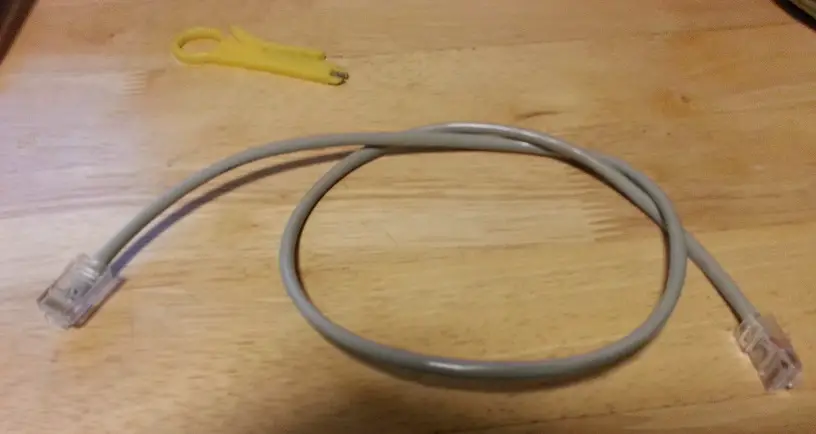
- Repeat Steps 1- 5 for the other end. 10 minutes later I had my first homebrew CAT5 cable:

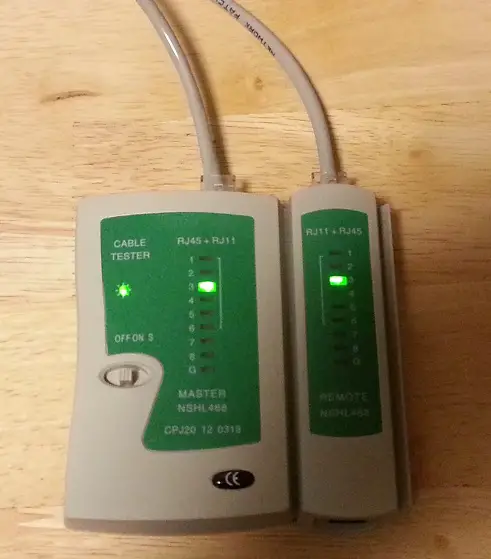
Let’s use the tester to verify we did good. Using the tester is quite simple: Just plug in the both ends to the device. If you lights blinking from 1 to 8 simultaneously on both sides that means we are good. I tested it with a broken table too. In that case no lights were on so it’s easy to see if it works or not.

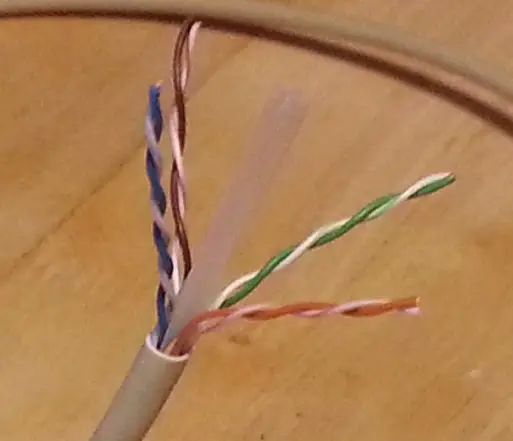
CAT6 is slightly different: It has plastic part in the middle of the cable which holds the cables apart as shown in the image below.

All we have to do cut that piece before separating the pairs and the rest is exactly the same as CAT5.