
Easy way to monitor Windows Services
When you have Windows Services you must also implement a monitoring solution to make sure that they are running at all times. Some time ago I needed a quick and dirty solution to notify myself when one of the services stopped. The solution I depict here is by no means an ideal one. The only advantage of it is it’s very fast to implement if you don’t already have a monitoring system. Disclaimer aside let’s get to work!
The tools we need come with Windows so no need to install anything. The idea is simple: Create a task scheduler that is triggered on an event. The triggering even will be the stopping of the monitored service and action that will be taken will be sending the notification email.
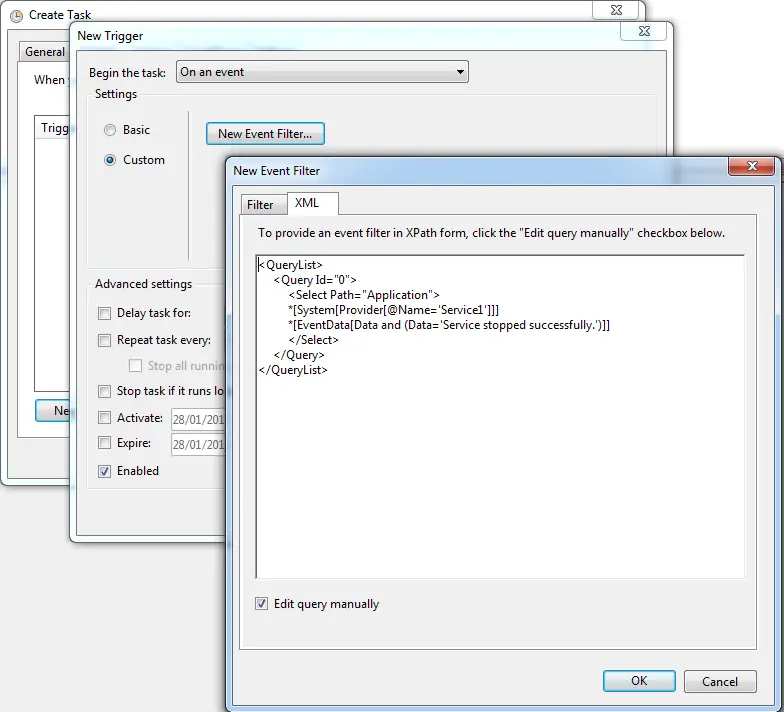
STEP 01: Create a new filter a. Launch Task Scheduler. b. Right click Task Scheduler Library and select Create Task c. Select the Triggers tab. d. Click New… e. In the Begin the task list select “On an event” f. In the Settings section select Custom and click New Event Filter g. In the New Event Filter dialog, select XML tab and check “Edit query manually” h. As the query text type in the following:
<QueryList>
 <Query Id="0">
 <Select Path="Application">
 *[System[Provider[@Name='Service1']]]
 *[EventData[Data and (Data='Service stopped successfully.')]]
 </Select>
 </Query>
</QueryList>
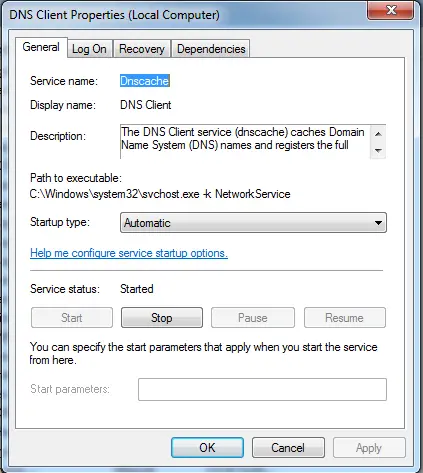
Change the name of the service name and the message it displays when it stops. Note that service name is not what you see in the services list. You have to right –click and view properties. For example, as shown in the picture below, service name for DNS client is “Dnscache” where as display name is “DNS Client”.
STEP 02: Create action to send mail a. Select the Actions tab and click on New b. From the Action list select “Send an e-mail” c. Fill in the details for the notification email. At this point we are good to go. An email will be fired when the service stops and logs the text we are looking for. Keep in my mind that it’s quite fragile because it will stop working if the text the service logs changes. Having a built-in send mail capability is great but if you need more features, like adding Cc/Bcc recipients or setting the priority of the mail this option would not be enough for you. In that case, playing around with PowerShell would do the trick.
STEP 03: [Optional] Create a script to send mails PowerShell is built on top of .NET framework so with a few lines of code we can send mails just like we can in C#:
$email = New-Object System.Net.Mail.MailMessage
$email.From = "user1@someDomain.com"
$email.To.Add("user2@anotherDomain.com")
$email.CC.Add("user3@yetAnotherOne.com")
$email.Priority = [System.Net.Mail.MailPriority]::High
$email.Subject = "Your notification subject"
$email.Body = "A bleak and gloomy text to drive the recipient into panic"
$smtpClient = New-Object Net.Mail.SmtpClient("SMTP hostname or IP address", 587)
$smtpClient.EnableSsl = $true
$smtpClient.Credentials = New-Object System.Net.NetworkCredential("username", "password");
$smtpClient.Send($email)
This example uses port 587 and SSL, your configuration may vary. That’s all there is to it to send a mail with PowerShell and you have full control over it.
To run this script in the actions list select “Start a program” from the actions list. In the Program/script textbox enter “powershell” and enter the full path of the script in the arguments textbox. Don’t forget to save it with a ps1 extension.