
AWS Developer Tools Services Part 4: AWS CodePipeline
Introduction
This post is part of my mini-series about AWS Developer Tools Services
- Part 1: AWS CodeCommit
- Part 2: AWS CodeBuild
- Part 3: AWS CodeDeploy
- Part 4: AWS CodePipeline
![]()
AWS CodePipeline
In the previous posts I was able to create a Git repository in CodeCommit, create a build and upload the artifacts to an S3 bucket using CodeBuild and deploy the artifacts to an EC2 instance. In this post I will use CodePipeline service to tie these steps together.
AWS CodePipeline is more like an umbrella service that it combines the the source, build and deploy steps together with some added benefits:
- Ability to retry deployment: In CodeDeploy, if the deployment fails you have to create a new deployment manually but with Pipeline we have the option to retry the deployment which clones the failed deployment and runs the new one automatically.
- Trigger build upon code changes: You can start builds manually or on schedule by creating triggers but you can not trigger a build when you push your code to the repository. CodePipeline handles this automatically.
Create a pipeline
Step 1: Give it a name
First step is to simply give the pipeline a name. CodePipeline can automatically create an IAM role with the required permissions. Required permissions are not really clear at this point as we haven’t connected any of the services yet. That’s why it’s very useful to keep the “Allow AWS CodePipeline to create a service role so it can be used with this new pipeline” checkbox ticked.

Step 2: Add source
Next, we choose the source provider. In this example, I will use CodeCommit. It also support Amazon ECR, Amazon S3 and GitHub.
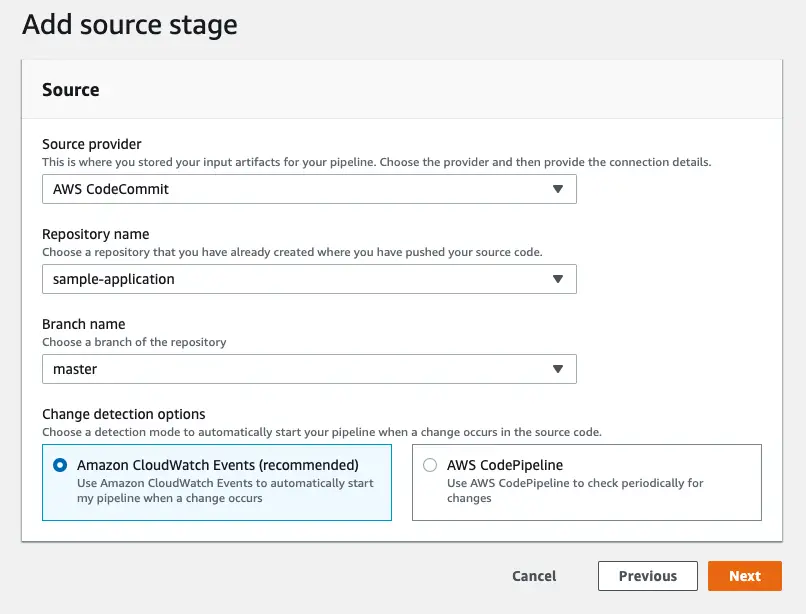
At this stage, by using CloudWatch events we can automatically start the build. This option os provided because CodeCommit is an AWS service. If you choose GitHub as your provider you’ll see GitHub webhooks which do the same job.
Step 3: Add build
By default two build services are supported: CodeBuild and Jenkins. It’s easier to connect to CodeBuild as you just have to select your build project from the dropdown list:

You can also choose to skip this stage. If you are copying static assets from an S3 bucket for instance you wouldn’t need to build anything and would choose to skip this stage.
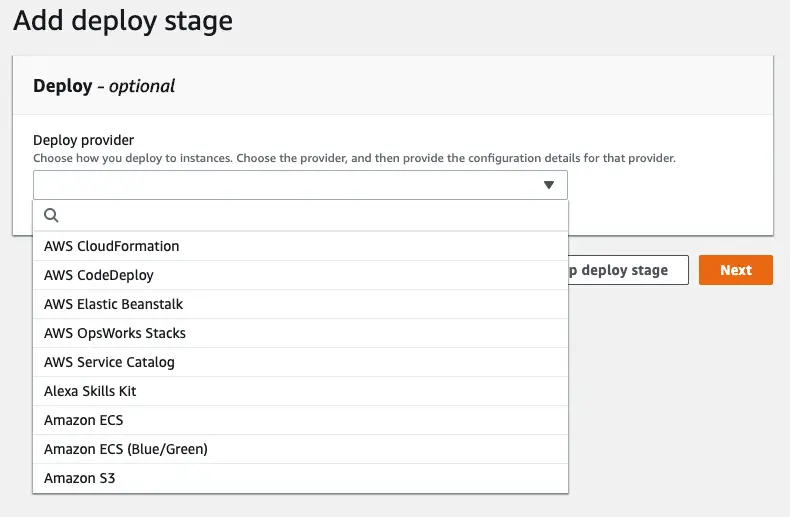
Step 4: Add deployment
At deployment stage, we have quite a few options:
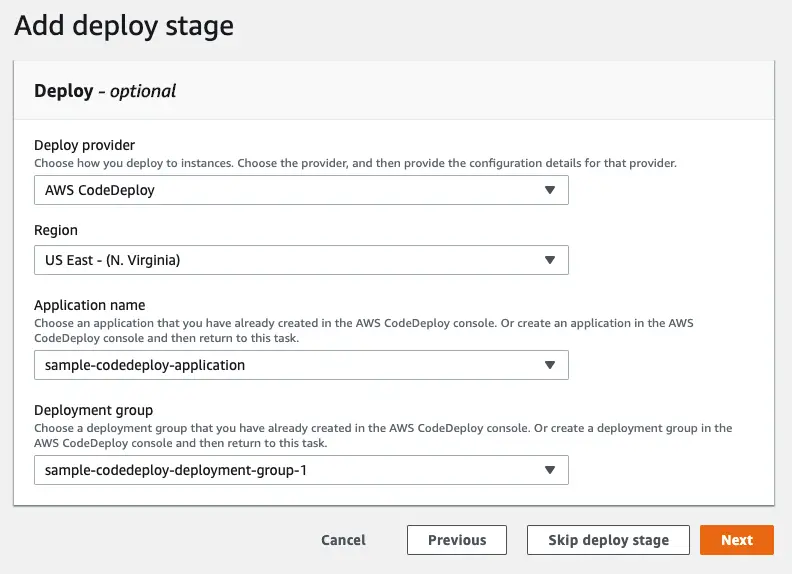
As stated before, I will use the CodeDeploy deployment I created before:
Finally we review and create the pipeline.
Troubleshooting the pipeline
Even though my CodeBuild and CodeDeploy projects succeeded, running the CodePipeline at this point fails. The reason for this error is CodePipeline creates its own S3 bucket and CodeDeploy agent needs access to that bucket as well to be able to download the deployment artifacts. So I had to modify my policy as such:
{
  "Version": "2012-10-17",
  "Statement": [
    {
      "Effect": "Allow",
      "Action": [
        "s3:Get*",
        "s3:List*"
      ],
      "Resource": [
        "arn:aws:s3:::replace-with-your-s3-bucket-name/*",
        "arn:aws:s3:::aws-codedeploy-us-east-1/*",
        "arn:aws:s3:::codepipeline-us-east-1-XXXXXXXXXXX/*"
      ]
    }
  ]
}
See it in action
After fixing the policy I retried the deployment (which creates a new deployment, doesn’t actually retry the failed one)

Conclusion
In this mini-series, I investigated creating a full pipeline using AWS developer services. In future posts I will delve deeper into these services and start using other complementary services as well.