
Dynamic DNS with AWS Route 53 - Part 2: AngularJS Client
I’ve been using my own dynamic DNS application (which I named DynDns53 and blogged about it here). So far it had a WPF application and I was happy with it but I thought if I could develop a web-based application I wouldn’t have to install anything (which is what I’m shooting for these days) and achieve the same results.
So I built a JavaScript client with AngularJS framework. The idea is exactly the same, the only difference is it’s all happening inside the browser.
Ingredients
To have a dynamic DNS client you need to have the following
- A way to get your external IP address
- A way to update your DNS record
- An application that performs Step 1 & 2 perpetually
Step 1: Getting the IP Address
I have done and blogged about this several times now. (Feels like I’m repeating myself a bit, I guess I have to find something original to work with. But first I have to finish this project and have closure!)
Since it’s a simple GET request it sounds easy but I quickly hit the CORS wall when I tried the following bit:
app.factory('ExternalIP', function ($http) {
    return $http.get('http://checkip.amazonaws.com', { cache: false });
});
In my WPF client I can call whatever service I want whenever I want but when running inside the browser things are a bit different. So I decided to take a detour and create my own service that allowed cross-origin resource sharing.
AWS Lambda & API Gateway
First I thought I could do it even without Lambda function by using the HTTP proxy integration. I could return what the external site returns:
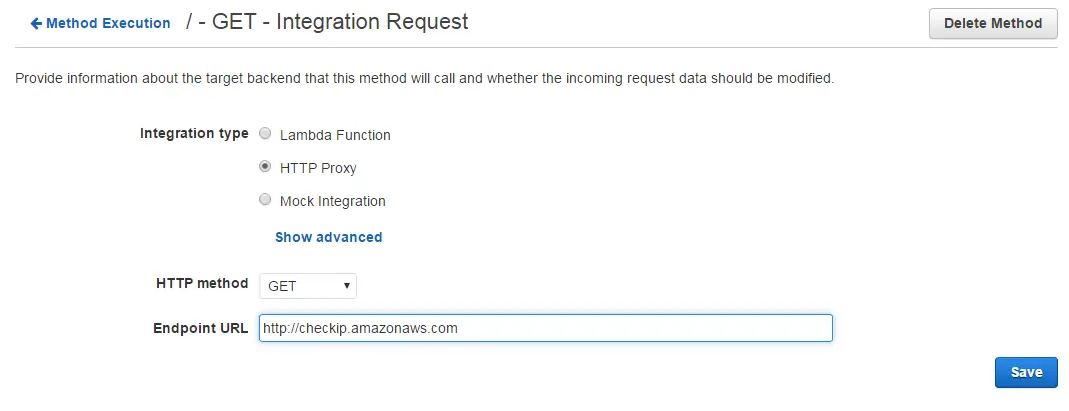
Unfortunately this didn’t work because it was returning the IP of the AWS machine that’s actually running the API gateway. So I had to get the client’s IP from the request and send it back in my own Lambda function.
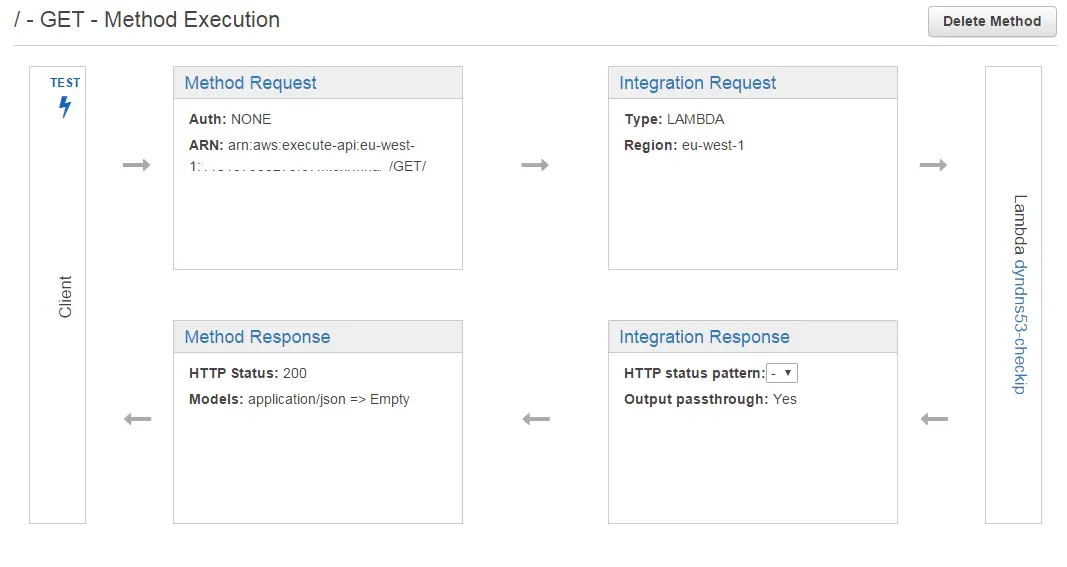
Turns out in order to get HTTP headers you need to fiddle with some template mapping and assign the client’s IP address to a variable:
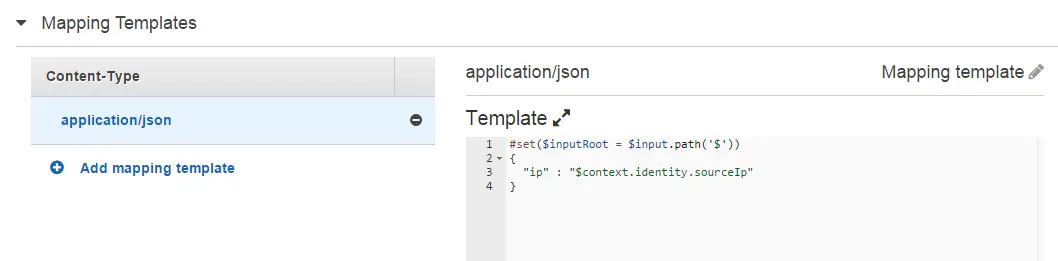
This can be later referred to in the Lambda function through event parameter:
exports.handler = function(event, context) {
    context.succeed({
        "ip": event.ip
    })
}
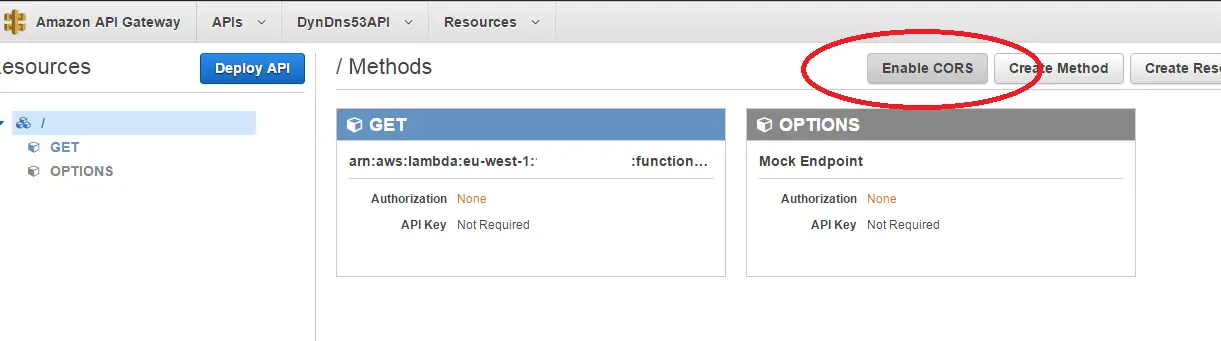
And now that we have our own service we can allow CORS and be able call it from our client inside the browser:
Step 2: Updating DNS
This bit is very similar to WPF version. Instead of using the AWS .NET SDK I just used the JavaScript SDK. AWS has a great SDK builder which lets you to select the pieces you need:
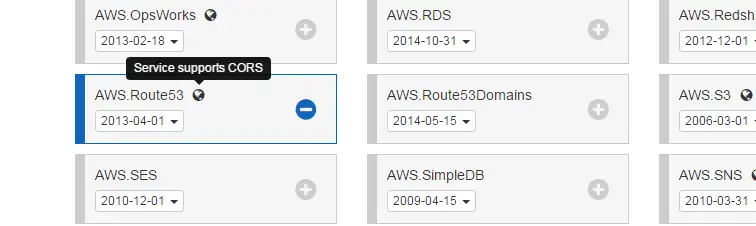
It also shows if the service supports CORS. It’s a relief that Route53 does so we can keep going.
The whole source code is on GitHub but here’s the gist of it: Loop through all the subdomains, get all the resource records in the zone, find the matching record and update it with the new IP:
  $scope.updateAllDomains = function() {
      angular.forEach($rootScope.domainList.domains, function(value, key) {
        $scope.updateDomainInfo(value.name, value.zoneId);
      });
  }
  $scope.updateDomainInfo = function(domainName, zoneId) {
    var options = {
      'accessKeyId': $rootScope.accessKey,
      'secretAccessKey': $rootScope.secretKey
    };
    var route53 = new AWS.Route53(options);

    var params = {
      HostedZoneId: zoneId
    };

    route53.listResourceRecordSets(params, function(err, data) {
        if (err) {
          $rootScope.$emit('rootScope:log', err.message);
          console.log(err.message);
        } else {
          angular.forEach(data.ResourceRecordSets, function(value, key) {
              if (value.Name.slice(0, -1) == domainName) {
                var externalIPAddress = "";
                ExternalIP.then(function(response){
                     externalIPAddress = response.data.ip;
                     $scope.changeIP(domainName, zoneId, externalIPAddress)
                 });
              }
          });
        }
    });
  }
  $scope.changeIP = function(domainName, zoneId, newIPAddress) {
    var options = {
      'accessKeyId': $rootScope.accessKey,
      'secretAccessKey': $rootScope.secretKey
    };

    var route53 = new AWS.Route53(options);
    var params = {
      ChangeBatch: {
        Changes: [
          {
            Action: 'UPSERT',
            ResourceRecordSet: {
              Name: domainName,
              Type: 'A',
              TTL: 300,
              ResourceRecords: [ {
                  Value: newIPAddress
                }
              ]
            }
          }
        ]
      },
      HostedZoneId: zoneId
    };

    route53.changeResourceRecordSets(params, function(err, data) {
      if (err) {
        $rootScope.$emit('rootScope:log', err.message);
      }
      else {
        var logMessage = "Updated domain: " + domainName + " ZoneID: " + zoneId + " with IP Address: " + externalIPAddress;
        $rootScope.$emit('rootScope:log', logMessage);
      }
    });
  }
The only part that trippped me up was that I wasn’t setting the TTL in the changeResourceRecordSets parameters and I was getting an error but found a StackOverflow question that helped to get past the issue.
Step 3: A tool to bind them
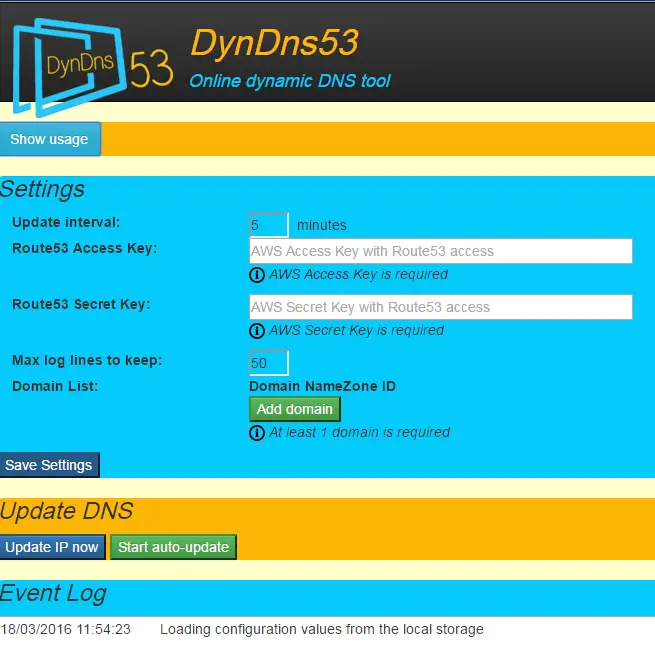
Now the fun part: An AngularJS client to call these services. I guess the UI is straight-forward. Basically it just requires the user to enter AWS IAM keys and domains to update.
I didn’t want to deal with the hassle of sending the keys to a remote server and host them securely. Instead I thought it would be simpler just to use browser’s local storage with HTML5. This way the keys never leave the browser.
It also only updates the IP address if it has changed so saves unnecessary API calls.
Also it’s possible to view what’s going on in the event log area.

I guess I can have my closure now and move on!